2/28/13
Reporting 4.8 pound Weight Loss as Promised at the End of 3 Days..
Slow Simmered Beef Stew in Slow Cooker or on the Range.
 |
| Slow Simmered Goodness in a One Pot Meal. |
Ingredients for Slow Simmered Beef Stew:
4 pound chuck roast trimmed and cut into generous portions (2" x 3")
2 T. oil for browning the meat
1 large diced onion
1 clove garlic chopped
2 stalks celery cut into chunks
6 carrots peeled and sliced into 1/2" pieces
2 parsnips peeled and diced
1 large turnip peeled and diced
2 large potatoes peeled and cut into chunks
32 ounces beef stock
1 whole bottle of beer
1/2 of a small can of tomato paste
2 t. salt
1/2 t. pepper
1/4 - 1/2 t. red pepper flakes
2 T. sugar
Brown the beef and add everything except the potatoes to a heavy dutch oven. Or in a skillet then transfer to a slow cooker. Cover and simmer 4 hours and check for doneness or simmer on lowest temperature all day in a crock pot., Correct the seasonings and add the potatoes. Simmer another 30-40 minutes until the potatoes are tender.
If you prefer the broth to be more of a thicker gravy add a slurry. Make a slurry by mixing about 1/2 C. water and 3 T. flour. Stir until smooth. Add the slurry to the stew and cook until thickened.
Serve with hot crusty bread in large shallow bowels. Yield 8-10 servings.
2/27/13
Pie Dough and Cookie Dough, I'm Making Dough Today!
 |
| Numbers are good for little ones and I still have time to find cutters for Easter. |
What I HATE is the way both Michael's and Jo Anne's herd customers like cattle at the check out and the way you ALWAYS have to wait in line in their corral! There is only one other place that I know of to have gotten what I needed, Ba's Kitchen Konnection, downtown. I will go there from now on I think, even if it is further and the parking is not good. At least the always have a great selection and they treat you like a valued customer. Plus they are locally owned. Now that I have that off my chest!
 |
| This wonderful cookie paint is 1 egg yolk, 1 t. water, and food color paste. |

 |
| Perfect Pastry for the Pecan Pie I am Sending to Indianapolis. |
thehiddenpantry.blogspot.com/2013/02/painted-hearts-cut-out-cookies-for.html
2/25/13
I am Trying the, "How to Lose Up To 10 Pounds In 3 Days on the 3-Day Military Diet" & Our Taxes Are Ready to Go.
 |
| My dinning room workplace has lots of windows and is my "desk" of choice. |
 |
| My dinning room view on a winters day. |
My neighbor next door Doris sent me a lovely old apron piece. Which brightened my day. I count old aprons as one of my "loves". Doris writes inspirational poetry and short stories on her blog, thewondermentoflife.blogspot.com and specifically addresses RSDS/CRPS.
 | ||||
| Sustenance |
You may have caught that I early on this year mentioned revisiting the diet I was on last year. It is restrictive for 6 days and then you can have whatever you want for 1 then you keep repeating for the duration you choose to stay on. It was a very successful diet for me but by the time I quit I had learned to loath it! So I didn't have the gumption to start again.
Last week I happened across this little diet on blessedmommy.hubpages.com and was intrigued. It was called the "Three Day Military Diet." She explained there had been a military gentleman who had joined her church some time back who had shared it. Her understanding was that some military folks had used it when needing to get into shape quickly. The headline is "HOW TO LOSE UP TO 10 POUNDS IN 3 DAYS ON THE 3-DAY MILITARY DIET."
She tells that she tried it for 2 days initially and lost 5 pounds. She is trying it again now and will post her results.
For my part I don't see this as a big deal at all and frankly could do for 3 days or so I think. This morning I started. So we shall see on Thursday morning my results. If it works I am jazzed! Think of it! 3 days on and 4 days off to loose even 5 pounds a week! Much less the expectation of 8-10 pounds a week. When it sounds too good to be true it is too good to be true.......but just the same on the off chance it works I don't see any harm in giving it a whirl.
Here is the diet as printed. I am posting this as information only. I am not advising, encouraging, condoning, or suggesting anyone try this. I am not responsible for you or the decisions you make. PLEASE CHECK WITH YOUR DOCTOR BEFORE STARTING ANY DIET OR WEIGHT LOSS PLAN.
3-Day Diet Day 1:
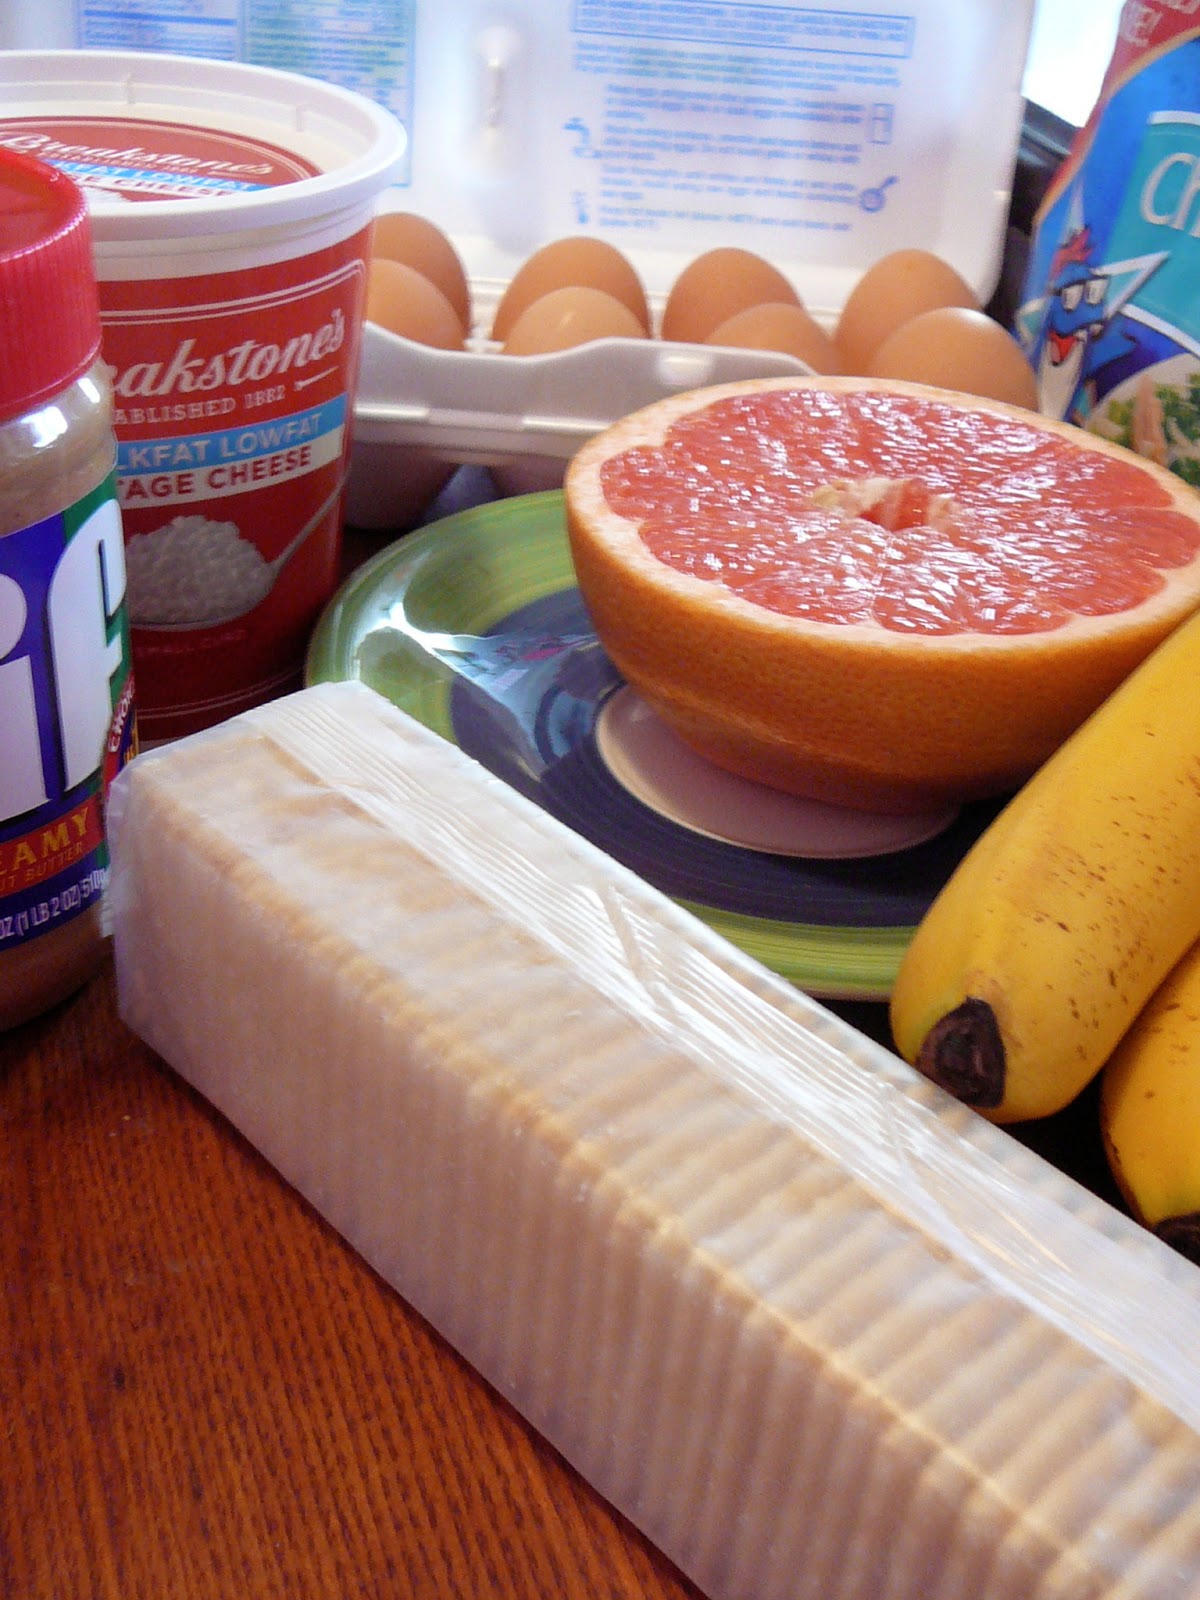
Breakfast--1/2 grapefruit (no sugar), 1 slice of toast, 2 T. peanut butter, and black coffee or tea (any brew as long as it has caffeine.)
Lunch--1/2 C. tuna, 1 slice of toast, and black coffee or tea.
Dinner--3 ounces of any type of meat, 1 C. green beans, 1/2 banana, 1 small apple, 1 C. vanilla ice cream.
Day 2:
Breakfast--1 egg, 1 slice dry toast, 1/2 banana and coffee or tea.
Lunch--1 C. cottage cheese (or 1 slice cheddar cheese), 1 hard cooked egg, and 5 saltine crackers, coffee or tea.
Dinner--2 hot dogs, (no buns) 1 C. broccoli, 1/2 C. carrots, 1/2 banana, and 1/2 C. vanilla ice cream.
Day 3:
Breakfast--5 saltine crackers, 1 slice cheddar cheese, 1 small apple, and coffee or tea.
Lunch--1 hard cooked egg, 1 slice of dry toast, and coffee or tea.
Dinner-- 1 C. tuna, 1/2 banana, 1 C. vanilla ice cream.
Blessedmommy further explains, "This diet works on chemical breakdown and is proven. Do not vary or substitute any of the foods. Salt and pepper may be used but do not use any other seasoning. The diet is to be used for only three days at a time."
She goes on to explain. After 3 days eat normal diet for 4 days you may start back on the diet for 3 days. Exercise is helpful. Do not eat or snack between these meals. Coffee and tea for the first 2 meals of the day only and water for the rest of the day. She gives additional information at http://blessedmommy.hubpades.com/Lose-Up-Tp-10-Pounds-In.....she also created "The Three Day, Military Diet" Facebook Page.
Will keep you posted on what happens! Going to the grocery for broccoli, green beans, and vanilla ice cream.
2/19/13
Updated Broccoli & Bacon Salad and Blanching Vegetables

The update to the original posting is blanching both the broccoli and cauliflower before mixing up the salad and the addition of shredded carrots, just because I like them. The vegetables turn a bright color and I think they keep longer upon being blanched. Many times I will blanch fresh vegetables just to keep them longer. It works great to then saute them as a hot vegetable in quick order with a bit of butter and seasoning.
To blanch I sort through the vegetables and trim them to size then plunge them into 2-3 quarts of rapidly boiling water I have added a couple of tablespoons of vinegar and a pinch of salt to. I return to a boil and hold them there for not more than 2 minutes. Using a spider or slotted spoon I quickly drain them and plunge them into a large bowl, a gallon or so of half ice and half cold water. As soon as they are totally cooled remove them to a colander to drain well. HELPFUL HINT: Blanch the lightest colored vegetables first and you can use the same water for all you want to do at one session. Now you are ready to use them or store them in the refrigerator for another day.
Ingredients for Broccoli & Bacon Salad:
4 C. broccoli pieces blanched and drained
4 C. cauliflower pieces blanched and drained
1 1/2 C. shredded or thinly sliced carrots
3 green onions sliced
2-3 ribs of celery sliced
2 T. fresh parsley chopped
6-8 strips of bacon diced and fried crisp and drained
1/2 C. raisins
1/2 C. shredded cheddar cheese
Ingredients for the Dressing:
3/4 C. Hellman's Mayonnaise
3/4 C. Ranch Dressing* (I use my "from scratch recipe.")
2-3 T. sugar (to taste)
1/2 t. salt
1/4 t. pepper
Assemble all of the vegetables in a large bowl, cover, and refrigerate. Stir the dressing ingredients together and pour over the vegetables. Stir in the raisins, bacon, and cheese.

www.thehiddenpantry.blogspot.com/2011/02/broccoli-and-califlower-salad-with.html
www.thehiddenpantry.blogspot.com/2013/01/the-best-homemade-ranch-dressing-recipe.html
2/18/13
Easy Homemade Beef Enchiladas with Homemade Enchilada Sauce
 |
| These Beef Enchiladas Look, Smell, and Taste Wonderful. |
I went to town this morning to buy gas and stop and pick up the few things I needed. Then of course I vacuumed.... seems like that is an everyday chore. (No mishaps, if anyone is wondering!)
I picked up a pound of shrimp for Pesto and Shrimp one night, Enchiladas ought to be good for 2 nights and carry out will work for another. (Brian stops and gets chicken about once a week at the Buehler's Buy Low grocery on his way home as they make it fresh and it's very good.)
 |
| This beautiful dish of enchiladas can be baked and served now, refrigerated and baked later, or freezer wrapped and frozen for later baking. It will keep about 3 months in the freezer. |
First I make my sauce either out of my home canned tomato sauce or store purchased sauce. I freeze what I don't need for another time. Today I am using my home canned sauce. www.thehiddenpantry.blogspot.com/2012/08/canning-basic-tomato-sauce.html

1-2 T. olive oil
1 diced onion or about 1/4 C. dried onion flakes
4-5 cloves fresh garlic peeled and diced
6-7 T. chili powder
2 T. ground cumin
1 quart canned tomato sauce (4 C.)
2 C. chicken stock
1 t. kosher salt add more to taste
1/2 t. freshly ground black pepper add more to taste

Ingredients for Easy Beef Enchiladas:
2 T. olive oil or melted butter
2 T. flour
5 C. enchilada sauce
1 C. chicken or beef stock
salt and pepper to taste
1 pound lean ground beef
1 diced onion
salt and pepper to taste
vegetable oil to fry the tortillas
12-14 corn tortillas
2-4 ounce cans of diced green chilies
1 bunch of green onions sliced with the tops
2 small cans of sliced black olives or 1 regular can of black olives and slice them
3-4 C. grated cheese (Cheddar or Monetary Jack and Cheddar blended or part Pepper Jack)
Whisk the fat and flour together in a saucepan over medium heat. Let it bubble for a minute or so and pour in the red sauce. Keep stirring and add the stock, taste for seasoning and add salt and pepper if needed. Reduce the heat to the lowest simmer and leave it to get delicious while you cook up the beef!


Preheat the oven to 350 degrees F. Butter a 9 x 13" baking dish and set it aside for now.


Bake for 25-30 minutes until bubbling and heated throughout. Let it sit a few minutes before serving. Yield 8 servings.
This casserole can be made ahead, covered and kept in the refrigerator until time to bake. It also freezes well for up to 3 months. Increase the baking time to about 1 hour and keep covered with foil for the first 45 minutes of baking. Check the center to be sure it has heated through. The edges should be bubbling and the cheese melted and bubbling.
2/17/13
Just a funny story about love.
 |
| Yellow Roses are My Favorite. |
It all started last Monday, or was it Tuesday? Well, no matter. The old oak seat to the upstairs throne suddenly lurched sideways as I was attempting to disembark. There are two identical thrones with two identical oak seats in our house. The upstairs bearing many more riders than the one in the downstairs as there is much more living going on these days up than down.
If any of you have ever suffered this indignity you know just exactly what I am talking about. We had assumed the "pin" and "hinge" were metal as that is how they were disguised to look. BUT NO! Treachery, they were plastic, (Just like the car that hit me as I was driving my old 1989 Fleetwood years ago. Needless to say who walked away unblemished in that tussle!) Well anyway, it is a most disconcerting situation to find yourself in when at every turn you are about to lurch to the left or right with a bit of a bump.
My hero and husband of 39 years rode heroically to the rescue in his shiny black S-10 pickup on Thursday, Valentine's Day. He not only appeared with a dozen of my favorite flowers, yellow roses, but a glowing new seat for our upstairs commode, which he promptly installed.
This having been traumatic enough I never dreamed another cataclysm of equal calamity loomed near!
The next day started quietly with our normal coffee and a kiss good-by as Brian left for his shop. In my wisdom I had decided to give the house a top to bottom vacuuming. After finishing upstairs I wrestled the upright sweeper a step at a time down the full flight of stairs connecting the two floors of our home. carefully balancing it as I swept one stair at a time until I reached the bottom. There I found the rag rug runner and decided it was due to be washed and I gathered it up and went for the door that sits between the family room and the garage. Being occupied with my thoughts I tossed the rug onto the floor of the garage, stepped back, and slammed the door. HARD.
It is unclear at this point exactly what misstep I had taken, only that there had been one as I had somehow slammed the door on my poor little third toe! I cannot tell you how it came to be my third toe only that it was. Great throbbing commenced as did bleeding! In hindsight I actually start laughing at what a sight I must have been as I hopped about barefoot (as I almost always am when cleaning house) on one foot with Molly our dog looking at me most curious as to what had just transpired.
So, I get up to the bathroom. pour hydrogen peroxide across the wound, grab a compress, and get the frozen rice bags from the freezer on my foot by now propped up across an ottoman. The rice bags are wonderful. They are cold and ready and sport not a drop of condensation!! Soon my dignity is somewhat restored so I band-aid my toes together to form a splint on what I believe to be a broken toe and proceed back down the stairs to finish my job and to clean up whatever spots of blood I have left.
I never deviate where I plug the sweeper or how I go about this task. But today after plugging into the regular socket and turning the sweeper on there is a flash and then quiet as nothing is running. There is no power on anything in my field of vision. The blue light on the computer is off, the light on the upright freezer is off, and the ceiling light for my office is out. Guessed I had blown a fuse or something.
As my friends and family well know I am not mechanical. Partly I will confess by plan. I realized when a girl in school in the '50s that had I learned to type I would have had to have been a person who got a job limited at that time to typing, so I didn't. Upon marrying I supposed that if I learned to change the oil in the car that too would have become my job, so I didn't.
I called Brian. He told me I needed to open the electrical box and see which lever had flipped and push it back so I did as he said. None were flipped. Our house phone did not work either as they are rolled in along with the modem on the computer. I had taken my cell phone with me for that reason.
So there I stood... by now sock footed on the cold garage floor. Toe throbbing. Nothing appeared to be wrong in the box. I tried to call Brian but could not get through. Unbeknown-st to me he was at the same time calling me, unable to get through! I tried again, and again. ENOUGH. I gave it up and proceeded upstairs to sit, just to sit.
In hindsight it may have been my location below ground and around all of that electrical "stuff" that kept me from getting through. I propped up my foot and turned on the TV.
Soon I heard the familiar sound of the garage door raising beneath me. (Our house sits built into the side of a hill and the garage is below the living room and the dining room.) Again my hero appeared riding his trusty S-10 pickup to my rescue.
He didn't come though because of the electricity. He came to be sure I was OK.
The funny in this story is me. Silly me. And the love in this story is about old love. The kind that comes from a lifetime of struggles, ups and downs, good times, and bad. It is about sticking together even when you may not think it is what you want to do. But....if you do you will find it is well worth the trip.

2/15/13
Banana Walnut Brownies with Browned Butter Frosting


Ingredients for Banana Brownies with Browned Butter Frosting:
1/2 C. soft butter (1 stick)
1 1/2 C. sugar
2 eggs
1 C. sour cream
3-4 ripe bananas
2 t. vanilla
2 1/2 C. flour
1 t. baking soda
scant 1 t. salt
1/2 C. chopped walnuts
Heat the oven to 375 degrees F. then butter well and dust with flour a half sheet pan (10 x 15") and set aside.
Combine in a large mixing bowl the butter and sugar. Beat the eggs into the sugar and shortening then add the sour cream mixing well. Using a small bowl mash the bananas and vanilla together then stir them into the creamed mixture and beat to blend well.
Whist the dry ingredients together and ass to the banana mixture beating for 1 minute. Stir in the nuts jut until blended. Empty the batter onto the prepared pan. Bake for 23-25 minutes until center tests done with a pick inserted comes out clean.
While the brownies are baking make the frosting.
 |
| Golden Browned Butter |
1/2 C. butter
4 C. powdered sugar
1 1/2 t. vanilla
1/4 C. milk
Using a heavy bottomed pan heat the butter over medium heat until golden brown then remove from the heat. Add the remaining ingredients and beat together until smooth. Add additional milk as needed to make the frosting thicker than a glaze but a bit thinner than cake frosting. Spread on the warm brownie bars using a butter knife or an off set spatula. It will be easier to spread on the warm bars.
Yields 24 large bars or 36 small bars. Cover when cold to keep fresh.
My Favorite Beet Salad or Pink & Purple Salad
 |
| Yes, I do appear to be on a beet craze of late. |
Ingredients for "Pink Dressing"
1/2 C. Hellman's Mayonnaise
1 T. Chili Sauce
1 T. chopped green pimento stuffed olives
1 hard cooked egg chopped fine
dash of paprika
pinch of chives
Salt and pepper to taste
Mix well and refrigerate.
Ingredients for Pink & Purple Salad:
1/2 large or 1 small head of Iceberg Lettuce washed, drained. and torn into bite size pieces
5-6 small beets cooked and sliced
1 recipe "Pink Dressing"
At serving time assemble on a large platter and garnish if desired with croutons. Yield 4 dinner servings.
2/14/13
Easy Vegetarian Vegetable Soup
 |
| Vegetarian Vegetable Soup |
Ingredients for Vegetarian Vegetable Soup:
4 C. tomatoes fresh or canned (mine were home canned with basil, garlic, and onions)
2 C. tomato sauce (again mine were home canned and seasoned)
4 C. water
2 cans condensed undiluted chicken broth (or plain water for a true vegetarian)
2 cans drained and rinsed white beans ( I used a quart of frozen I had cooked another day)
3 stalks celery sliced
4 carrots sliced
2 onions chopped
4 cloves garlic minced
2 zucchini sliced into half moons
2 potatoes diced
1/4 C. parsley chopped
1 jalapeno pepper diced
1 red bell pepper diced
salt and black pepper to taste
1 t. sugar
hot sauce to taste
1 1/2 C. small pasta cooked and rinsed and drained
Mix all ingredients EXCLUDING the zucchini and pasta together in a large soup kettle and simmer for 3-5 hours. Thirty minutes before serving ass the zucchini. Five minutes before serving stir in the pasta and stir until it is heated through. Serve hot with saltines or crusty bread.
 |
| Snow falling out side my front door this morning. |
 |
| Yellow Roses have long been my favorite and my husband surprised me with a dozen last night. |
2/12/13
"Painted Hearts" Cut Out Cookies for Valentine's Day Gift Giving
 |
| I love the way these bake up and leave a cookie dough outline around the outside of the cookie from when you painted them. The crackle is lovely and I dusted half of the cookies with red sugar which adhered well to the paint and gave a really nice effect. |
 |
| My husband, Brian's Valentine, shhhhh don't tell. |
Ingredients for Painted Cut Out Cookies:
1 1/3 C. shortening
1 1/2 C. sugar
2 eggs
2 T. + 2 t. milk (8 teaspoons total)
1 t. vanilla
4 C. flour
1 T. baking powder
1/2 t. salt
Combine the sugar and shortening in the bowl of a stand mixer and beat until smooth, add the vanilla and the milk and beat 5 minutes. Add the 2 whole eggs and continue beating for 1 minute.
 |
| This recipe makes 4 nice disks of dough to wrap in waxed paper and refrigerate. |
Preheat the oven to 375 degrees F. Lightly grease a baking sheet or line with parchment or sil-pat mats. Set aside.
Ingredients for Cookie Paint:
2 egg yolks
5-6 drops food coloring (I made both red and pink paint.)
2 t. water
 |
| HELPFUL HINT: Here is the part where I place the 2 unused egg whites in a small container and pop them into the freezer to use another day. |
 |
| It is fun to collect cookie cutters and they make nice gifts too. |
 |
| Unbaked painted cookies ready for the oven. |
Ingredients for the White Decorative Icing:
1 pound powdered sugar
1/4 C. milk (You may add more milk a droplet at a time until you reach the right consistency if needed.)
1 rounded T. dried egg whites
 |
| The kid's all get a cookie with their initial made just for them. |
 |
| Some of the cookie decorations are made just for fun. |
2/10/13
Slow Cooker Italian Beef
 |
| The aroma of this perfumed the house all Sunday long and tasted as good as it smelled. |
I have adapted this recipe from one found on a new blog I am enjoying, littleindiana.com and it was featured there from another Indiana blog, sahmchef.blogspot.com.
Ingredients for Slow Cooker Italian Beef:
3-4 pound Sirloin Tip roast halved
1 recipe Homemade Zesty Italian Salad Dressing
12 ounce bottle of beer or 1/2 C. dry red wine
3/4 C. stock
1 sliced onion
3 cloved minced fresh garlic
1 t. basil
1 1/2 t. oregano
1 t. onion powder
sprinkling of kosher salt and pepper
Add all of the ingredients to the bottom of the crock pot except the meat. Position the two halves of the roast next to each other in the crock pot and sprinkle with salt and pepper.
Cook covered on low for 8 hours. Shred the meat with 2 forks and serve on toasted French rolls or bread. Yield 5-8 servings shredded Italian beef.
My BIG Angel Food Cake
 |
| Beautifully tall and stately this BIG Angel Food Cake is served with strawberries for dessert for Sunday Dinner. |
Ingredients for My BIG Angel Food Cake:
2 C. egg whites at room temperature
1 1/2 t. cream of tarter
1/2 t. salt
1 C. sifted cake flour
1 1/2 C. sifted powdered sugar
1 1/2 t. vanilla
1/2 t. almond extract
1 C. granulated sugar
Preheat the oven to 375 degrees F. Inspect a large angel food tube pan to be sure it is clean and free of any residue. Set the pan aside. Sift the flour and the first amount of sugar together on a sheet of waved paper and set aside.
Combine the egg whites, cream of tarter, and salt in a large stand mixer bowl and beat until foamy. Turn up the mixer. Begin adding the sugar flour a fourth of a cup at a time quickly but carefully sprinkling it into the mixer as it runs. After you have added the flour and sugar mixture turn the mixer all the way up and beat until stiff peaks form.
Remove the stiff beaten egg and flour bowl from the mixer stand and fold in by hand the flavorings using a large spoon. Next fold in 2 T. at a time the last amount of granulated sugar.
Carefully spoon the batter into the tube pan spreading until even. Take a long table knife or spatula and run it around the batter at the edges of the pan to rid of air bubbles. Then continue until all of the batter is level and without large air pockets.
Bake with the top of the cake in the center of the oven for 30-35 minutes. The top should be well browned and dry to the touch. Remove from the oven and hang upside down over a tall thin necked bottle until the cake is cold. Run a long thin knife blade around the outer edge and the tube to loosen the cake. Turn out onto a stand and frost as desired.

http://thehiddenpantry.blogspot.com/2010/05/all-things-strawberry.html
One Hour French Bread
 |
| This recipe quickly made 4 nice large loaves of French bread and the addition of the melted butter over the loaves the last 10 minutes of baking results in a deep mahogany crust. |
Ingredients for One Hour French Bread Recipe:
3 C. Warm Water 115 degrees
3 T. Instant Yeast
6 T. Sugar
2 t. Salt
6 1/2 C. Bread Flour
1 C. melted butter
Add the yeast and sugar to the warm water in the base of a stand mixer. Let stand 5 minutes. Add the salt and mix. Add the flour and mix just until the ingredients come together. Change to a dough hook. Knead for 5 minutes.
Divide the dough into 4 parts and roll each into a 8" x12" rectangle. (Remember a bigger rectangle makes a skinnier baguette a smaller a thicker one.) Cover two large baking sheets with parchment paper. Preheat the oven to 450 degrees F.
Roll up each rectangle and pinch the ends to give that baguette shape. Place 2 loaves on each sheet. Cover with a clean towel and let rise for 30 minutes.
Now cut a 1" deep cranny along the length of each loaf of bread. Bake for 9 minutes. Rotate the baguettes and dump all of the butter equally on top of the loaves, drizzling it over the sides, every-which-way. ( You can reduce the amount of butter by half with equally delicious results.)

NOTE: I doubled the original recipe so you can easily cut it in half for 2 loaves.
Yields 4 loaves.
Better Oven French Fries

Annie's Eats is a popular blog written by a doctor who had worked in the same lab as my son and he told me about it a few years ago which inspired me further to blog. There is where I discovered this post. She credits "Cook's Illustrated" with the recipe.
Baked Oven Fries:
24 ounces (about 3 lg.) peeled and cut Russet potatoes
5 T. peanut or canola oil, divided
3/4 t. kosher salt + more to taste
1/4 t. freshly ground black pepper +more to taste
Preheat the oven to 475 degrees F. Prepare a heavy half sheet pan with 4 T. oil spreading evenly with a pastry brush then sprinkle evenly with the salt and pepper and set aside.
Soak the uniformly cut potato wedged in a bowl of VERY hot water for 20-30 minutes. Drain the potatoes and place onto clean dry towels and dry thoroughly. Dry the bowl. Return the dry potatoes to the bowl and toss with the remaining 1 T. of oil. Arrange the potatoes in a single layer on the prepared sheet pan. Cover tightly with foil and place into the preheated oven for 5 minutes. Remove the foil and continue baking for about 10 minutes than rotate the pan and continue for another 10-15 minutes until the underssides of the potatoes have browned. Using tongs and a spatuls turn all of the fries keeping them in a single layer. Bake an additional 10-15 minutes.
When the fries have browned remove them to paper towels to drain and season additionally if desired. Serve hot with condiments or plain.
2/8/13
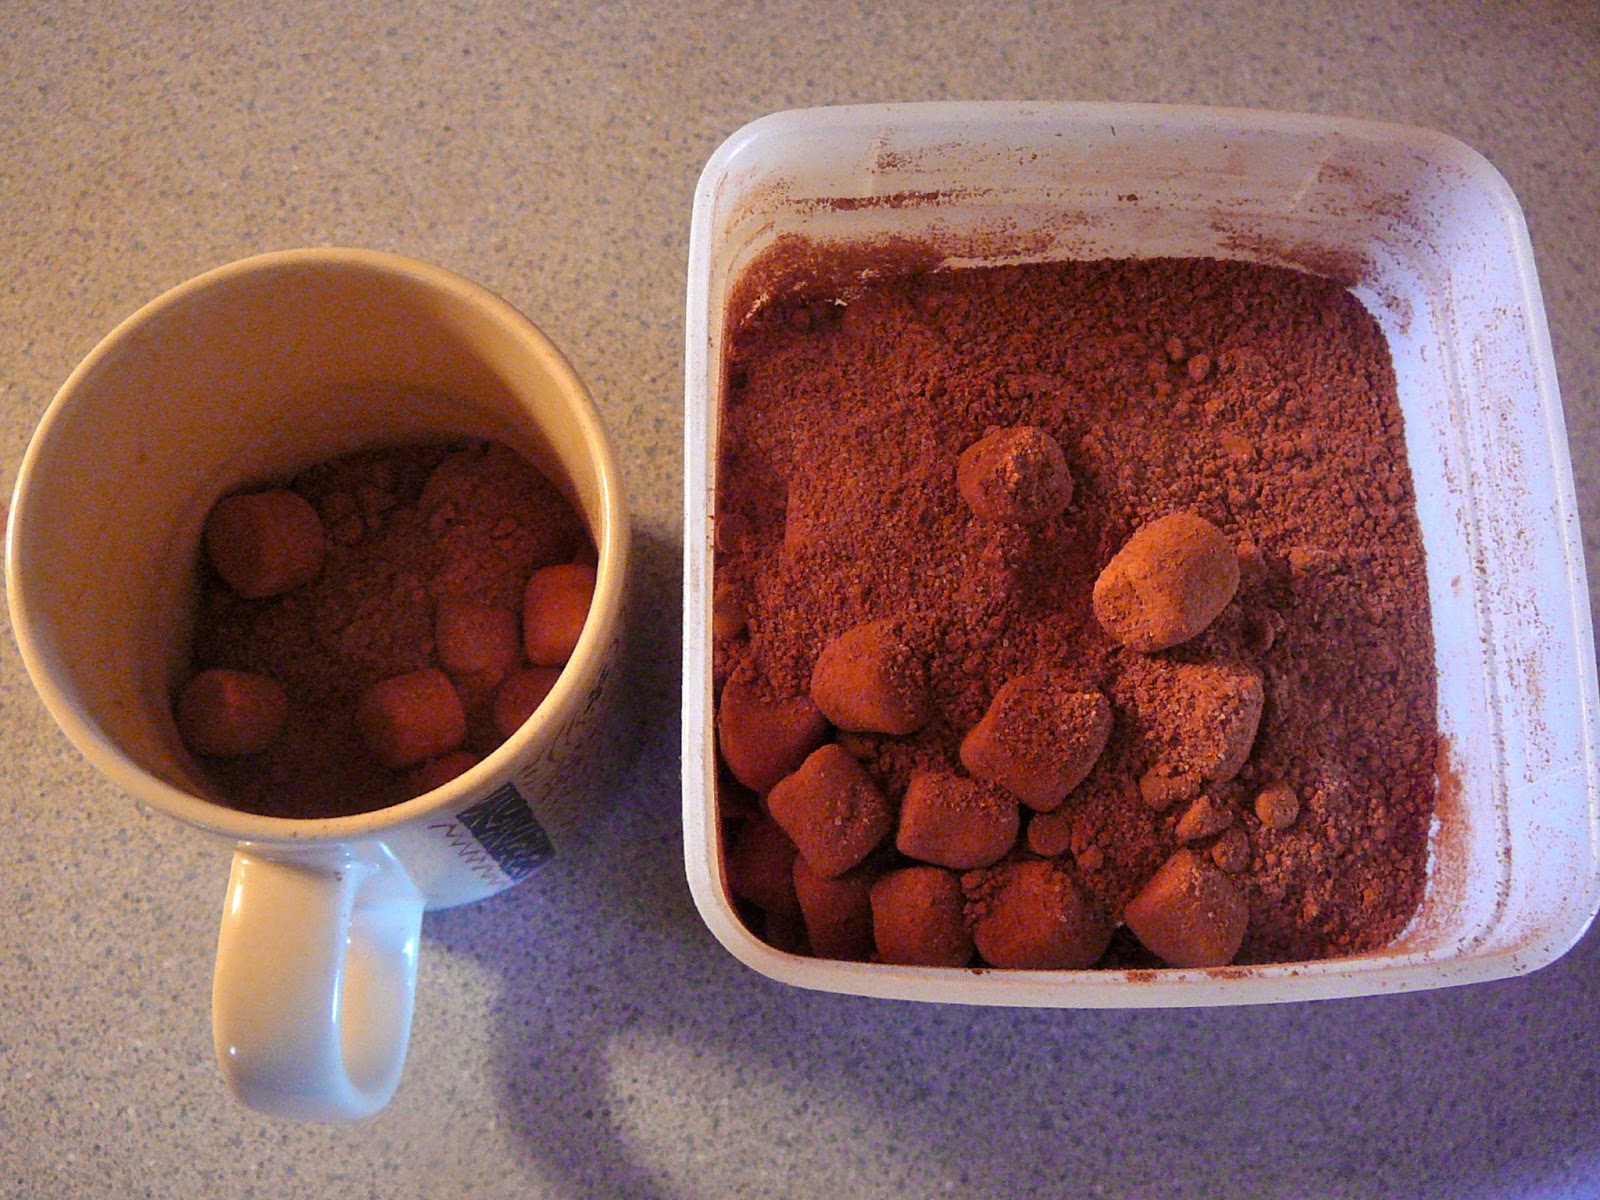
Hot Cocoa Mix in a Jar, Just in Time for Valentine's Day Giving!


1 C. granulated sugar
1 C. unsweetened cocoa powder
1 C. powdered milk
1/2 C. mini chocolate chips
1/2 C. miniature marshmallows
1/2 t. salt
Layer 1/2 C. granulated sugar in the bottom of each jar you are making. Next add 1/2 c. cocoa powder, 1 C. powdered milk, 1/2 c. cocoa, 1/2 C. granulated sugar, 1/2 t. salt, 1/2 C. mini chocolate chips, and 1/2 C miniature marshmallows.
Gently lift the jar and tap it several times on the counter to tamp down the ingredients and then top off again with additional marshmallows. Top with a seal and screw on the band. Cut about a 5" square of red or other fabric and remove the band. Lay the fabric atop the seal evenly and screw on the band. Add a ribbon around the screw top and a card.
I am going to make up another jar and gussy them up a bit and I will add that photo later. For now I just wanted to get this idea out there for anyone who might like to give it a try. I LOVE food gifts in jars! To receive them as well as to give them.
2/6/13
Pileated Woodpecker Visits Our Window Today.
 |
| Pileated Woodpecker @10:30 AM this morning. Picture taken by my friend and next door neighbor, Doris. |
It was amazing as my neighbor Doris and I visited I saw something very large land in the big old tree directly in front of our living room's picture window. The big branches come within just a couple of inches of the house and squirrels daily jump from roof to house and back in play. I thought it a white tailed hawk at first as it blended with the snarl of branches. It was when the stark pointed top notch arose I gasped at the blood red streak it made in my field of vision and Doris and I in unison gasped, "A Pileated Woodpecker!"
It was Doris who thought of the camera and for that I am grateful. I was so thrilled to have him within 3 feet of the window I was aflutter. Quietly I stood from the rocker where I had sat and quietly stepped backward through the dining room towards the kitchen where my camera lay on the kitchen counter. I whispered to Doris, "Is he there?" He was, and we both adjusted our positions for a better view.
 |
| This was my best picture. |
Subscribe to:
Posts (Atom)