Translate

12/22/12

Frostings, Chocolate Butter Cream, Cream Cheese, & Old Fashioned Whipped, plus My Favorite Cookie Icing.

Left to right, Chocolate Butter Cream, Cream Cheese, and Old Fashioned Whipped Frosting.
As I told my Mother this morning I have always had more issues finding a frosting to ice my cakes with than the making of the cakes.  Since I delivered the desserts last night to the Christmas party I have been thinking of these cakes and frosting's and decided to share with you my FAVORITE frosting/icing recipes, how to make them successfully, and the tips I use.  I do not like the ultra sugary sweet frosting.  These are just the ones I like and hope you might too.  Some take some time and trouble and others are very simple.  All are delicious!

There is method to my madness and the confessions of my OCDS are as follows!  (Obsessive, compulsive disorder syndrome.)  The first thing I do is to assemble everything I need.  I would have already made the cakes and either wrapped the layers in waxed paper or parchment and slipped each into a large plastic bag and refrigerated or frozen them.  The reason is that it is WAY easier to frost a cold cake.  When I have the frosting done I take out the layers and unwrap brushing lightly any loose crumbs from the sides with my hands as I go.  I really prefer to freeze them overnight.  This is especially helpful if it will sit out with a cream cheese or butter cream to keep it cool and it is terrific if you have to transport the cake.  If it will not have time to thaw before you want to serve just refrigerate instead.

Tools: turntable if available, decorative flat cake platter, offset spatula, bamboo skewers, stand mixer with paddle and whip attachments, rubber scraper, measuring cups and spoons.


Ingredients for Old Fashioned Whipped Frosting:

7 T. flour
1 1/2 C. milk

Mix the flour and milk in a heavy bottomed pan and cook stirring constantly until it forms a very thick paste.  Remove from the heat and scrape into a small bowl and cover with plastic wrap.  Refrigerate until cold.

1 1/2 C. powdered sugar
3/4 C. Crisco shortening
1 1/2 sticks room temperature margarine (3/4 C.) Do not use butter. 
1 1/2 t. vanilla

Beat the sugar, Crisco, margarine, and vanilla until it turns very white using the whip of a stand mixer for about 6-8 minutes.  Add the cold flour mixture and continue beating until it becomes very white and very fluffy, about 6-10 minutes.  The resulting frosting is not a sugary sweet frosting but more like whipped cream.  Very light and not overly sweet.  This recipe frosts a three layer cake.

To assemble I first place a good tablespoon of frosting in the center of the cake plate to anchor.

Next I frost the layers.

When I have placed the top layer onto the stack I ofter insert a wooden skewer or two to anchor and keep the layers from sliding, especially it they will be transported or on a hot day.  I use a scissors and a bit of elbow grease to cut it to size.

Old Fashioned Icing.
The skewer if placed in the center will just drop by the wayside when you slice and serve the cake.  It does not show on the frosted cake.


Cream Cheese Frosting.
Ingredients for Cream Cheese Frosting for a Three Layer Cake:

12 ounces softened cream cheese
3/4 C. softened stick margarine, not butter
6 C. powdered sugar
1 1/2 t. vanilla

Beat the cream cheese and margarine together in a mixing bowl with the paddle attachment until very well blended.  Then add the powered sugar,and vanilla and beat until smooth.  Frost the cake using the above steps.  This recipe is adapted from Chef Doug Rennie of Evansville, Indiana.  This recipe frosts a large three layer cake.


Chocolate Butter Cream Frosting.
Ingredients for Creamy Chocolate Butter Cream:

2 1/2 sticks of room temperature butter
1 C. powdered sugar
3/4 C. Dutch process cocoa
pinch of salt
1/2 C. light corn syrup
1/2 t. vanilla
1 t. instant powdered coffee or espresso powder
7 ounces semi-sweet chocolate chips melted over simmering water and cooled to room temperature

Add then butter, sugar, cocoa, and salt to the bowl of the food processor.  Pulse until smooth, scraping the sides of the bowl once or twice, about 30 seconds.  Add the corn syrup, vanilla, and espresso powder and process until just combined, about 10 seconds.  Scrape the sides of the bowl one more time and add the cooled chocolate.  Pulse until the frosting is creamy, about 15 seconds.  Makes about 3 cups of frosting.  This is a recipe I think I saw of Bobby Flay's on The Food Network and have adapted it to suit our family..It is easy and delicious!


Cookie Frosting Recipe and Ideas:


Ingredients for my favorite Cookie Frosting:

For each cup of powdered sugar add 1 T. soft butter and 1 t. heavy cream adding more a droplet at a time until you reach the desired consistency.  This icing becomes firm if left out to dry a bit and then does not stick to the other cookies.

I also occasionally use this recipe for some cake frosting.   I just cover it with a cake dome instead of leaving out to air dry a bit.

These coolies were baked and decorated by my two granddaughters 13 and 17 this afternoon using this frosting recipe.  They made 2 cups and tinted part if the frosting.  I mixed up the dough for them last night and they came this afternoon and had a "cookie bake" at our house and Grandpa and I enjoyed it very much. It made great memories for us all.

12/20/12

Chocolate Bourbon Cake and Chocolate Marble Cheese Cake

Chocolate Marble Cheese Cake.
A few weeks ago a friend asked me to bake desserts for a party for 100 people at a local country club for this weekend.    I have completed the task and am relieved to have it done.  There are 3 cakes 2 cheesecakes and 6 dozen cookies.  Most of the recipes have already been shared with you but these two had not been although I have made them both before.  They are both chocolate involved but are a little different.


Lorenzo's Chocolate Bourbon Cake is from a local restaurant of the same name and  the recipe is given in "Once Upon a Time, Recipes and Recollections from a River City"  by the Junior League of Evansville, Indiana.  I hope you enjoy it.

Lorenzo's Chocolate Bourbon Cake.


This is a deep dark black chocolate cake flavored with coffee, bourbon, vanilla, and chocolate.


Ingredients for Lorenzo's Chocolate Bourbon Cake:

1 3/4 C. hot brewed coffee
1/4 C. bourbon
1 C. (2 sticks) butter cut into small pieces
5 ounces unsweetened chocolate cut into small pieces
2 C. sugar
2 C. flour
1 t. baking soda
pinch of salt
2 eggs at room temperature
1 t. pure vanilla extract

Combine the coffee, bourbon,butter, and chocolate in a large metal or glass bowl.  Let it stand covered, until the butter and chocolate are completely melted.  Meanwhile preheat the oven to 275 degrees, yes it is 275, not a misprint.  Butter and flour 2 nine inch cake pans and set aside.  I also line mine with parchment and butter and flour it also.  When the butter and chocolate have melted whisk until everything is well blended.  Whisk in the sugar and cool to room temperature.

Sift the flour, soda, and salt together into another bowl or onto a sheet of waxed paper.  Whisk half at a time into the chocolate mixture.  Whisk in the eggs and vanilla.  Pour into the 2 prepared pans.  Bake in the preheated oven for 50 minutes until a wooden pick inserted into the center of the cake comes out clean.  Cool in the pans on wire racks.  You may refrigerate in the pans to frost later covered with plastic wrap as it is easier to frost a cold cake.

To remove from the pans, run a knife around the inside edges of the pan and invert, tapping on the bottoms of the pans to loosen the layers.  If the layers stick slightly, place the pans over low heat, moving them constantly to prevent scorching. (I have never had to do this.)  Remove from the pans and frost.

Note:  This cake is lovely with a basic chocolate butter cream or chocolate ganache.

Ingredients for Chocolate Marble Cheese Cake:

1-10" Spring Form Pan

Crust:

1 3/4 C. graham cracker crumbs
1/3 C. melted butter
1/4 C. sugar

Filling:

3-8 ounce  packages of cream cheese at room temperature
1 1/2 C. sugar
4 eggs
1 T. vanilla

Preheat the oven to 300 degrees F.   Generously butter the sides and bottom of spring form pan.

Blend the crumbs, butter, and sugar together.  Press onto the sides and bottom of a well buttered spring form pan.  Set aside.

Melt 1/4 C. semi sweet chocolate chips on a glass bowl over simmering water and stir until smooth.  Set aside to cool to room temperature.  

Mix the cream cheese and sugar for 3-5 minutes.  Add eggs and vanilla.  Beat the entire mixture scrapping the sides occasionally for a full 30 minutes.  Remove 1 C. of the filling and blend with the melted chocolate.  Pour the remaining batter int the crust.  Spoon the chocolate at intervals then swirl to marble just before baking.  Bake for 55-65 minutes.  Cool to room temperature.  Serve as is or chop additional chocolate and sprinkle over the top.  Refrigerate until serving time. 


12/17/12

Maple Pecan Fudge for Christmas.

Maple Pecan Fudge.
Back a few months ago I came across a recipe for Maple walnut fudge and since I keep granulated maple syrup as well as powdered maple syrup it got me thinking how I might use these things in my version of a Maple pecan fudge.  Here is what I came up with and it is delicious.  I will also give the original recipe from intimateweddings.com for anyone wanting to give this a try but without my ingredients on hand.  You could also use a couple of droplets of maple flavor to help it a bit if desired.

Ingredients for Maple Pecan (or Walnut) Fudge:

3 C. granulated sugar + 1 C. powdered maple sugar   (or 4 C. granulated)
1/2 C. butter
3/4 C. real maple syrup
1 C. half and half   (or milk)
1 1/2 C. miniature marshmallows
1 t. vanilla   (+ 1/8 t. maple extract optional)
pinch of salt

Line an eight inch square pan with parchment paper running it up all 4 sides past the tops  by using 2, 8" wide pieces and crossing them in opposite directions.

In a large pan over medium heat combine the sugars, butter, maple syrup, milk, salt, and marshmallows. 

Cook the mixture, stirring occasionally until a candy thermometer reaches 225-235 degrees F.  ( I took mine off the heat at 232 degrees) or until it forms a soft ball when a little bit of the mixture is dropped into cold water.

Remove from heat.  Let cool to 125 degrees and add the nuts and flavorings.  Mix at medium speed with an electric mixer until the mixture loses it's gloss and starts to harden around the edges of the pan.  KNOWING EXACTLY WHEN TO STOP MIXING IS THE TRICKIEST PART OF THE PROCESS.  IF YOU WAIT TOO LONG THE MIXTURE WILL BE DIFFICULT TO POUR.  It took me maybe 4 minutes to get there.  Pour the mixture into the lined pan and refrigerate for 2 hours.  Lift out of the pan on the paper, cut and store in a tightly lidded container.   Yield about 36 squares or 1 1/4 pounds of fudge.

This is a lovely treat to leave Santa beneath your tree this Christmas.

Devil's Food Cake and BBQ Ribs, Double Duty Baking For Birthday's and Christmas.

This is a beautiful tall, delicious cake baked in either 3, 8" pans or 2, 9" pans.
A great friend of ours asked me to help with the desserts for a Christmas Party for 100 people and  so these last weeks I have been baking and freezing cookies.  This morning I have until about 10:30 when I will have to leave for an appointment and I am trying something new.  Mixing up a double batch of cake batter and baking two three layer devils food cakes.  (  Posted 8/1/10 as Devil's Food Cake.)  The cakes will not all fit in the oven at once but only take 25 minutes to bake so I am going to have a run at it and see what happens.  If successful it will save me work.  One for this weekend and one for later.  I have made cookies and cakes ahead many many times and frozen them with excellent outcome. The cakes worked fine baking on two shelves and rotating the pans and shelved half way through the allotted baking time.  I double wrap one and freeze the layers to frost later,  just before the party they were baked for.

This weekends cake.
I arranged "3-8-4-2" candles in a line across the top as Joel was 38 and Mike 42 this month.  It was sort of funny to see 3,842 strewn atop the already tall cake!

Three slabs of baby back ribs smoked to perfection.
We also served Smoked BBQ baby back ribs, the very best Brian has ever made and a salad and twice baked potatoes all by request.  These we season with black pepper, kosher salt, and garlic powder, with a good pinch of red pepper flakes and smoke over low heat in a smoker for 5-6 hours then coat with sauce and wrap in foil and keep in the oven at 200 degrees for another couple of hours.  hey were perfection.  It was a nice evening.

Of course the best part is when they blow out the candles and we all smile and sing.  Happy Birthday boys.

12/13/12

Gingersnaps and 12/12/12 the bed is finally back together!

Gingersnaps
I may well remember this day, not just because of the uncommon alignment of the numbers composing the date but because on this day I finally got what should have taken maybe and hour took me 4 days to complete.   Am I getting old or was this just a fluke?   I take solace that my eyesight is good,  my mind clear,  and my trigger finger is strong. 

Betty Crockers' Cookbook
Gingersnaps if you are inclined to like sweet spicy cookies that are crisp around the outside and a bit chewy in the center are quite delicious and this is far and away the best recipe I have ever found.  I like them better than Ina Garten's ultimate Ginger cookie.  This is a repeat of the recipe I have already given and continue to bake each fall. As you can see the old worn Betty Crocker Cookbook has yellowed with age and is stained from wear and usage.

Finally got these big old rails in place!
You can see the blocks for the slats.
Antique beds are snugger and require a bit of easing to fit.
At last all together.
Both guestrooms have been readied with clean, warm and fuzzy flannel sheets.  Soft quilts and warm blankets cover them.  The quilts are made by my Mother of my late Grandparents clothing and my late Father's shirts, all softened by repeated washings.  Or some were made by my husbands Grandma Ruby,   Soft cozy store bought and home made stuffed animals adorn them for my Grandchildren.  These same animals always have greeted Emily and Katie as they now do Jack and Sam.  I don't think adults mind either to tell you the truth as it is a lot like going home to my Grandmother's house in Loogootee, Indiana was all those many years ago.

Note:  Our parents grew up 5 miles apart on farms between Loogootee and Haysville, Indiana.  Both had upstairs bedroom's with big old beds adorned with quilts and comforters made by family members.  This oak sleigh bed is exactly like the one at my Grandma's house.

12/11/12

The Big Christmas Cookie Bake is on and my misadventures with an antique bed!

Last night I mixed up a batch of cut out cookies,  see Sugar Cookies to Cut Out 12/10/11.  I like to frost them with the frosting recipe at the end of the post and sprinkle them with decorative sugars. I baked these first thing this morning.

This morning I tried The Pioneer Woman's Malted Chocolate Chip Cookies.  She had them going a week or so and I printed off the recipe as malts are my friend and that sounds awfully good in a chocolate chip cookie!  So this morning was spent baking and decorating cookies.   It is a very lovely thing to do on a cold and gloomy day.

This is my adaptation of Malted milk Chocolate Chip Cookies.

Ingredients for Ree Drummond's Malted Milk Chocolate Chip Cookies

2 sticks soft butter
3/4 C. brown sugar packed
3/4 C. sugar
2 large eggs
2 t. vanilla
1/2 C. malt milk powder, rounded
2 C. flour
1 1/4 t. baking soda
1 1/4 t. salt
12 Oz. bag of chocolate chips

Preheat the oven to 375 degrees F. and whisk the flour, soda, and salt together in a small bowl and set aside.   Prepare the baking sheets with parchment or silpat mats.

Cream the butter and sugars until fluffy.  Add the slightly beaten eggs.  Combine the vanilla and malted milk powder with the creamed mixture until smooth.  Add the flour mixture until just combined and stir in the chocolate chips until distributed.

Drop by teaspoons onto the prepared pans or use a cookie scoop.  Leave quite a bit of room between them as these are a thin cookie that spreads.  I made six per half sheet pan.   Bake 9-11 minutes.  The cookies will be very flat and chewy.  Allow to cool a few minutes before removing them from the pans to cool.

Option:  Cool completely and use two cookies to make ice cream sandwiches.  Add sprinkles to the sides of the ice cream, then wrap individually in plastic and return to the freezer until serving time.

Again I will put at least half of these in the freezer for later.  The most important thing is to place waxed paper between the layers and double wrap them.

After I cleaned up the kitchen I headed to the back bedroom where I have worked for 3 days to switch out the rails of an antique oak sleigh bed.  Why 3 days?  Brian had hurt his shoulder and I don't want to aggravate it further by asking him to help me.  Right off the bat I hurt my back hauling the rails from the garage.  I didn't have enough sense or patience to take them one at a time.  I expect I am old enough to have known better.  Ha  ha!  By the way, the reason I got started on this project is that every fall, before Christmas, I change all of the beds to flannel sheets before we get overnight company.  So, while I was at it I thought I would out go ahead and switch out the rails.  I am thinking of using the old rails as shelves mounted with brackets for display or for plants.  I have seen this done with old ironing boards and I think this might do nicely.

Anyway it was the first days adventure.  Getting them up a full flight of stairs.  This bed is made with oak plugs instead of nails which dates it quite a bit.  It is solid oak and the rails have a ledge as well as notches built into it to place the slats into every few inches.  I have never seen one like this although my church pew is made this way. We have been using the incorrect rails up until now.

I broke a light bulb all over the place Sunday when I started again.  When it hit that hard old oak it shattered like it was concrete and I am still finding glass and sweeping it up today. 

Finally Monday I was able to drag the mattress and box springs off and lean them against the wall.  I pulled up, wiggled, and cajoled the first rail out and managed to keep the whole bed from collapsing on top of me.  About then I lost my balance, regained it, and decided "enough for today."  Thus my 3 days.

Still can't get this finished.  Tomorrow is day four of trying to get this bedroom back together and maybe Gingersnaps?


12/8/12

Sewing up a Christmas Banner for my Red Front Door!

Merry Christmas to all and to all a good night!
As you may recall I have happily received a major amount of fabric and notions from Grandma Powell. (92 year old Mother of my late first husband.)  Included was a stack of holiday sewing.  I have started into the stack, first by laundering everything and next by selecting the first things I plan to make.  Yesterday afternoon I took a large Santa Banner, about 34" x 42" and decided I would add batting and a backing and machine quilt the major parts of it.  Thus far I have joined the sides and bottom and left the top open.

I also made a trip to Michael's and found jingle bells to sew onto the sleigh and some metallic cord I may use to embellish the reign's with to set them apart a bit more.  We will see about that one.

Basically you place the right sides of the backing and of the banner facing each other and then pin on the batting.  Take great care that all of the sides are evenly matched and pinned.  I started at the front center of the bottom and sewed across to the corner then repeated from the center front to the opposite corner.  The purpose of taking this approach is you do not want to have any slack or fullness or twist in any of the layers if you can help it.  This method helps reduce that likely hood.  Next I sewed from the bottom corners to the top.

I have left the top open to help pull out any fullness when I create a casing at the top for a dowel rod by which to hang it with a red ribbon on our red front door.

I just finished and hung Santa on my door and I like him a lot.  Mostly because it is a bit different than hanging a wreath.

I used a 1" wide gross grain ribbon as seam binding and stitched it across the top of all three layers on the right side of the fabric overlapping 1/2" and stitching 1/8" from the lower edge of the ribbon.  Next I used the dowel I had and laid it across the top to see exactly how far down to turn the fabric to form the casing.  Next I pinned it and sewed across the entire top forming a perfect sized casing.

For fun I used a darning needle threaded with 1/8"  wide red satin ribbon and just sewed them in place along the reindeer's harness.  There are 10 lovely jingle bells to announce someone at our front door.  I found some white fake fur left from making bunnies tails and thought it perfect for the sleeves of Santa's coat.  Just a dab of fabric glue and a bit of a trim and it worked perfectly.

This project was an ad lib all the way and that made it fun.  I will start another soon!

12/6/12

Christmas Cookies, Italian Biscuits (Cookies), as my Cookie Press Bites the Dust!

Such a list of plans I had for today!  And. honestly it all started off pretty well.  Last night after telling one son the pants size of another backwards I worried all night that I had ordered 32" W and 36"L instead of the other way around on the order I placed yesterday morning!  When I checked this morning I had done it correctly so I was reassured I had lost only part of my marbles!  

I proceeded to throw a load of fabric in the washer so I can sew this afternoon.  Then made a few necessary phone calls.  Actually it was moving right along.  I had washed and dried my cookie press last night to be ready this morning so I proceeded to mix up the dough.  It has been a couple of years since I have had this cookie press out so I opted to use the cookie recipe enclosed for and Italian Biscuit to be sure things would go smoothly.  I headed down and looked up the recipe conversions from grams and pounds to cups and was ready to roll.

Ingredients for Italian Biscuits (Cookies):

4 C. all purpose flour
1 C. + 2 T. sugar
1 C. melted and cooled butter
pinch of salt
4-6 T. milk
3 egg yolks
2 t. cocoa (optional)

Place the flour, sugar and salt into a bowl and whisk together.  Make a well in the center and beat the egg yolks adding the cooled melted butter and stir together with a fork.  Using your hands add the milk a few droplets at a time until the dough is formed and holds together.  Form into sausage like rolls about 1 1/2 -2 " wide to fit into the shaft of the cookie press.

Press the cookies through into desired shapes, sprinkle with sugars, and bake 12-15 minutes.  Cool and store in an airtight container.  Yield 6 dozen small cookies.

So away we went BUT ALAS after 2 pans of cookies the press LOCKED UP and would not budge!  A broken cookie press did not fit in my plan!  First I decided to forget it and put the dough away in the refrigerator.  Then I thought no I don't want to clean up the same mess twice.....So, (HELPFUL HINT) I poured decorative sugar in a paper plate and rolled each log until it was coated and just sliced them off and baked them.  All is well that ends well I guess!  They taste fine and while they are not as pretty as I had hoped they still have a bit of Christmas Spirit about them.


12/5/12

Christmas Baking!! Pecan Tarts start the cookie tray.


I have no idea where I got this recipe or when.  It seems like one I have made forever and is so faded I can barely read it.  But it is tried and true and I find them quite irresistible.  Truly you cannot eat just one, you really do want another!


I am starting my Christmas baking today with these and will double wrap and freeze each batch to thaw and serve when needed.

Ingredients for Pecan Tarts:

1 Cup soft butter
6 Oz. Cream cheese softened
2 C. flour

2 eggs
1 1/2 C. brown sugar
pinch of salt
1 T. instant coffee (optional)
2 T. melted butter
1 t. vanilla
1/2 C. chopped pecans

Preheat the oven to 350 degrees.  Spray miniature tart or cupcake pan lightly with baking spray.  Set aside.

Combine the butter and cream cheese with an electric mixer until smooth.  Add the flour and beat until well combined.  Gather the dough together with you hands or a large spoon to form a rough ball.  Cover the bowl with plastic wrap and refrigerate until firm.

Whisk together the eggs, sugar, salt, coffee, butter, and vanilla  in a medium size bowl.

Form the dough into balls, about 1", rolling them in the palms of your hands.  Make an small indentation in the center of each with your thumb.  Place the roughly formed cup in the prepared pan.  HELPFUL HINT:  Use the end of the handle of a wooden spoon dipped in a little flour and insert it into the cup you have started to enlarge and deepen it.  This works better than anything I have ever found to form the tiny cups for the filling!

Place a half teaspoon of chopped pecans in the center of each tart and top with a teaspoon of the filling mixture.

Bake for 20 minutes, remove from the oven then cool for 10 minutes.  Remove the tarts from the pan and cool on a rack or sheet of waxed paper until cold.  Store in a tightly closed container.  Yield 3 - 3 1/2 dozen tarts, depending on the size.

NOTE:   I also made a batch of Brownies from the "Homemade Brownie Mix" given on 10/15/12.  I omited the walnuts and added 1/2 C. Andes Green and Black mint baking chips.  These I baked in a 12 cup muffin pan sprayed with baking spray.  The chips dissapeared in the brownies and gave a wonderful and NOT overwhelming mint flavor to the brownie bites.  Yield 12.


12/4/12

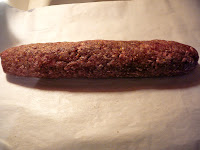
Spicy Salami or Beef Stick, Easily Made in YOUR Kitchen for the Holiday's

This has been a recipe that has evolved a bit from the first time I made it.  I have used venison as well as beef and it is equally good.  This year I almost substituted beer for the water and I still may in another batch.  (You knew this was coming to go with all that beer Brian has going!)  I also kicked up the spices with the addition of red pepper flakes and onion powder.

Ingredients for Spicy Salami or Beef Stick:

2 pounds freshly ground chuck
2 T. Morton's Tender Quick
1 1/2 teaspoon coarse ground black pepper
1 1/2 teaspoon liquid smoke
1/2 teaspoon onion powder
1/4 teaspoon garlic powder
1 tablespoon mustard seeds
1/2 teaspoon dried red pepper flakes
1 cup cold water

Mix altogether in a large bowl until all of the water has been absorbed.

Roll into two long sausages and wrap in parchment paper or foil.  Refrigerate overnight.

Preheat the oven to 300 degrees F.   Spray a broiler rack with nonstick cooking spray or cover with foil.  Bale 1 hour and 20 minutes.  Remove from the oven and cool completely.

Wrap tightly and refrigerate.  Slice and serve on crackers or party rye.  Keep unused portions wrapped tightly and refrigerated.   Yield 2  one pound salami sticks.  Special note of thanks to Theresa Slankard who shared this recipe with me probably 30 years ago!  Thanks again.

12/3/12

Homebrew Beer Episode 3, Bottling the Brew.


Sunday afternoon we got busy and performed the final stage of the beer brewing project. ( Except of course the very last chapter,  tasting and consuming it! )

After washing and sterilizing all of the caps, bottles, and equipment needed to bottle Brian got comfortable and we mixed the final special sugar. He dissolved the sugar in 2 C. of warm water and stirred it into the brew.  Basically it was an ounce of the special finishing sugar to a gallon of the brew and it combines with the yeast and results in the natural carbonation.  That is if you get everything right!!


Brian sat on the kitchen floor and filled each bottle then handed it off  to me and I caped and packed the bottles back into the cases.

He then marked each cap as our first batch so we would know what we had should we proceed with additional batches of different beers.  The really tricky part of this is you keep edging along not knowing if the batch is any good.  Did we mess something up along the way?  We can't know until the end.

The bottled beer will sit in the house at room temperature for a couple of days then be moved down into the cool garage for 1 or 2 weeks before tasting.  Mark, Brian's brewing friend says it is good after a week but better after two.  Guess time really will tell.

YES.  THIS TURNED OUT GREAT.  WE ARE SO EXCITED!  A friend of Brian's who has done this for years says it is terrific.  The only advice he offered was to put just a little bit less in each bottle.   We are tickled to death and have started a new batch.  More to come later......