Translate

Showing posts with label Cake decorating. Show all posts

7/7/15

7 Year Old Twins Decorate Their Own Birthday Cakes with Grandma

Last year and this year I have baked the birthday cakes for our twin grandson's and they decorate them with small toys and candies and just have a ball doing so!  Next they put on candles and we arew ready to party!
We set up trays of goodies next to freshly frosted cakes of their choosing.

A few days ahead I shopped Cracker Barrel, the grocery, Walmart, and the Dollar Store for cake mixes, frosting, disposable pans, gummy worms etc, sprinkles, and lots of "boy" toys they like.
I DO NOT ABIDE POLITICAL CORRECTNESS.   At any rate they loved the spiders, snakes, grasshoppers, commandos armed with guns and the assorted candies. 

Before hand I washed all of the toys in hot sudsy water, rinsed well, and air dried.  So they were clean and free of yuck.  After blowing out the candles I washed again and saved them for the boys to play with later.

Sam likes Strawberry cake and frosting.
Jack ordered chocolate cake and frosting.
Then they sang and blew out candles.
To assemble I frosted the cakes and arranged the "decorations" on a tray next to each readied cake and turned the boys loose.  They had a ball!

7/26/14

Creating a Fancy Cake for a Whimsical Baby Shower

We have pink cheetah bottom vanilla layers,  pink zebra chocolate layers, and a whimsical pink giraffe sitting atop!
Our oldest granddaughter loves to bake and decorate cakes and cookies, cupcakes too.  This afternoon she has delivered a special shower cake she made for one of her friends with a little help from her Grandma!  Her friend is expecting twin girls and is all aglow about pink!  She when asked had a vision for pink cheetah, pink zebra, and a pink giraffe!

I love this little guy.  We used raw pieces of spaghetti to support his neck on the inside.
We started this project Thursday evening by baking layer cakes and cupcakes which I wrapped and froze.  Next we made two batches of marshmallow fondant.  This is not new for me and here are the links to my previously posted recipes and directions.     thehiddenpantry.blogspot.com/2012/07/making-marshmallow-fondant-part-1.html       and     thehiddenpantry.blogspot.com/2012/07/baking-birthday-cakes-marshmallow.html     and also    thehiddenpantry.blogspot.com/2012/07/marshmallow-fondant-final-episode-two.html

It is always advisable to make the fondant ahead and refrigerate at least overnight and longer is fine.  It can also be frozen and thawed when needed. One more thing lest I forget....it tastes a whole lot better than the fondant you buy!  The cake layers are much easier to trim to size while frozen and the frosting goes the frozen layers so much more easily.

Friday evening we frosted, decorated, and put all of the finishing touches on the cake and cupcakes and were ready for bed at 11PM when we were finally done.  This morning both granddaughters arrived to make the delivery.  Poor Katie sat with "big eyes" and the giant cake on her lap as Emily backed her car out of our driveway.   Such wonderful girls.  I am so proud!

Happily Emily sent me this picture from the shower!
I missed my chance to get a picture of the cupcakes.  She found black and white zebra cupcake papers at Wal-Mart which were perfect.  We baked two dozen chocolate cupcakes and piped on white butter cream.  We melted white chocolate over a pan of simmering water and colored it pink.  Next Emily piped pink hearts onto parchment paper and we placed them in the freezer to harden.  After sprinkling the frosted cupcakes with a bit of fairy dust (sanding sugar) each one was topped with  pink twin hearts.  I am sure they were beautiful arranged around the towering cake!

Cute cake even sitting on my cluttered dinning room table.
We had a lot of fun making this and I am so happy to help and encourage her. 

4/24/14

"MINECRAFT" Devils Food Birthdsay Cake with White Chocolate Butter Cream Frosting a Tutorial with Pictures.

Happy Seventh Birthday Nate!


Who knew what "MINECRAFT" is?  Not I!  Well that is until a good friend text-ed me and asked if I could make a birthday cake for this Thursday for a little boy turning 7 years old.  After meeting with his Mother I have agreed to take this project on.  I plan to make two recipes of my Devil's food cake and bake each in a 9"x 13" pan with a creamy white filling between the two layers to form a two layer 9"x 13" cake.  Next I plan a butter cream tinted light green with the Minecraft logo in black atop the cake and a birthday greeting piped below.


And lets get started!

Ingredients for Devil's Food Cake:  This is the link to my recipe which I would normally bake in three layers.     thehiddenpantry.blogspot.com/2010/08/brians-red-devilsfood-birthday-cake.html

Sit the dish on top of the parchment and trace the bottom.

But, today I buttered a 9" x 13" baking dish and cut a piece of parchment paper to fit the bottom.  I pressed the parchment on top of the butter then proceeded to butter the parchment and well up all sides.  Lastly I dusted with flour and set the dish aside.  Preheat the oven to 350 degrees F.  (NOTE:  I save all of the butter wrappers as I unwrap sticks and place them in my freezer.  Then when I need to butter a dish or pan it is ready and I have no muss and no fuss.)

Use a sieve as a sifter.

Some of the habits I have developed in baking this cake and others are to let the eggs, butter, and buttermilk all come to room temperature before mixing.  I also like to place all of the ingredients that require sifting into a large sieve over a bowl and shake them through.

This is layer one turned onto a large glass tray.

After letting the cake cool for 10 minutes I turned it out onto a large serving platter.  Now I am ready to bake the second recipe for the second layer!

But first I will start the base for the whipped cream like filling by combining 1/4 C. flour and 1 C. milk in a heavy bottomed but small saucepan.  Bring to a biol while whisking constantly.  Continue whisking vigorously while boiling for about 4 minutes until a thick smooth paste forms.  Scrape the paste like mixture into a small clean bowl and fit a piece of plastic wrap down over the entire surface and refrigerate until very cold.

While it cools make a second devils food layer exactly the same way and the same size as the first.  After cooling the baked layer for 10 minutes invert it onto a cookie sheet lined with a piece of parchment paper.  Cool completely.

Creme filling for between the layers.

When everything is cold proceed with the filling.  Combine in the large bowl of a stand mixer 1 stick of margarine, i/2 C. Crisco, 1 C. powdered sugar, and 1 t. real vanilla and beat at the highest speed about 6 minutes scraping the sides of the bowl once or twice.  After it has turned very white and fluffy add the cold flour and milk paste and beat with the whisk attachment about 8 minutes scraping the sides of the bowl occasionally.  The filling will be very smooth, light, and fluffy.

This looks just like a giant SUZY-Q.

Spread this over the first layer then top with the cooled second layer.  It will look a lot like a giant Suzy-Q and that is a good thing!

Wrapped to tuck away for the night.

Wrap well to store in the refrigerator.  I use a sheet of parchment to lightly cover the cake's surface then wrap the whole thing securely with wide foil and pop it into the refrigerator while starting the butter cream frosting.

Earlier today I went to Target to look for a Minecraft box with the logo and found an empty box that pictured a just the right size logo to use as a pattern.

Ingredients for White Chocolate Butter Cream Frosting:

8 ounces good quality white chocolate chopped (such as Lindt or Baker's)
1/2 C. whipping cream
2 C. room temperature butter (4 sticks)
1 C. egg whites (about 8)
2 1/4 C. granulated sugar
2 t. pure vanilla extract

White chocolate and heavy cream melted together.

Stir the white chocolate and the cream together in a glass bowl over simmering water until melted and stirred smooth.  Do not let the water touch the bottom of the bowl.  Set aside to cool. 

Using an electric mixer, beat the butter until light and fluffy then set aside.  (Use a hand mixer and medium sized bowl for this as you will need the large stand mixer and bowl for the egg whites.)

Done as is French meringue egg whites and sugar is heated to 160 degrees before whipping.

Combine the egg whites and sugar in a large metal or glass bowl.  Set the bowl over a large pan of simmering water (do not let the bowl touch the water) .  Whisk until the sugar dissolves and a thermometer inserted into the mixture reaches 160 degrees F. (about 3-5 minutes).  Remove the bowl from over the water.  Using the very clean whisk attachment beat the egg whited with a stand mixer about 10 minutes until the meringue is cool, stiff, and shiny.

Beat the butter about 1/4 cup at a time into the meringue.  Blend well after each addition.  If the frosting starts to curdle place the bowl over hot water again and beat again to soften slightly. Repeat this as necessary.  (I have never had to do this.)

Gradually beat in the cooled white chocolate and add the vanilla.  Chill the butter cream about 30 minutes in the refrigerator before frosting the cake to firm a bit.

White chocolate butter cream tinted black.

Before refrigerating I took about a cup of the frosting and placed it in a small bowl.  I added a whole container of black cream food color and whisked it together.

Black frosting rolled between two layers of parchment and frozen.

Next I placed the black frosting onto a piece of parchment and put a second piece on the top and rolled it out about a quarter of an inch thick.  I slid a small cookie sheet under it and placed it in the bottom of my freezer.

Using the pattern to be sure the disk is rolled large enough.

I plan to cut out the little "MINECRAFT" man out from this with a pattern and a sharp knife!  So for now it freezes.  I found an empty box at Target and have laid it across the circle of frosting to be sure I have made it large enough.  I will cut him out of the cardboard and use it to trace into the frozen frosting making a pattern to guide a sharp knife.  I have worried how to make sharp lines and corners.

Frosting the top layer green.

Meanwhile I took about 3 C. of the butter cream and tinted it green with past food color and used it to frost the cake top.

And frosting the sides white.


Next I frosted the sides of this big 9" x13" double layer cake with the plain white chocolate butter cream frosting.

Storing extra frosting for the birthday greeting.


There is about a cup left and I will store it in a plastic bag for now to pipe on, "Happy Birthday Nate" after I affix the the '"MINECRAFT" man, using it like glue to slide it into position.

Cutting out the pattern.


The layer of black tinted butter cream is frozen and I removed it to sit at room temperature for a few minutes in hopes the pieces will not crack or break.  Meanwhile with my sharpest scissors I cut out my pattern.  Next I peeled of the parchment from one side of the frozen disk, loosely replaced it and flipped it over and removed the other side of parchment.  My purpose is to see if one side or the other looks better and so it will not stick so tightly that I will have issues removing it a it softens.


The "MINECRAFT" man is positioned on the cake.

After selecting the best side and positioning it face up without parchment on top, but only beneath, I placed the first piece of the pattern and carefully cut around it with a very thin bladed knife.  Then using a small offset spatula and a very small pancake turner in unison I lifted the first piece into position on the cake.  I repeated this process until all of the pieces of the little man were in place. Whew!  Was this nerve wracking!  And of course I did have a piece break and I did have a speck of the black get on the green!

It was not as difficult as I had supposed to correct by carefully using a clean butter knife and scraping a tiny bit away then smoothing a bit.  I am hopeful that while it is not perfect it will not disappoint!

Meanwhile I removed the white butter cream from the top shelf of my refrigerator to soften so I can finish up with "Happy Birthday Nate" across the cake.

THE REST OF THE STORY:  I am so pleased to tell you that I got a note this morning that the cake was a big hit.  I am always thrilled to hear someone likes what I have made them!


8/3/13

Red Bandanna Cake for Grandpa's Birthday (the easy way).

Red Bandanna Birthday Cake.
Our Granddaughters took over my kitchen yesterday to bake and design their Grandpa's Birthday cake.  I had a lot of shopping and errands to do but stopped home a couple of times to lend a hand should they need me.  Emily is 18 and Katie will be 14 yet this month.  I was very impressed with their creativity and dedication as it took almost all day to complete this project and clean up!  They both had tired hands after completing!

Note:  In the years before I started this blog Grandpa was a "Cowboy Shooter"  and shot in many as well as sponsored many S.A.S. sanctioned  Cowboy Shooting Matches, thus the cowboy motif.

Here is how they did it.

First they buttered and floured a 12" cake pan and 2, 9" cake pans and preheated the oven per the package directions using 2 German Chocolate cake mixes.  Next they prepared the mixes per the directions.  They used 1/2 of the batter in the 12" round pan and baked it per the 9 x13 directions and split the other half between the 9" pans and baked according to the time given on the box.

After cooling for 10 minutes they removed the layers from the pans and completely cooled on racks.

Using 4 cans of canned plain white butter cream frosting and black food color paste they colored 1 1/2  cans black and frosted the 1st layer reserving about 1/2 cup for pipping.  They placed the first 9" layer centered on the 12" layer and frosted then the second both with plain white butter cream. 

The girls had purchased all on their own a couple of cans of red spray frosting color and proceeded to spray the top 2 layers bright red.  blocking the spray from the bottom layer with waxed paper as they went.  AREN'T THEY CLEVER?  I would have never thought about this even having used the spray before to color cookies.

Next Emily pipped on the black and Katie the white in the bandanna pattern!

Needless to say Grandpa was IMPRESSED!  Thanks girls!

7/7/13

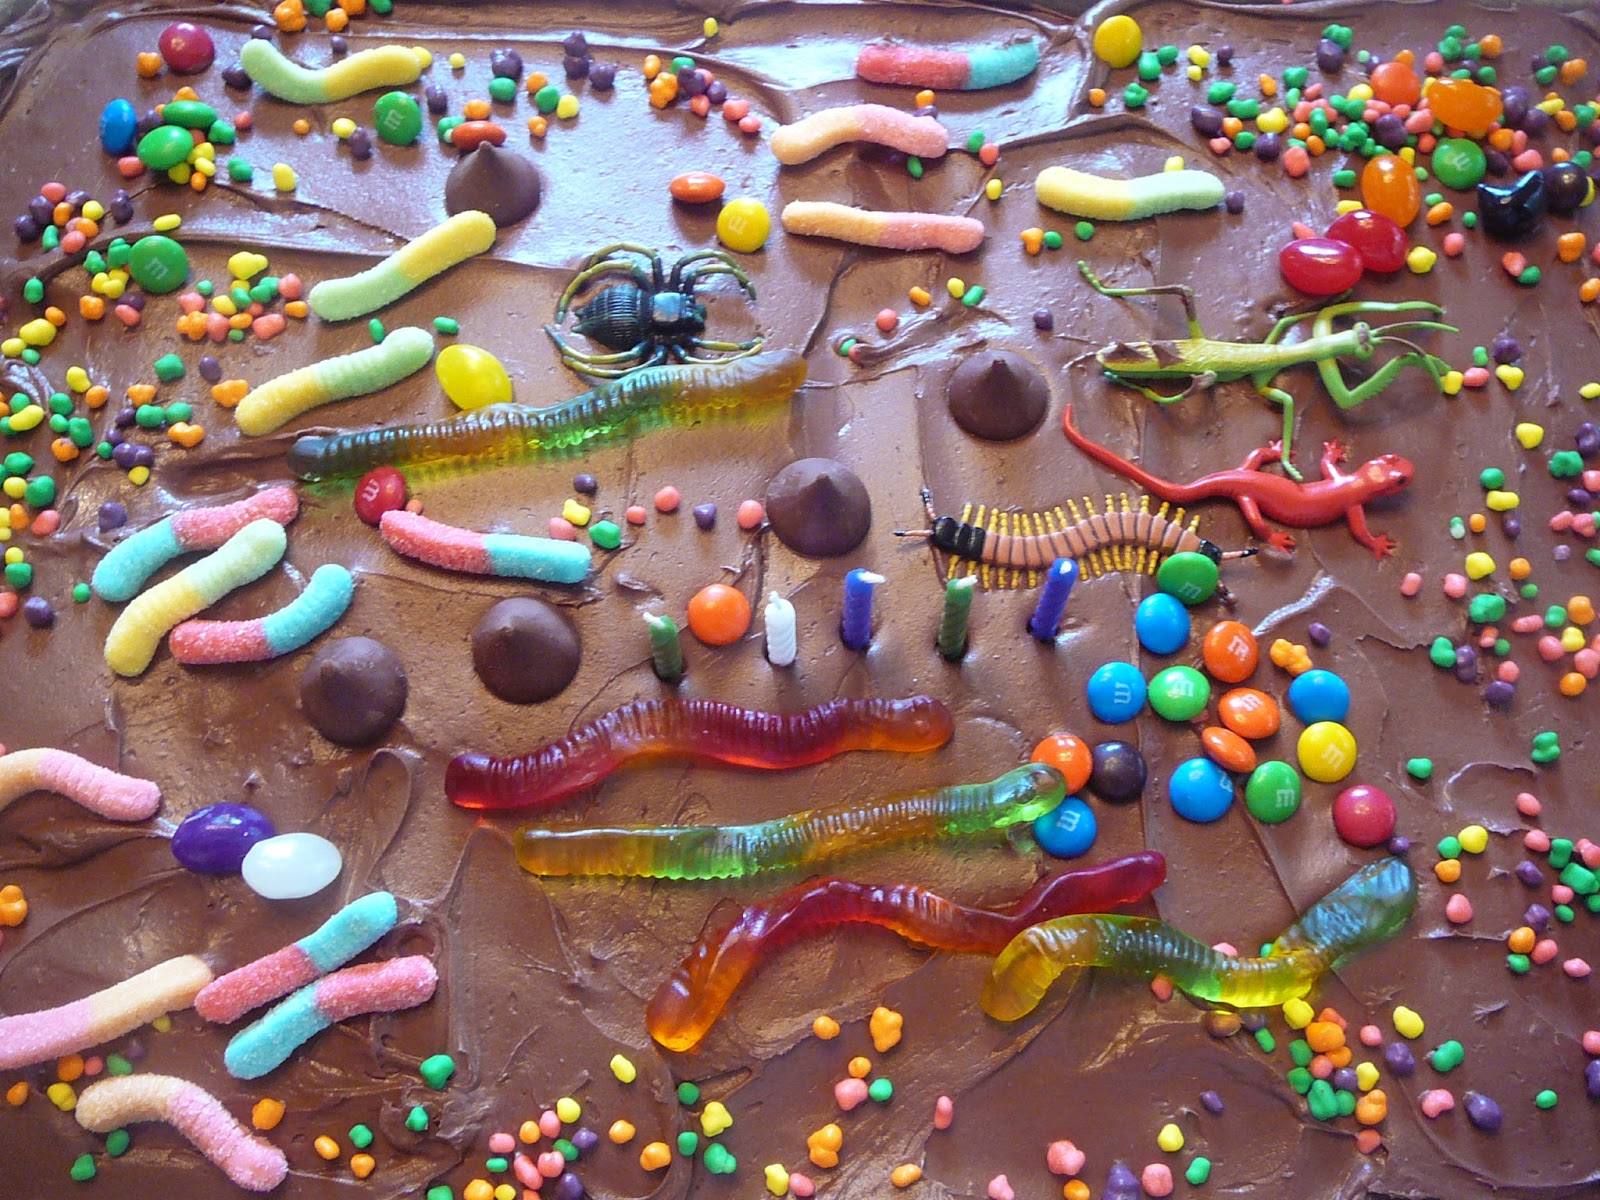
EXTRA EXTRA! 5 Year Old Twin Boys Decorate Their Own Birthday Cakes and Have A Blast! Read All About It!!

Sam's creation had a lot of c-r-e-a-t-u-r-e-s as he called them. 
Jack's Creation had a lot of everything.
Yup, they are big stuff now!  5 years old.  Our twin grandsons decorated their own cakes this year and they had a blast!!  Grandma had quite a good time too I might add.

Ingredients for Birthday Cake Decorating for Twin Boys:

2 boxes cake mix made as package directs and baked in a half sheet or jelly roll pan, reduce baking time about 8 minutes or so.  Test for doneness by baking until inserting a tooth pick in a center it comes out clean.  Bake and cool ahead of time.
4 cans corresponding cake frosting
gummy worms
fruity gummy worms
chocolate kisses
M & M's candies
nerds candies or assorted sprinkles
assorted small rubber or plastic "creatures"
birthday candles
paper towels

Strawberry Cake frosting, candles, nerds in a dish, candy in a tray.
Chocolate Cake, frosting, candles, nerds in a dish, candy in a tray.
Arrange a lot of paper towels across the end of whatever table or counter the children will be decorating at.  This will save tons of clean up mess later! 

Both Boys Had a Tray of Assorted Candies.
Arrange the candies in a dish and the creatures in another next to the cake to be decorated.  Place them so they are easily reached by the children.  An adult can now spread the frosting onto the two sheet cakes.

Assorted creatures as Sam says!
While the frosting is fresh have the children decorate their cakes.  Everything will stay in place very well now.  You do have to be careful about sleeves though!  We were intrigued by how different yet wonderful both boys did their own cakes!  When they have completed the decorating let them pick their candles and arrange them too atop the cakes.  Now slip the paper towels and mess out from beneath the cakes and the mess is over.

NOTE:  The boys wanted to be sure and take their "creatures" home so their cousin Emily washed and dried them as soon as the the candles were blown out and while I was cutting the cakes.  

We did not light the candles and sing until later in the day but the boys kept checking out the great cakes they had done!!  It was indeed fun for all!!

Yield 24 generous portions.  Served with fruit from the shark centerpiece!!  Link for Shark centerpiece    thehiddenpantry.blogspot.com/2013/07/shark-centerpiece-filled-with-fruit.html


6/30/13

Mixed Berry & White Chocolate Butter Cream Cake.....A Knockout Cake Every Time I Make It.......

Serves 22-24 people and is a really big and impressive cake.
For most of my adult life I have worked and many of my recipes were shared with me by wonderful and generous clients and customers who also loved to cook and appreciated good food.  This recipe was shared with me in 2002 by Diana Winiger, one of my customers.  She too had a lot of family "get together's" and made this very large cake for them.  She said at the time it serves 24 but she had not found that to be so as so many people want seconds!  This cake requires 12 inch diameter by at least 2 inch high cake pans.  The layers are both split and three of the four layers are assembled for this recipe. 

This is a 15 egg cake!
The recipe yields an extra cake layer that can be reserved for another time.  Wrap it tightly in foil and freeze for a month or so.  Keeping the cake wrapped defrost it at room temperature.  Then, serve with berries and cream or ice cream.  I have several times cut the remaining layer in half and frosted it as a completed half of a layer cake.  I always make the layers ahead of time and freeze them until the day I need to frost them.  Just double wrap them snugly and freeze flat.

I am making this for my granddaughter's 18th birthday so it needs to be special!

Note:  It is very helpful to have two very large mixing bowls for the cake.  I use 2, 7 quart mixing bowls for this and they are none too large.  Anything smaller than 6 quarts would be a problem.

Ingredients for the Cake:
 
3 3/4 cups cake flour  (14.10 oz. if using a scales)
1 1/2 cups sugar  (10.6 oz.)
3 tablespoons baking powder
1 teaspoon salt
1 1/2 cups lukewarm water
1 1/4 cup vegetable oil
15 large egg yolks
2 1/2 tablespoons vanilla extract
15 large egg whites
2 1/4 cups powdered sugar

Position one rack in the center and one rack in the lowest third of the oven and preheat to 350 degrees F.    Butter and flour 2, 12" diameter cake pans with 2 " high sides.   Do NOT, I repeat NOT use cooking or baking spray on the pans.  Use solid shortening or butter and then dust liberally with flour.

15 egg yolks.
Whisk flour, 1 1/2 c. sugar, baking powder, and salt in very large 6-8 quart bowl blending well.

Thick smooth batter.
Add 1 1/2 c. warm water using an electric mixer, beat until smooth (batter will be thick).   Beat in oil, then egg yolks, and vanilla.

Beating 15 egg whites fills my 7 quart mixing bowl!
Using clean dry beaters and another very large clean bowl beat the eggs whites and powdered sugar until the whites are very thick and billowy and form medium firm peaks when the beaters are lifted.
(Should take about 12 minutes to get to this state, do not under beat.)   Fold the whites into the yolk mixture in 3 additions.  Divide the cake batter evenly between the two prepared baking pans.

This cake fills up my 7 quart bowls.  This is the third addition of whites to the batter.
Place one pan on each rack in the oven, staggering pans so one is not directly above the other.   Bake the cakes 25 minutes and then reverse the positions of the pans.   Bake the cakes until tester inserted into the center comes out clean, about an additional 10-12 minutes.   Remove from the oven and cool the cakes for 10 minutes.  Line 2 cooling racks with clean tea towels.   Cut around the outside of the cakes to loosen:  turn the layers onto the towels.   Cool completely.  The instructions indicate this can be made a day ahead and wrapped in foil and kept at room temperature.  

Fills my cake pans to the top.

Note:  I think frosting the layers while the cake is frozen is much easier.  Also if traveling with the cake the cold layers seem to keep everything together nicely.

Also I find it is easier to split the layers of a frozen cake.  To assemble the cake split the layers.  You will only use 3 for this recipe and you may freeze the third.  I usually cut the extra layer in half and frost it as a two layer cake.

Ingredients for White Chocolate Butter Cream Frosting:

8 ounces good quality white chocolate such as Lindt or Baker's chopped
1/2 cup heavy whipping cream
2 cups  (4 sticks) unsalted butter at room temperature
1 cup egg whites ( about 8)
2 1/4 cup sugar (15.93 ounces)
2 1/2 teaspoons fresh grated orange peel
2 teaspoons vanilla extract

Stir white chocolate and cream in heavy small saucepan over low heat until melted and smooth.    Cool to room temperature.   Using electric mixer, beat butter in medium bowl until fluffy; set aside.

Combine whites and sugar in large metal bowl.  Set bowl over a large saucepan of simmering water (Do NOT let the bottom of the bowl touch the water).   Whisk until sugar dissolves and thermometer inserted into whites registers 160 degrees F,  about 3 minutes.  Remove the bowl from over the water.   Using clean dry beaters, beat meringue until cool, stiff, and shiny, about 10 minutes.   Beat butter, about 1/4 cup at a time, into meringue.    Blend well after each addition.   If frosting looks curdled, place bowl over very low heat for 3-5 seconds to soften slightly.  Remove from heat and beat until smooth.  Repeat warming technique as necessary.  Gradually beat in the cooled white chocolate mixture, then orange peel, and vanilla extract.   Chill butter cream until beginning to firm about 30 minutes.

NOTE;  Today when I made the frosting it was hot and humid and I thought the frosting was ruined because it all sort of deflated after I had it all together.  This did not happen before when I had made it.  I refrigerated the whole bowl of frosting and the beaters for a full 30 minutes and re-whipped it.  It came back and was just fine!!  Whew!

Ingredients and Assembly:

1 cup seedless raspberry jam
6 cups (about) assorted fresh berries.  (raspberries, blueberries, blackberries, halved if large and sliced if large strawberries)
3, 12" cake layers (after splitting there are 4)

Place 1 layer on a large cake plate or cardboard round.  Spread with 1/2 cup jam, then with 1 1/4 cup butter cream.   Arrange half of the berries atop the butter cream, spacing about 1/2" apart.   Press second cake layer atop the berries.   Repeat the process of the jam, butter cream, and berries.   Top with the third cake layer.

Spread 2 cups of the butter cream atop and on the sides of the cake in a thin layer to anchor the crumbs and smooth the surface.   Refrigerate the cake on it's base until the crumb coat is firm, about 10 minutes.  Spread 2 1/4 cups butter cream over the top and sides of the cake until smooth.    Spoon remaining butter cream into pastry bag fitted with a medium star tip.    Pipe border around the top edge of the cake.    (Can be prepared 2 days ahead, cover and refrigerate.)

The red current jelly causes the berries to glisten like jewels!
Final Decoration:

4 cups assorted fresh berries
1/2 cup currant jelly

Place the cake on base or platter.  Fill the top center of the cake with berries.  Melt the jelly in a heavy small saucepan over low heat, stirring constantly.   Using a pastry brush, brush warm jelly over the tops of the berries.  Let cake stand at room temperature at least 1 hour and up to 3 hours.   Using a long knife, cut the cake into quarters.  Cut each quarter into 6 wedges.

The cake is pretty spectacular after you get into it too!
Note:  I have used frozen berries on the inside layers in the past and put fresh on the top.  It works both ways.  This is a delicious and beautiful cake!  It will knock your socks off!!

It was perfection!!  HAPPY BIRTHDAY EMILY.


4/8/13

Niece LEXI, 13 years old, bakes and decorates beautiful cupcakes!

I love the variety of the decorations and the creativity she shows.  The 85 is in honor of my Mother's birthday.
Our niece Lexi, My sister Linda's oldest daughter's oldest girl......what a mouthful that was......baked up and decorated these beautiful cupcakes this weekend.  I just could not resist sharing this photo!

The cupcakes were served at the waiting room of the hospital where my sister Sheree's youngest son Jacob is receiving treatment.  Jacob had been admitted because of a recent seizure that resulted from an automobile accident a little over a year ago but he is making progress everyday.  We pray without ceasing for Jacob and his family and trusting in our Lord for his restoration.


Mark 11:24 Therefore I tell you, whatever you ask for in prayer, believe that you have received it and it will be yours.

We believe for Jacob.

3/11/13

Birthday Cake

I am certainly impressed when my granddaughters make such a pretty cake!
Thought I would share these birthday photos this morning.  Emmy and Katie, my granddaughters are quite the bakers.  No doubt you will agree when I tell you they are 13  and 17 years old!!  They made me this lovely and delicious birthday cake and we celebrated with a pizza party, cake, ice cream, and fresh berries on Saturday.  She uses the marshmallow fondant which I find much tastier than what you buy.  Here are the links if you would like to make some too. thehiddenpantry.blogspot.com/2012/07/making-marshmallow-fondant-part-1.html  and   thehiddenpantry.blogspot.com/2012/07/baking-birthday-cakes-marshmallow.html  and also  thehiddenpantry.blogspot.com/2012/07/marshmallow-fondant-final-episode-two.html

The "little boys" four year old twins Jack and Sam made things for Grandma too!  Jack a lovely plate and Sam a little dinosaur, his favorite thing in this world. They now occupy places of honor in the living room.

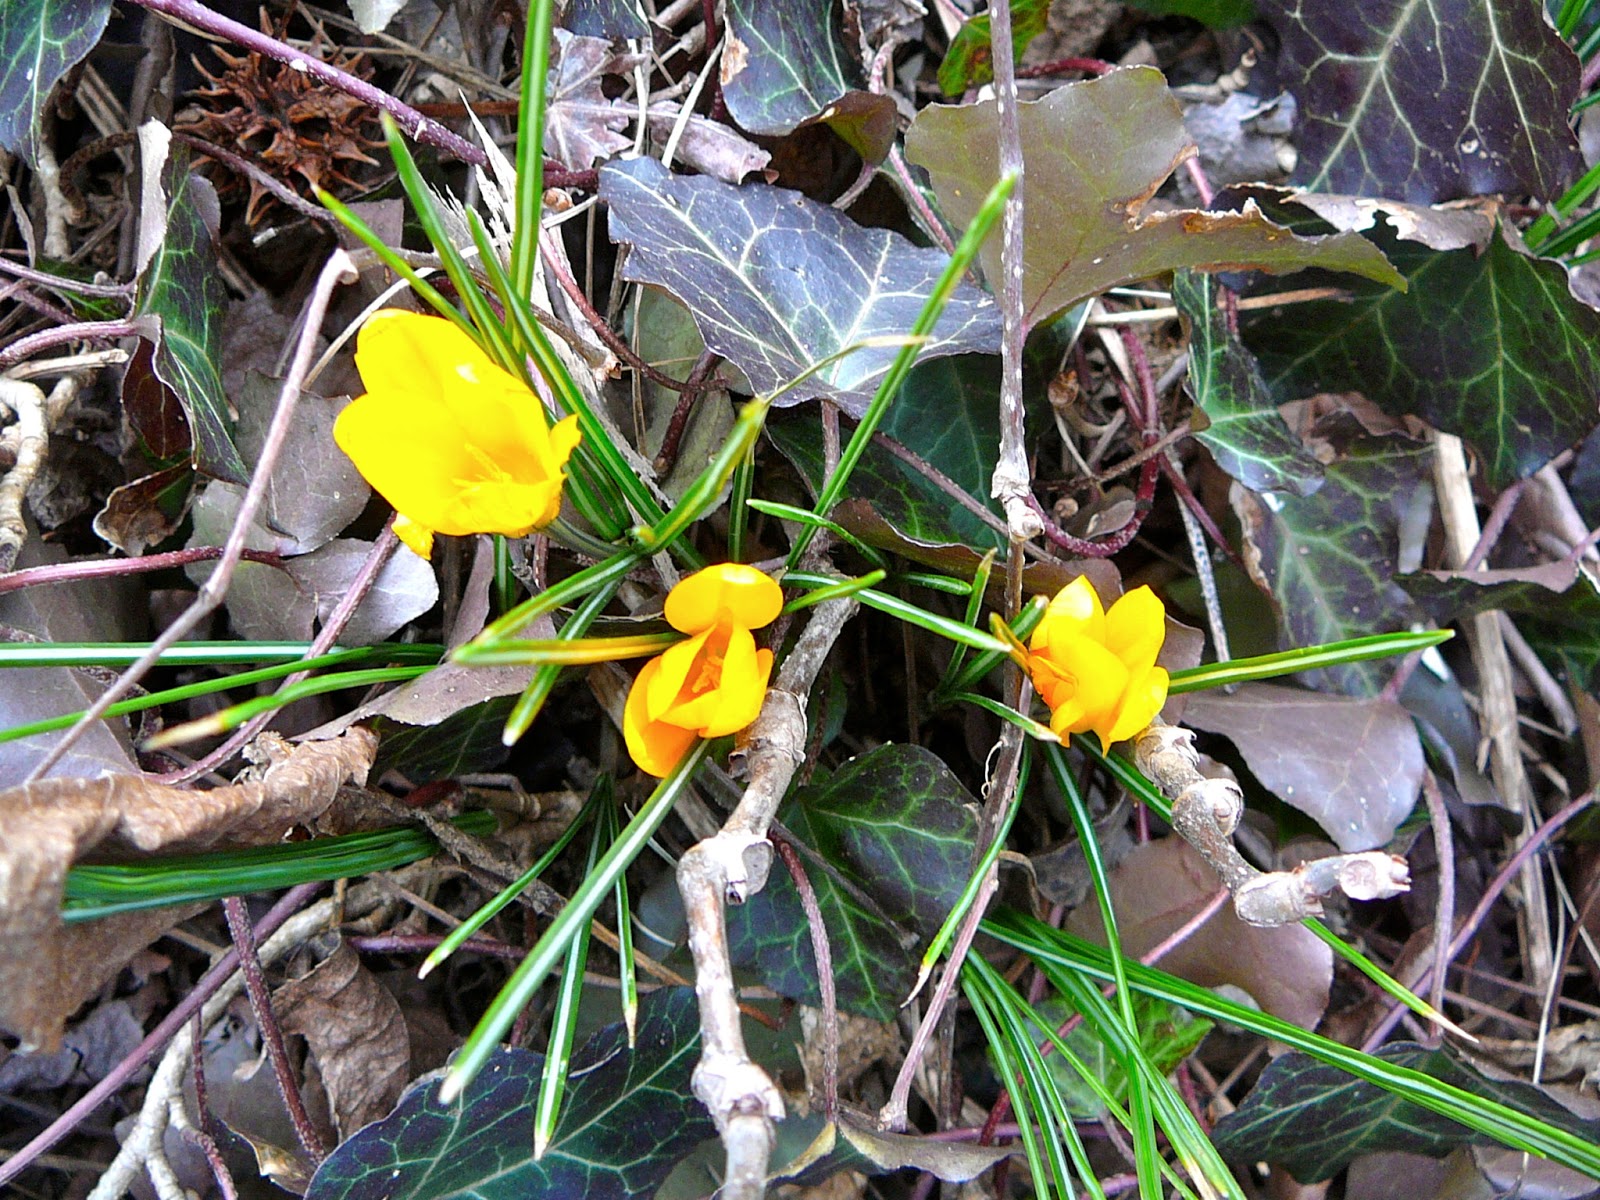
To top this off the first crocus blooms opened in the front yard along the walk!  What a lovely day!
Thank you everyone.