Translate

1/31/12

Scalloped Potatoes & Ham, Crockpot Easy with only 4 Ingredients

Ham and Scalloped Potatoes made in the Slow Cooker.
This recipe was inspired by something I saw in a Church cookbook called "Pitch-in from the Pews" from my home Church, Christ Lutheran of Noblesville, Indiana.  Carolyn Drahn contributes a recipe that I have adapted here.

What attracts me to this is again my best friend who requested easy recipes with just a few on hand ingredients.  True confession, I had never made scalloped potatoes from a box but my late Mother-in -law did and they were good.  So there was nothing to discourage me from moving forward!!

For ease of cleaning I sprayed the inside of my slow cooker with cooking spray at the start.

Basic Ingredients:
1 box of scalloped potatoes
1 box of Au gratin potatoes
1-2 C. diced ham (or you could use smoked sausage or hot dogs)
1/2 t. black pepper
--------------------------------------
Optional Add On Ingredients:
1/2-3/4 C. sour cream, Optional
1 T. snipped fresh chives or parsley, Optional (use 1/2 stated amount if using dried herbs)

 
Combine the 2 boxes of potatoes and mix them together following the package directions in the slow cooker.  I used both boxes the same brand and size for the sake of ease.  The directions were identical
so I just doubled the water, milk, and butter.  I used Hungry Jack because they were on sale the day this was on my shopping list. Cover and heat on high for about 20-30 minutes.  Just to get it going.  Add the meat and reduce theheat to low and cook 4-6 hours.   About 30 minutes before serving time I  tasted to correct the seasoning then stirred in about 3/4 C. sour cream and a tablespoon of snipped fresh parsley to up the ante a bit!!  The yield was eight or ten very generous servings and then some.

My plan was to use this as our main course and add Cole slaw and a fruit crumble for dessert.  It was just great and I will make it again.

If I still worked outside my home this would be terrific to throw together before heading out in the morning,  I think it might be ideal for a family get together and pitch ins too.  Our crowd is always big on potatoes.  I will probably reinvent this for breakfast heated up with a couple of fried eggs on top.....maybe salsa on the side????Any way I look at this I get a lot of mileage out of it!!

1/30/12

Old Fashioned Salmon Patties, Big on Omega's and Small $

There are some things that are just plain good and I could make them every week and I doubt anyone would complain around here anyway.  Silly me, I thought everyone made them and there was no reason to share this one.  That is until last week when I spoke with my best friend in the whole wide world  Diane.  I asked her what she would like to see in a blog like mine.  She answered recipes that took just a few ingredients that she would probably have on hand.

This is just such a recipe.  Let me add that I am currently using Safflower Oil and would fry the patties in this.  But you can do whatever you like.  Good old Dr. Oz had somebody on one day as I turned off the vacuum,  and what I got out of it is that they had used Safflower oil exclusively for 2 or 3 months and had changed NOTHING else in their life and lost 2" from around the waist.  Well heck I have to try it too!!  There was a big explanation for all of it but the sweeper was running and I didn't get it all.  If you are interested I would check his website and see if it is explained further.....

Ingredients:

1 can of salmon  red or pink (14.75 oz.)
1 egg
2 T. finely diced onion
1/4 to 1/3 sleeve of saltine crackers crushed
pinch of black pepper
2-4 T. oil for pan frying

Drain the salmon and empty the can into a medium sized bowl.  Using a fork mash the fish until it is well flaked and looks more like tuna.  Add the rest of the ingredients.  Mix well using your fork, let this mixture sit for 10 or 15 minutes for the crackers to moisten and the juice to be well adsorbed before making into patties.   Then form into about 6 patties and fry in the hot oil.  We like them well browned and crusty but this is purely a matter of personal preference.   The onions brown first so don't be alarmed if they darken.  My Mother does not even use onion, again it is a matter of what you  and your family like.

Many people make a cheese sauce for this but we never have.  We love them with plain old ketchup which makes this a "pretty down home" kind of dish!!  They are good cold to and make a great sandwich the next day with sweet pickles.

Note: See "How to cut an onions without tears."


To round out meal we had oven roasted potatoes, buttered Lima beans, and a fresh fruit salad of pineapple, oranges, bananas, and pink grapefruit.


1/29/12

Thank You, Today Was My 400th Post.

I have been watching the numbers click by and earlier today was my 400th post.  It is very exciting for me to have gotten this far on what started with my Granddaughter Emily calling and asking if she could come and make dinner with me and she wanted to cook something Julia Child made as she was reading "Julie and Julia". 

Then we came down to the computer and she showed me how to start this blog.  That is why the first post has no picture.  It was unintended.  But since my daughters-in-laws wanted the recipes this seemed a perfect vehicle.  And then came all of you!!  My friends!!  I so look forward to and enjoy hearing from you.  I am as excited as I can be each time a new person joins as a follower!!  I especially want to thank each and every one of you. 

So I decided I would stop what I was doing upstairs ( hubby's taxes) and come down and say thank you!

I am having a lot of fun with this and I hope you are too!!

MY VERY BEST TO ALL of YOU who join me and follow The Hidden Pantry.  Now let's see what tomorrow brings.

Candied Orange Peel

Candied Orange Peel
First thing I need to say that I have "been off my feed" for a few days.  I had a knee injury and had been favoring the other leg and in all my wisdom decided I was making matters worse by doing that so I forced weight on the leg and got EVERYTHING screaming with pain.  Makes me a grouch when I do stupid things.  So anyway I have been taking it easy and the things I have cooked didn't turn out badly but they were not really all that good either....No sense posting things I don't really like,  so I don't.

I LOVE candied orange peel.  Love it just as it is or dunked in chocolate, both milk or even better dark!!  I had never made it, so I did.  It is yummy if you like this kind of thing.  The peel becomes sweet, tart, a bit chewy, just really good.  I have not made up chocolate to dip any yet.  I am enjoying them so much just as they are.  I can promise that come Christmas if not before more dried citrus and the chocolate will flow!!  The French call them Orangettes when they coat one half of the strip of the candied peel with chocolate or serve them with chocolate bark.  An additional plus is that after the treats are finished I have a pint of both orange sugar and orange syrup packed to use in other recipes or maybe to sweeten my tea with??

I first saw a recipe for making candied lemon peel on Martha Stewart one day,  then I saw a post at chefjoshuaalan.com that was beautifully done.   Here is my version:

Candied Orange Peels:

6 navel oranges
4 1/2 C. water,  plus water for boiling
1 1/2 C. sugar, plus sugar for coating
optional,  dark chocolate

Wash wash and thoroughly dry 6 navel oranges.  Peel the oranges by scoring the skins about 1/4" deep with a sharp knife.  First start at the stem and cut all the way around and through the navel and back to the stem end.  Start again 1/3 of the way around repeating as before.  Then once more.  See the picture and it will be clearer to you.  Place you thumb under the peel at the top and gently work your way down to the bottom.  You should end up with 6 sections.

Next slice each section into thirds (about 1/4" thick) and place them in a medium pan with enough water to cover.  Bring the water to a boil.  Immediately drain the pot and repeat 2 more times.  Please just bring to a boil and drain, the object is not to cook them,  just bring to a boil.  Drain after the third time and set aside.

Over medium heat bring the sugar and water to a boil to form a syrup stirring to dissolve the sugar.  Bring to a simmer and reduce the heat.  Add the peels and cook for 45 minutes at a gentle simmer.  Drain the peels well and toss in to sugar and shaking to coat.  Dry on a wire rack.  This time to dry may vary.  Some give a few hours but that would vary depending on time of year and humidity.  I let mine dry overnight and they are fine.  Upon thinking about this it would also vary depending on how thick skinned the oranges were.  Mine were quite thin.

After they have dried you can enjoy them as they are or dip in melted chocolate, or strew across chocolate bark.  I have packed mine in clean jars and will probably have all sorts of wonderful ideas of how to enjoy them.


1/24/12

Preserving Meyer Lemons

Last week at the grocery I picked up 2 bags of Meyer lemons intending to preserve  them as they are not always available and they add a terrific flavor punch when added to many (or maybe even any) hot or cold dish!!  They really pack a giant flavor boost to salad dressings and marinades.  I sometimes toss them in as is or chop them, either way they are a wonderful secret ingredient to spike up the pow factor in your dishes.  They need to sit for 4-5 days in the refrigerator and be turned each day or you can just give them a bit of a shake to stir things up a little. They will keep in the refrigerator a good year but I cannot imagine they would be around that long.

I am going to visit a friend this week and she too is a "foodie" but she is also I think a vegan and perhaps eats mostly uncooked food.  When thinking of what I could take her a jar of these sounded like a great fit.

This made 2 nice pint jars and I think If I cut a swatch of fabric and place it under the band with a ribbon it will be lovely.

Ingredients:

2 pounds of Meyer Lemons (about 14-15)
7-8 T. natural flaked salt ( I used Murray River Pink)
1 t. crushed dried red pepper flakes (optional, you could add crushed black peppercorns or garlic cloves, whatever your taste )
3-5 sprigs fresh rosemary or other herb as desired
1  1/4 C. fresh squeezed Meyer Lemon Juice


Run the containers you choose through the dishwasher on the sterile setting to clean them.

Bring a large sauce pan of water to boil and salt it as you would a pan of pasta or potatoes.

While it is heating squeeze 1 C. of lemon juice, about 7 lemons.  Set 2 lemons aside to squeeze later if you need additional juice.

When the water comes to a boil add 5 or 6 lemons and boil for 5 minutes.  Drain and run under cold water to cool.  Meanwhile assemble the rosemary, salt, crushed red pepper in a medium sized bowl.  Cut the lemons in wedges and add to the salt and herb mixture stirring well to combine.

Pack the lemons and salt mixture into the jars.  I used a small pickle fork to get them pushed to the bottom of the jars.  Empty any excess salt and spice mixture over the top of the lemons and pour the reserved lemon juice to cover well.  NOTE: Juice the 2 reserved lemons if needed.  Push the wedges of fruit down into the juice and force out any pockets of air.  Seal the jars and refrigerate.

Yield 2 pints.

I do want to add that Strokine from Cooking Melangery  posted a piece on preserving lemons on 1/23/12 if you don't have Meyer Lemons and would like to look further on the subject, her method is a lot like mine.  Great minds!!!

1/20/12

Honey Biscotti

My excursion to the Library led to finding a terrific book all about honey.  I had told my oldest son there were healing properties in honey and he was less than sure that I knew what I was talking about.  This book tells all of the wonderful and beneficial things that is in honey and it does have healing properties.

I love to cook with honey, and am always on the lookout for those recipes that use it in some way.  This Biscotti recipe has tons of the things I love in it and cannot help but be good.  That was my thinking before baking them up.  Now, after tasting them I would have to say they are absolutly delicious.

The book is titled, The Healing Powers of Honey by Cal Oray and he gives a good number of recipes.  I of course did a little amending here and there but then again, don't we all??

Here is my version:

1/4 C. sugar
1 3/4 C. flour
1 t. baking powder
1/2 t. kosher salt
1 t. Vietnamese  Cinnamon
1/4 t. ground cloves
1/2 t. grated fresh nutmeg
3 egg whites
2 1/2 T. Safflower oil
1/2 C. honey
1/4 t. almond extract
3/4-1 C. Chopped nut meats (I used equal parts almonds, walnuts, and pecans)
1/4 C. chopped maraschino cherries
Zest of 1 whole orange
1 T. cherry syrup if needed (I did not use.)
2 Oz. melted semi-sweet chocolate (melt in a glass bowl over simmering water.)

Preheat the oven to 350 degrees F.  Cover a half sheet pan with aluminum foil and coat with cooking spray.  Set aside.

Measure the dry ingredients and spices into a large mixing bowl and whisk them together.  Make a well in the center and set aside.   Using another bowl mix the eggs, oil,honey, and almond stirring well.

Pour the egg mixture into the well and stir, add the orange zest, nuts, cherries, and syrup if needed.  The dough will be a bit sticky.  Turn it out on a well floured surface and knead a few turns adding additional flour to reach a workable dough.  Divide into three equal portions and form each into a 2 x 12" log.  Place the logs on the baking sheet leaving 4" between each log.  Bake in the preheated oven 20 minutes until firm to the touch.


Remove from the oven and cool 15 minutes.  Cut diagonally with a serrated knife into 1/2" thick slices.  Place cut side down back on the baking sheet and return to the oven for 9-10 Minutes.


Cool completely and drizzle or dip ends in melted chocolate.  Cool again then store in an airtight container.  Yield 30-35 pieces.

1/19/12

Chocolate Scratch Cake for ONE in a Mug. (YOU ASKED FOR IT.)

Microwaved Chocolate Chocolate Chip Cake form Scratch for One.
Recently a post from 11/30/11(Aunt Betty's 1-2-3 Cake) has attracted WAY WAY more attention than I would ever have dreamed!!!  Almost all of the comments have been extremely positive but there have been requests for a moister, richer more fudge like cake in a mug.

Moist, dense, and chocolate with chocolate chips!!!
Here it is!!  I expect almost everyone will have the ingredients on hand and it takes just a minute to stir up, and, 3 minutes in the microwave.  To the lady who loves to bake and her oven is on the blink.....this is for you too!!
First off please be sure to bake this in a large microwave safe coffee mug with a capacity of at least 1 1/2 cups.  Or, a 1 pint canning jar (you knew I would say this, didn't you) would work beautifully!!  Cake in a jelly jar....I love it.

Spray whatever vessel you choose generously with cooking spray and set aside.

Ingredients for Chocolate Chocolate Chip Cake in a Mug:

1/4 C. flour ( 4 T.)
1/4 C. sugar (4 T.)
2 T. unsweetened cocoa
1 large egg white  ( If you are using small or medium eggs use a whole egg.)
3 T. milk
3 T. oil
3 T. semi-sweet chocolate chips
a few droplets of vanilla

Ready for the microwave.
Stir everything together well in the mug and microwave on high for 3 minutes in a 1000w oven or 4 minutes for a 700w microwave.

It's CAKE!!
Let this cool a few minutes before digging in and you might like to top with ice cream,  whipped topping,  or fruit for an "over the top" luscious dessert.

1/18/12

Hand Held Pies, Jar Pies, and Pot Pie with Savory Cheese Pastry and Taco Cheese Filling.

This is something I have been thinking about and turning over in my mind weeks before I made the taco soup (last week, 1/11/12, Spicy Taco Soup in Cumin Spiked Bread Bowls).  I froze about 3 pints that were left and I had planned to make up a pastry and add spices and cheese to form a savory cheesy pastry for  either chili cheese pies or taco pies.  My thinking was to make them up three ways.  As hand held pies, as pies in jelly jars, and as a pot pie using the regular foil pans traditional for pot pies you buy at the store.

Today it all came together and I had the one pictured for lunch.  It was REALLY GOOD!!  I am so glad I made these.  I only baked the one.  Everything else I wrapped in foil and put away in the upright freezer for another time.  These will be terrific for lunches, dinner and all I will need to do is turn on the oven and pop them in.  Set a salad along side and you have a meal.  My inspiration for the pastry was a Lucinda Scala Quinn episode on Mad Hungry I happened to see.  She was making up hand held chicken pies.

This recipe would also make 4, 9"  crusts, either single or 2 doubles.  This made me 7 hand held pies, 4 half pint jar pies and 1 regular pot pie in a foil pan.

Here is how I made the pastry:

16 T. room temperature butter
8 Oz. room temperature cream cheese
1/2 C. heavy cream
3 1/4  C. all purpose flour, plus more for the board when rolling
1 T. kosher salt
1/2 C. Vermont Cheddar Cheese Powder* or Parmesan cheese
1 t. Paprika
1/8-1/4 t. cayenne pepper

* I order this and keep it on hand from the King Arthur Flour catalog.

Add the cold cream, butter, and cream cheese to a large mixer bowl.  Blend until fluffy.  Using another bowl mix the flour, salt, seasonings, and cheese powder until well combined with a whisk.  Add the dry ingredients to the cheese and butter mixture and blend on the lowest mixer speed until it comes together as a dough.  Flour hands and work surface and form into 4 disks.  Wrap them in plastic wrap and refrigerate for at least 30 minutes.

Roll and cut into appropriately sized circles.
Add filling to half of the circle.
Fold the dough in half and press the edge together crimping with a fork.
For pies in jars drape the circle of dough over a small juice glass and form.
Turn the half pint jelly jar upside down over the pastry and form.
Spoon in the filling and cheese.
The assortment of pies is ready to freeze or bake!!
To form pies roll the dough and cut into circles.  I used a 5" plate as a pattern.  Place 1/4 C. or whatever portion is appropriate to the size circle you have made and the thickness of your filling on half of the dough.  Sprinkle with cheese and fold the other half over and press the edges together.  Pierce the top with a fork to make a vent for the steam to escape.

If you are using jelly jars, fit them with the crust and fill appropriately.   Top with cheese and a disk of pastry.  Crimp the edges and pierce the top for the steam to escape.  Follow the same procedure for pot pie tins.

Wrap well and freeze.  When i baked the hand pie I preheated to oven to 400 degrees F. and baked for 15-20 minutes, peeking as not to burn.

I generally bake homemade frozen pot pies for an hour at 400 degrees.  These are smaller so I would go with 375 for 30-40 minutes then check for doneness.  If not done I would check at 5-7 minute intervals.

1/17/12

Bean Salad in a Mason Jar!!

It has occurred to me that I have tons of jars just waiting for me to put them to use.  Canning is something our family has always done and I still do but way less than when I had a family at home and a larger garden.

Do you have a drawer or a cabinet full of plastic stuff you use for storage and packing meals??  I sure do.

We both love salads and it seems like a good idea to me to make them up in one pint jars for lunch size servings.  So over the weekend I packed one of Brian's favorites, kidney bean salad.  This has really worked well.  The dressing is mixed up and put into the jar first at the bottom.  If I had packed a lettuce salad it would have kept the greens from wilting by layering in this fashion!  Next I placed the sliced celery in a layer then the diced sweet pickle.  These sturdy vegetables rise above the dressing and are substantial enough not to fade or wilt.  The nest layer was drained and washed kidney beans topped off with a diced hard cooked egg and a sprinkle of salt and black pepper.

Here is the ingredient list for each of 2 one pint jars:

2 T. mayonnaise
2 t. sweet pickle juice

Stir the dressing ingredients together and spoon into one of the jars, repeat for the second jar.

1/4 C. sliced celery
1/4 C. diced sweet pickle
1 C. rinsed and drained kidney brans
1 diced hard cooked egg
sprinkling of salt and pepper

Add the vegetables, beans, egg, and seasoning in the order given.  Seal the jar with a flat canning lid and band and refrigerate until ready to pack your lunch or eat!!  To serve, turn out into a dish ans stir or stir in the jar and enjoy.  Yield 2 one pint salads.

Julia Child's Rustic Potato Loaves (Yeast Bread)

One day last week before it turned cold and snowed I slipped over to out town's library and checked out a few books.  One was Baking with Julia by Dorie Greenspan.  I certainly marbled at what I don't know about bread baking!!!

There are such interesting recipes,  I am anxious to try them all!!! On a scale this was probably the easiest.  I have made hundreds if not thousands of potato rolls and maybe, just maybe a loaf of potato bread but not that neared the description of this one.

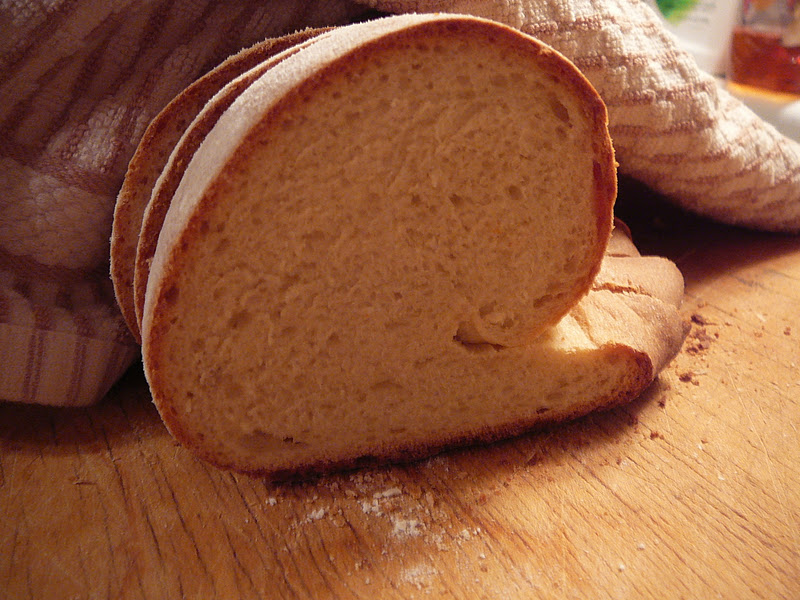
The crust is deep and dark, crisp,  and the ratio of potato to flour is about 50%.  The crumb is fine and tender and the rise is extremely quick yielding 2 rustic loaves.

I did modify (wouldn't you know!) the recipe by using cooked potatoes I had on hand from the evening before.  I can't help it.  I have that German frugal,  or maybe it is the staunch Missouri Synod Lutheran, well anyway.......waste not want not......I put about a good quart of cold boiled potatoes through my food mill to rice them and measured out 3 cups after letting them come to room temperature.

Since I didn't have the potato water called for I used 1/2 cup of very warm water and dissolved about 1/2 t. of the riced potatoes in the warm water to equal what she calls for in the recipe.

The end result was 2 deep dark crisp and delicious loaves of the bread.  We enjoyed a loaf with dinner and shared a loaf when my granddaughter came by to grab an onion for her Dad who was cooking their dinner last night.

Her is Julia's recipe:

1 1/2 pounds russet potatoes (about 3)
4 t. salt
1/2 C. tepid reserved potato water (80-90 degrees F)
1 T. active dry yeast
2 T. extra-virgin olive oil
4 3/4 C. unbleached all purpose flour

Wash, peel, and quarter the potatoes adding them to a lidded 2 quart pot,  covering with water, and adding 2 t. salt.  Boil until easily pierced with a fork.  Draw off 1/2 C. of the potato water before draining the potatoes and set it aside.  After draining the potatoes spread them out over a flat surface to cool and air dry for 20-30 minutes.


Stir the yeast into the cooled water (below 115 degrees as to not kill the yeast).     Allow this to rest for 5 minutes; it will become creamy.

Meanwhile, turn the cooled potatoes into a mixer bowl fitted with a paddle attachment and mash them.  Turn the mixer on low speed and add the dissolved yeast and the olive oil.  Mix until well incorporated.

Replace the paddle with the dough hook.  At low speed add the flour and the remaining 2 t. of salt.  Mix on low for 2-3 minutes.

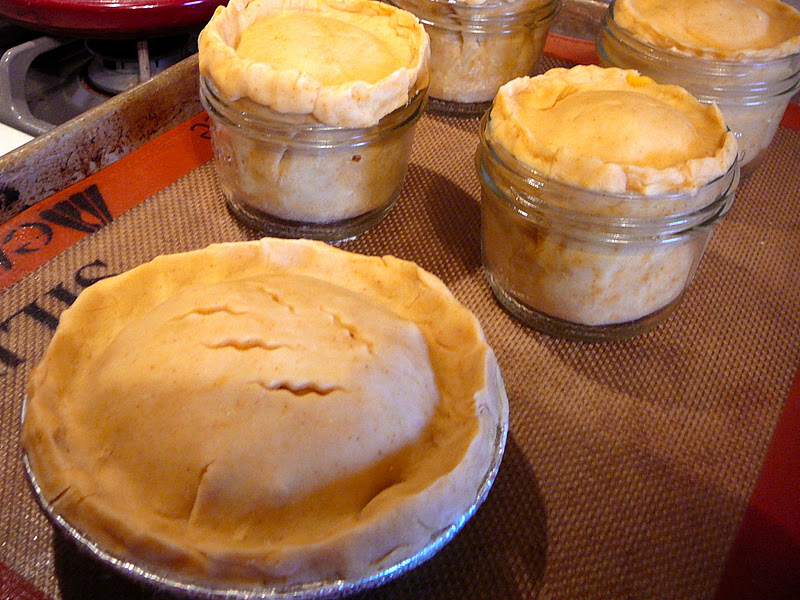
Increase the speed to medium and mix for 11 minutes more.  The dough will be firm at first and soft at the finish.  In the beginning it will look so very dry you will think you're making pie crust!!  But as the dough is worked, it will be transformed.  It may even look like a brioche,  cleaning the sides of the bowl but pooling at the bottom.   HAVE FAITH AND KEEP BEATING.

Cover the mixing bowl with plastic wrap and allow to rise at room temperature for 20-30 minutes.  The dough will have risen noticeably but may not have doubled.

While the bread is proofing, position a rack on the bottom setting of the oven and fit it with a baking stone or quarry tiles, leaving a border of at least 1" around all sides.  Preheat the oven to 375 degrees F.    Place a tea towel on a baking sheet and rub it with flour. and set it aside, this will be the resting place for the breads final rise.   Rub a bakers peel or baking sheet with corn meal or flour.  Fill a spray bottle with water and set aside.

After the first rise is done turn the bread dough out onto a lightly floured surface and cut the dough in half.  Shape each piece into a ball then flatten into a disk.  Starting at the edge farthest away from you, roll the dough towards you.  When you are on your last roll, stop and pull the free end towards you,  stretching it gently, and dust it's edge with flour.  Finish the roll and, if necessary, rock the loaf back and forth a little to taper the ends and form a torpedo, or football.

Place the loaves on the floured towel, seam side down, and cover them.  Let rise at room temperature 20-30 minutes.

When you are ready to bake , spray the inside of the oven wall on all sides with the water  and immediately close the oven door to trap the steam.   Turn the breads out, seam side up, onto the peel and transfer them into the oven.   Spray the oven with water again closing the door quickly.  Bake the loaves for 45-50 minutes until the crust is very brown.   The loaves should sound hollow when thumped.  The most important test, the temperature should read 200 degrees F when an instant read thermometer is plunged into the center of the loaf.

Remove the bread from the oven and cool on a rack for at least 20 minutes before slicing.  "Slathering this bread with butter while it is still warm is a great treat."

The breads should be stored at room temperature.  Once sliced the bread should be turned cut side down on a cutting board.  It will keep at room temperature for about 2 days.  To store longer wrap and freeze for up to a month.  Thaw still wrapped at room temperature. 

1/16/12

Egg and Canadian Bacon Panini

We started enjoying breakfast sandwiches made with English Muffins about the time we figured out that an English Muffin has dramatically fewer calories than most biscuits.  Pair that news flash with the difference between bacon and Canadian bacon in both the fat and calorie content.  And, a  4 minute poached egg is a skinny egg!!  All in all I can afford a half of a slice of cheese to glue all of this together in light of the most respectable savings I have accumulated on everything else!!

My goal is to be able to make up homemade breakfasts that are available wrapped and ready in my refrigerator to heat and eat.  Neither of us are apt to want to cook at 5:30 or 6:00 AM......Does this sound like your house??  On the other hand, who wants to take the time to sit in line at a drive through window?

Enter the new Panini-Griller combo and this is a great new "GO".  Previously when we tried this the English muffins were toasted then assembled and wrapped.  We heated then in the microwave loosely wrapped in a paper towel instead of the plastic wrap it was stored in but the result was awfully chewy.

The new idea was not to toast the muffin at all but to slap it on the preheated Cuisinart Griddler for about 4 1/2  or 5 minutes and they are terrific.  Warm all of the way through, cheese melted, and crispy on the outside!!

Here is the how to:

6 English Muffins
3 slices cheese of your choice
6 poached eggs cooked until firm and drained on paper towels
12 slices thinly sliced Canadian bacon

Fork split the muffins and lay them out assembly line fashion.  Place a half slice of cheese on the bottom of each muffin, breaking and fitting it to lay within the confines of the muffin.  Place an egg on top of the cheese then top with two slices of Canadian bacon.  Wrap snugly with plastic wrap and refrigerate until needed.

Preheat panini maker or grill for 3-5 minutes.  Meanwhile remove the plastic film the sandwich was stored in and re-wrap loosely in a paper towel.   Place the muffin on the bottom portion of your appliance and close and hold the top down firmly for 30 seconds.  Release the top and leave it down, heating for another 4-5 minutes.  Remove and enjoy.  Yield 6 breakfast sandwiches.

NOTE: You can make these successfully without any appliance by heating in a heavy skillet over medium high heat and weighting down with another heavy skillet.  Just flip the muffin sandwich over half way through the process.  Voila!!

1/15/12

Blueberry Pies Baked in Jelly Jars (Easy tips for Pies in Jars)

This morning I acted on plans I have been mulling around to use up the  two half pint cartons of fresh blueberries in the refrigerator by making them into blueberry pies baked in half pint jelly jars.  I also had a pint of pecan pie filling in the freezer from my post on Pecan Pies in Mason Jars posted on 9/4/11.

I love this whole idea of food in jars because I really have never been a huge fan of any other storage or preserving material and I have lots of them!! I also think this is the height of shabby chic and have always embraced it.

To expedite my plans I pulled out two round disks of previously frozen pie crust* dough (enough for a 2 crust 9" pie) and the pecan filling** from the freezer early this morning to thaw.

Last time I made these little gems I used the new and more contemporary half pint Mason Jars and while they were attractive they were very clumsy to work with.  Since then I have found that what I thought to be an original idea was not and have seen them made in the older style slightly flared straight sided jelly jars.  Having a large supply of jelly jars on hand I just pulled these out and ran them through the dishwasher!!   NOTE:  I ONLY USE REAL CANNING JARS I HAVE PURCHASED AND WOULD NEVER TRY THIS WITH ANY OTHER TYPE OF GLASS JAR.

 A 6" circle is about perfect crust size to fit the crust into the jars.  I used a 6" soup bowl as a pattern.  A  pastry disk yielded 3 circles when it was rolled.  The next big discovery is that you can take a small jar.  I used the ones Kraft sells their spreadable cheese in and place the centered circle of pastry over the upside down small jar and then plop this into the jelly jar.

Tamp the pastry into the bottom of the jelly jar with the smaller jar.  You can also roll the sides of the pastry into the jelly jar a bit using the side of the smaller jar.  This saves a lot of frustration and time.

The final yield was 7 jars lined with crust and standing at attention.  There was enough dough left to make lattice tips for the 4 blueberry pies and I threw out maybe a half tablespoon of unused pastry at the most.

Blueberry Pie Filling:

2 C. fresh washed blueberries
2 T. minute tapioca
1/2 C. sugar
pinch of salt
pinch of cinnamon
2 t. butter
sugar to sprinkle

Combine all of the ingredients except the butter and the sugar to sprinkle in a bowl and stir to mix well.  Let this sit while you roll the crust and form the little pies.  Preheat the oven to 400 degrees F.

After the crust is formed distribute the berry mixture in the 4 jars.  Top each with 1/2 t. butter and a assemble the lattice tops using a woven pattern and sprinkle with sugar.  Place all of the pies on a baking sheet and bake for 30-35 minutes.  The fruit should be visibly bubbling and the crusts golden brown.  Cool or serve warm with ice cream or a dollop of sweetened whipped cream.

Storage note:  To store either cover with a small square of plastic wrap and screw the metal canning ring over the top or use the flat disk with the screw on band and refrigerate.

*Pie Crust recipe posted 7/7/10, Cherry Pie (makes 5 crusts)  and 10/29/10 Pastry for 3 crusts.
** Posted 9/4/11 Pecan Pie in Mason Jars.

1/13/12

Chicken 'n Dumplings

It's snowing, gray, cold, windy and I don't want to leave the house....so I am thinking real old fashioned comfort food.  Chicken 'n dumplings just the way my Mother makes them, rolled and pinched off into bubbling chicken stock rich and well seasoned.  Now that is comfort food for a cold winters night.


I have set about to accomplish this earlier today by thawing 3 split chicken breasts and 2 quarts of home made stock tucked away in my deep freeze for just such an occasion as this.

After preheating the oven to 425 degrees F. I salted and peppered generously the chicken and placed them on a foil lined half sheet pan drizzled with olive oil. They were then popped into the oven for 45 minutes and have emerged a golden brown.  When cool enough to handle I pulled the meat from the bone to later accompany the dumplings.


Rolled Dumplings:

2 C. flour
2 T. shortening
2 t. baking powder
milk enough to form a dough that can be rolled

Place the flour and baking powder in a bowl and whisk them together well, cut in the shortening with you fingers until very well combined.  Make a well in the center of the flour and add a small amount (start with a few tablespoons) of cold milk.

Gather together with a fork and continue adding small amounts of milk until you have a dough similar to biscuit dough.  Poll out on a well floured counter or board until about 1/8" thick.  Using a paring knife cut the dough in strips about an inch wide.

Bring the broth to a boil and add the dumpling strips, pinching them off at about 2" intervals.  Simmer for a couple of minutes.  Taste and add additional salt and pepper as needed.  Add the pieces of the reserved roast chicken and bring back to a simmer and serve. It only takes a few minutes for the dumplings to cook although they can be held on simmer for a time without difficulty.

Note:  When the recipe was given to me by Mom she wrote it out by cup of flour.  For each cup of flour use 1 T. shortening and 1 t. baking powder and cold milk to form dough.  If you want to make more or less than this,  that would be the formula.  Beware of how much you can roll out and cook at one time.