Translate

2/29/12

Fresh Green Bean Casserole and BBQ Meatballs....my plan.

BBQ Meatballs and Fresh Green Bean Casserole.
This afternoon I have to go to a meeting and don't know how long it will take so I made up supper this morning and stuck it in the refrigerator to wait for me to finish it up.  This meal was inspired by Ree Drummond  the Pioneer Woman as I saw her prepare a similar meal recently on TV.  So thanks Dee for your inspiration.  I prefer to make fresh green beans and often blanch them and stick them back into the refrigerator until later and finish them up with a quick stir fry.

My family loves good old green bean casserole and this is a marriage using fresh beans and making a cheese sauce laden with bacon and aromatics.

Ingredients:
1-1 1/4 pounds fresh green beans ends removed, blanched 2-3 minutes in boiling water, shocked in ice water, and drained well.  Set aside.

3-4 slices diced fresh bacon
4-5 cloves garlic minced fine
1/2 red bell pepper, diced
1/2 large onion diced
2 T. butter
2 T. flour
2 1/4 C. milk
3/4 t. salt
black pepper
3-4 shakes cayenne pepper
1 C. shredded sharp cheddar cheese
1 generous cup crushed potato chips

Butter baking a shallow baking dish and preheat the oven to 350 degrees F if you are going to bake this now.  Cook the diced bacon over medium heat in a skillet. When it has browned add the peppers, onions, and garlic.  Cook 2-3 minutes more taking care not to let the onions and garlic get too brown.  Turn off the heat and let them rest.


Using a heavy bottomed sauce pan melt the butter over medium high heat and shake in the flour stirring as you do.  Cook a minute or so then add the milk all at once stirring without ceasing until it comes to a boil and thickens.   Add 3/4 t. salt and a shake of black and cayenne pepper.  Add the cheese stirring until it melts then add the bacon and vegetables.  Turn off the heat.

Stir in the green beans and pour into the prepared baking dish and top with the crushed potato chips.  Bake until the sauce bubbles around the edges and the chips are toasted golden brown, about 30 minutes.    Yield 4-5 servings.


 ********************************************************************************


BBQ Meatball Ingredients:

1 1/2 pounds lean ground chuck
3/4 C. quick oats
1 C. milk
1/4 C. diced onion
1 1/2 t. salt
1/2 t. black pepper
1/4 C. safflower oil (for browning)
1/2 C. flour

Add the meat. oats, and milk to a bowl and mix well.  Add the onions and seasonings.  Form into meatballs of the desired size and place in the refrigerator to set up for 45 minutes or so.  Meanwhile prepare the sauce.

When ready to finish the dish flour the meatballs and brown them in the oil.  Transfer them to a baking dish and top with the sauce.

Sauce Ingredients:

1 C. ketchup
3/4 C. diced onion
3 T. vinegar
2 T. sugar
2 T. Worcestershire Sauce
3-4 shakes of hot sauce as desired

Stir all of the ingredients together and set aside until you are ready to bake the meatballs.  Then slather the sauce atop the browned meat and bake until bubbly and hot, about 45 minutes.  Yield 4-5 servings.


Note:  You could also brown the meat ahead then refrigerate or you can just make it all and cook it up in one session.  This just worked for me today!!

Liebster Award Yeh!!


 Thanks so very much to Susie at "earning my cape" for the Liebster award this morning!!It has been really crazy here as a tornado just hit on either side of our subdivision!!  My neighbor Doris just called and warned us and we got to the basement then it was gone as quickly as it came.

Next I open my mail and have this lovely surprise!!
So I thank you so very much and I will be on board in the next few days to PASS IT ON!!!

2/27/12

Salmon and Salad

I let the cat out of the bag last week and revealed I like to make dinner salads on Monday nights because I have all of the "good stuff" fresh from the weekend.  Yesterday I made Boeuf Bourguignon but didn't post as it was my very first post when I started on 4/19/10.  None of it left!!  But there was a nice array of salad fixings so I was in business!!

Happily I picked up a nice piece of fresh salmon from the Rivertown Butcher Shop Saturday and that sounded divine roasted and nestled next to a fresh salad.  And so it was!!

Brian prefers Ranch dressing and lately I am in for Italian.  He likes a lot of cheese and I like just a little.  I like croutons and he prefers none.  But we agree on the salmon.

Here is how we like it:

1-1 1/4 pound slab of salmon with the skin on
lemon pepper
salt black pepper
4 T. butter
2 T. safflower oil
2 lemons

Preheat the oven to 350 degrees F.  Ready a glass baking dish large enough to accommodate the fish by slathering it with soft butter then set it aside.

Heat a large griddle or cast iron skillet.  While it preheats season the fish liberally with the lemon pepper, salt, and pepper on both sides.  Drizzle it on both sides with the safflower oil.  When the pan is hot slide the fish into place skin side down.  Let is cook until the edges are quite brown and it easily releases when you slide a spatula beneath the skin.  Using a fork and a spatula to support it turn the fish just long enough to sear it golden. 

Place the fish in the prepared dish and baste it with the juice on one lemon.  Dot with butter and place it in the oven for about 15 minutes, depending on the thickness of the fish.  It is done when it flakes readily.  Serve hot or cold with lemon wedges.  Delish!!

Orange Dreamcicle Pie, The EASIET Pie I've Ever Made & Drop Dead Delicious!!

THREE ingredients for the CRUST, THREE ingredients for the FILLING, and NO BAKE!!!  Oh my gosh by golly, what a dish!!! On top of all of that our family just LOVED it.  I had thought they might because we make an orange dreamcicle cake everyone loves.  So here you are the drop dead easy and delicious recipe.

Crust ingredients:

1 1/2 C. crushed Graham cracker crumbs (or you could use cookie crumbs too..)
3 T. sugar
1/3 C. melted butter

Mix together until all of the crumbs are moistened and clumping just a bit.  Place your hand inside a sandwich size plastic bag or wrap a piece of plastic wrap around your fingers.  Pat the crumbs into a 9" pie plate evenly and push the crumbs up the sides to form a shell for the filling.  Refrigerate for an hour.  (If you prefer a baked crust you can bake for 8 minutes in a preheated 350 degree F. oven, then cool completely and proceed with the filling.)

Filling ingredients:

1 can of condensed milk
1 pkg. unsweetened orange drink mix (I used Kool Aid)
1 thawed 8 Oz. tub of frozen whipped topping (I used Dream Whip)


Stir the ingredients until they are totally incorporated and spoon into chilled crumb pie shell, spreading evenly.  Chill until serving time.  Serve as is or top with an additional dollop of sweetened whipped topping or sweetened whipped cream.  Yield 6-8 servings.


I would have been shocked if this were not a hit at my house and I hope it will be a hit at your house too.  You may use any flavor powdered drink mix you like.  Thus there are a lot of variations to be tried......lemonade pie, pineapple cream pie, cherry cream, strawberry cream, and the list goes on.

PS:  Our bunch prefers cake to pie in general but they did all like this a lot.


2/25/12

Spoiling Molly Rotten with Dehydrated Chicken Strips

Dehydrated Chicken Strips.
Molly is still a pup at about 16 months and keeps us on our toes.  Thankfully one of my wonderful readers has posted some very informative comments under some of the dog treat recipes I have posted.  She also mentioned in an email (We have been conversing.) that she wanted to attempt to dehydrate some chicken for her dogs using her oven.

We have to keep her BUSY chewing on things we choose.
Idea!! I have an electric dehydrator sitting in the bottom of the closet and have been buying dried chicken and duck strips in one pound bags for Molly.  Perhaps I should look for a sale on chicken breasts and dry my own??

Molly loves all of the treats I make her.
So I did.  Step one was to place the boneless skinless chicken breasts in the freezer to get them firmed up for easier slicing.  I probably left them there for 60-90 minutes.  They were not frozen hard but the were quite firm.  Next I placed the half breasts on a clean cutting board and sliced them making long thin strips about 1/4 to 3/8" thick.

Ready to start the process.
Place the chicken strips on the trays or on a rack over a pan if you are using your oven in a manner that does not crowd them.  When I looked up chicken in the direction book that came with the dehydrator it said to turn it on high and that it would take between 12 and 24 hours.  This batch was perfectly done in 14 hours.

If you are using a conventional oven I suggest a temperature of 325 degrees and I would just check it ever hour or so. 

Molly's window on the world.
It looks to me that my yield is maybe a third of what the fresh chicken weighed so I am not certain I save any money this time but you can be sure I will certainly be watching for good sales on chicken as this was easy as pie!!

Molly is a happy dog.

2/23/12

"Fork Tender" and "Melt in Your Mouth" Chicken Parmesan

Tomatoes preserved from our garden, fresh onion, garlic, and parsley make this a chocked full of flavor main dish.
It is a day to be noted when my husband Brian is all about the chicken.  It is NOT his favorite dish unless it is deep fried tenders with a little container of BBQ sauce to dip it into!!  So when he raved about this dinner dish last night I grabbed the camera and jotted down how I had put it together.  Truth be told I had planned to just grill the chicken and serve it warm sliced across the top of our salads on Monday and he turned up his nose at chicken that day.  I was left with two thawed skinless and boneless chicken breasts that I had asked my butcher to run through the tenderizer the day I purchased them.  (It is that thing they run the cube steaks through.)

So here I was, what to do with my chicken as not to waste it!!  If I would have had fresh spinach on hand I would have gone a different direction but alas.....no spinach.   Here is what evolved from what I rustled up!!

The sauce:

1-2 T. olive oil
1 large chopped onion
8 cloves of garlic chopped
1/3 C. dry red wine (I used Merlot use whatever YOU like.)
3-4 C. peeled, cored, and seeded tomatoes thawed from the freezer (last bag!)
1/4 C rough chop parsley
1 t. salt
1/2 t.  freshly ground black pepper
a good shake of Parmesan cheese

Heat the oil and saute the onions in a large skillet for about4-5 minutes until golden.  Add the garlic and wine and cook until  the liquid is reduced.   Stir in the tomatoes, parsley, salt, pepper, and a generous shake of cheese.  Reduce heat to simmer and proceed to the chicken.

The chicken:

2 skinless boneless chicken breasts ( If your chicken has not been tenderized, pound it between layers of plastic to a thickness of about 1/4".)
1/2 C. flour
1/2 t. salt
good pinch of freshly ground black pepper
1 egg
1-2 T. water
2/3 C. dry pread crumbs or panko crumbs
1/3 C. Parmesan cheese plus more for the topping

Set up an assembly line using flat shallow dishes as follows:  Dish 1. Combine flour, salt, and pepper.  Dish 2.  Beat together in a pie plate the egg and water.  Dish 3.  Mix the crumbs and cheese.

Preheat the oil in a large skillet over medium-low heat and quickly.....

Dip the chicken on both sides in the flour, then the eggs, and lastly the crumbs.  Saute the chicken in the hot oil on both sides for 2-3 minutes per side until golden.  Add more oil if needed and adjust the heat as needed.  Remove the chicken and set aside.

Preheat the oven to 325 degrees F.

Butter a glass baking dish just large enough for the chicken pieces to set side by side.  Spoon half of the sauce across the bottom of the dish then place the chicken atop the sauce.  Spoon the remainder of the sauce over the chicken and top generously with additional cheese.  Bake for 30 minutes and serve over angel hair pasta cooked al dente.  Add a vegetable or side salad and it's dinner.  I hope you like this as much as we did, in my daughter-in-laws words it is a do-over!! and over and over....


2/22/12

Criss Cross Peanut Butter Cookies

Criss Cross Peanut Butter Cookies.
Lately I have NOT been dieting but rather I have kept up on a few of the things I did while I was.  Happily I have not gained back a bit of the 33 pounds I had lost before the Holidays.  I had gotten a horrible upper respiratory "thing" and been really ill for the better part of the last 10 days and even went to the doctor.  So of course when I got on the scales I was thrilled not to have gained!! That may have done me more good than the meds I got !! Just kidding Doc!!

Store Cookies in an Air Tight Container.
One of the things I often do is to substitute coconut oil for shortening in cooking.  From what I have read and understand it is terribly beneficial for you and it aids in weight management.  It does not have a coconut taste or smell that I can discern.  It is solid at room temperature and it made for a delightful cookie today.

Here is my ingredient list:

1/4 C. soft butter
1/4 C. coconut oil
1/2 C. sugar
1/2 C. brown sugar
1/2 C. peanut butter
1 egg
1 1/4 C. flour
3/4 t. baking soda
1/4 t. salt.

Preheat oven to 375 degrees F. Prepare pans with parchment paper or sil-pat mats and set aside.

Using a large mixing bowl combine shortenings, sugars, peanut butter and egg beating until well combined.  Add the dry ingredients and mix until blended completely.  Refrigerate for an hour or so then form into walnut sized balls and place on prepared pans.   Dip a fork into sugar and make criss cross marks across the tops of the cookies to flatten them.  Bake for 10-11 minutes and remove from the oven.  Let them rest in the pans a few minutes before removing them to cool on racks. 

Store in an air tight container.  Yield 3 dozen cookies.


2/21/12

Super Supper Salads and Faux Olive Garden Dressing

Supper Salad with Vegetables, Ham, Egg, and Cheese.
Often times on Monday evening we have a "Super Supper Salad" for supper.  Brian in his more recent years has come to be a big salad fan whereas in his youth the would have had a hemorrhage  had I set a salad down for his dinner regardless of how chocked full of protein and "goodies" it was!!  There is another reason for this Monday night occurrence.  I usually have on hand a lot of fresh greens and raw vegetables from the weekend shopping and leftovers from the "Sunday Dinners" our family still has.

Supper Salad for My Husband.
You can use any number of terrific items to combine with great results.  This weeks salads for two went like this:

Iceberg lettuce washed and torn, !/2 head
Cherry tomatoes, 1 pint
Sliced celery, 2 stalks
Carrot shreds, 1 large
Sliced green onions, 2 with tops
Sliced sweet pickle*
Thawed and rinsed frozen green peas*, 1/4 cup
Sliced hard cooked eggs, 2
Diced baked ham, 8 ounces
Shredded cheddar cheese, 4 ounces
Croutons*, 1/4 cup
Olives
(*these items were used on only one of the two salads)

Start by laying down the lettuce in the bottom of a broad flat dish.  You can make one large and serve from one bowl or make individual salads as I did for us.  Next place the various vegetables then top with the eggs, ham, cheese, and croutons.  We season with salt and pepper and add our dressing!!

My husband loves ranch dressing and that recipe is given in an earlier post.   Salads with Ranch and Thousand Island Dressing  Made at Home,  5/30/2011.

I found this Faux Olive Garden Dressing recipe someplace and wrote it down in long hand.  I honestly cannot remember where it came from to give credit or I certainly would!!  At any rate it is a spin off using Good Seasonings Zesty Italian Mix and adding some pantry staples to it. 

Faux Olive Garden Dressing in an Old Mason Jar!!
Faux Olive Garden Salad Dressing Ingredients:

1 pkg. Good Seasons Zesty Italian Dressing Mix,  follow the directions on the back of the package then add:

1 t. dried Italian seasoning
1/2  t. salt
1/4 t. pepper
1/2 t. sugar
1/4 t. garlic powder
1 1/2 t. mayonnaise
1/4 C. Safflower Oil
2 T. vinegar
1 1/2 t. water

Add to the dressing and shake vigorously to combine until the dressing is smooth.  Chill and serve.  Keep refrigerated in a covered container.  Enjoy. 

Note:  For perfect hard cooked eggs cover egg in their shells with 1" tap water and bring to a boil in a covered pan.  When the pan boils immediately turn the heat off but leave the eggs in the water.  Keep the pan covered and set the timer for 15 minutes.  At the end of the 15 minutes pour off the hot water and rinse in cold water until cool enough to handle and peel.  Hint,  the fresher the egg is the harder it is to peel.  I often buy eggs weeks ahead (for Easter) just not to have them be too fresh!!

Note:  For croutons dice French bread into cubes and drizzle with olive oil, season and bake on a cookie sheet in a 200 degree oven for 2 hours.  Cool completely and store in an airtight container.

2/18/12

Chocolate Chocolate Pudding Cake

Deep dark chocolate sauce bubbles and oozes up through the chocolate cake.

This is a revamped old recipe that I loved as a child and that my Mother often made.  She had dessert every night and baked pies several times a week.  Dad was always home for a good supper and it was built around her good home cooking!! The rich ooze of the chocolate pudding nestled just below the rich cake makes for a chocolate lovers delight.  Count me in!!

Ingredients for the cake:

3/4 C. sugar
1 C. flour
1/4 t. salt
2 t. baking powder
2 T. good unsweetened cocoa powder
1/2 C. half and half, cream, or evaporated milk
3 T. melted butter
1 t. vanilla extract

Preheat the oven to 350 degrees F. and spray a baking dish with cooking spray, set aside.

Combine the dry ingredients in a medium sized bowl and whisk together well.  Using another bowl combine the cream or milk and the melted butter and vanilla stirring well.  Pour the wet into the dry and mix well.   Batter will be very stiff.  Spread evenly across the prepared pan.

Ingredients for the Topping:

1/2 C. sugar
1/2 C. packed brown sugar
1/4 C. good unsweetened cocoa
1 1/2 C. water

Combine the dry ingredients and sprinkle evenly over the batter.  Pour the water over all and bake for 45 minutes.  Serve warm or at room temperature.  Yield 6 servings.


2/16/12

Home-Cured Bacon, Quick, Easy, and NO NITRATES!!


Fresh home cured bacon.
Wednesday,  2/8/12,  6:15 PM.
This one is a very unusual subject for me to address especially because I DO NOT APPRECIATE PREACHY PEOPLE, thus I do not want to be one.  I risk that I fear in this post because I am interested in this subject because I do not want to have nitrates, artificial colors, and flavors, etc. in my life to the extent I can reasonably avoid them.  Thus, I become "preachy" I fear!!  I am sorry in advance.

Well now then, I am past all that and here is what happened.  I had phoned my butcher and asked if he could get bacon without nitrates and he said no.  We still eat bacon.  Then somebody shipped something from somewhere to my husband wrapped in newspaper.  My hubby noticed an article written in the wrappings telling how to home-cure bacon.  He brought it home to me.

I called my butcher back and asked if he could get me 2 two pound slabs of fresh pork belly and remove the rind.  "Of course," he said and a deal was struck!!  He ordered  the fresh pork bellies and I picked them up today.  I have prepared 2 glass baking dishes because they are just about an inch or so wider than the meat and that is just perfect.  I am making 2 batches of "cure".  One is the original recipe and the other I have adapted a bit.  Here is the first:

2 C. coarse Kosher salt
2 C. packed brown sugar
1 T. freshly ground black pepper
2 pounds pork belly, rind removed


Mix the dry ingredients in a medium bowl until it is uniformly combined.  Place one half of the cure mixture in the bottom of the glass dish.  Place the pork flat into the dish and press it in a bit.  Spoon the rest of the mixture across the top of the meat and press it uniformly all around covering the slab of pork covering it completely.  Place the dish uncovered in the refrigerator for 7 days.

Two Pound Slab of Fresh Pork Belly Packed in Curing Mixture.
The second batch of cure is as follows:

2 C. coarse Kosher salt
1 1/2 C. packed brown sugar
1/2 C. granulated maple syrup
1 T. freshly ground black pepper
1/2 t. hickory smoke flavor (without any nitrates or artificial ingredients)

Mix altogether and proceed exactly the same as the first batch was done.

So now I have 2 trays of bacon uncovered and curing in the spare refrigerator we keep in our garage.  Boy does the aroma hit you when you open the door!!

The article instructs to rinse all of the cure and slice at the end of the seven days.  Randy Pearson, my butcher offered to slice it when I have it to that stage so I will go a week from today and revisit him.  I am going to share some of this with him as I expect there are folks who might be interested in this if it is good.  The article says, "it is amazing and we will just love it!!"

For now, I am leaving this post in draft and will conclude a week from today with fresh cooked bacon and taste test results.

Wednesday, 2/15/12, 7:30 PM.

These are the slabs once the curing salts were washed away.
Tonight I toted the two containers of bacon and cure upstairs from the extra refrigerator and washed both pieces of pork belly in cold running water to remove all of the salt mixture.  Then I dried them with clean paper toweling and placed them in zip lock bags.  I labeled the first batch "A" and the second "B" so we can compare the two blends of cure I mixed up.

Randy Pearson owner Rivertown Butcher Shop, Newburgh, Indiana.
Calling our butcher, Randy Pearson of Rivertown Butcher Shop tomorrow to have him slice for me.

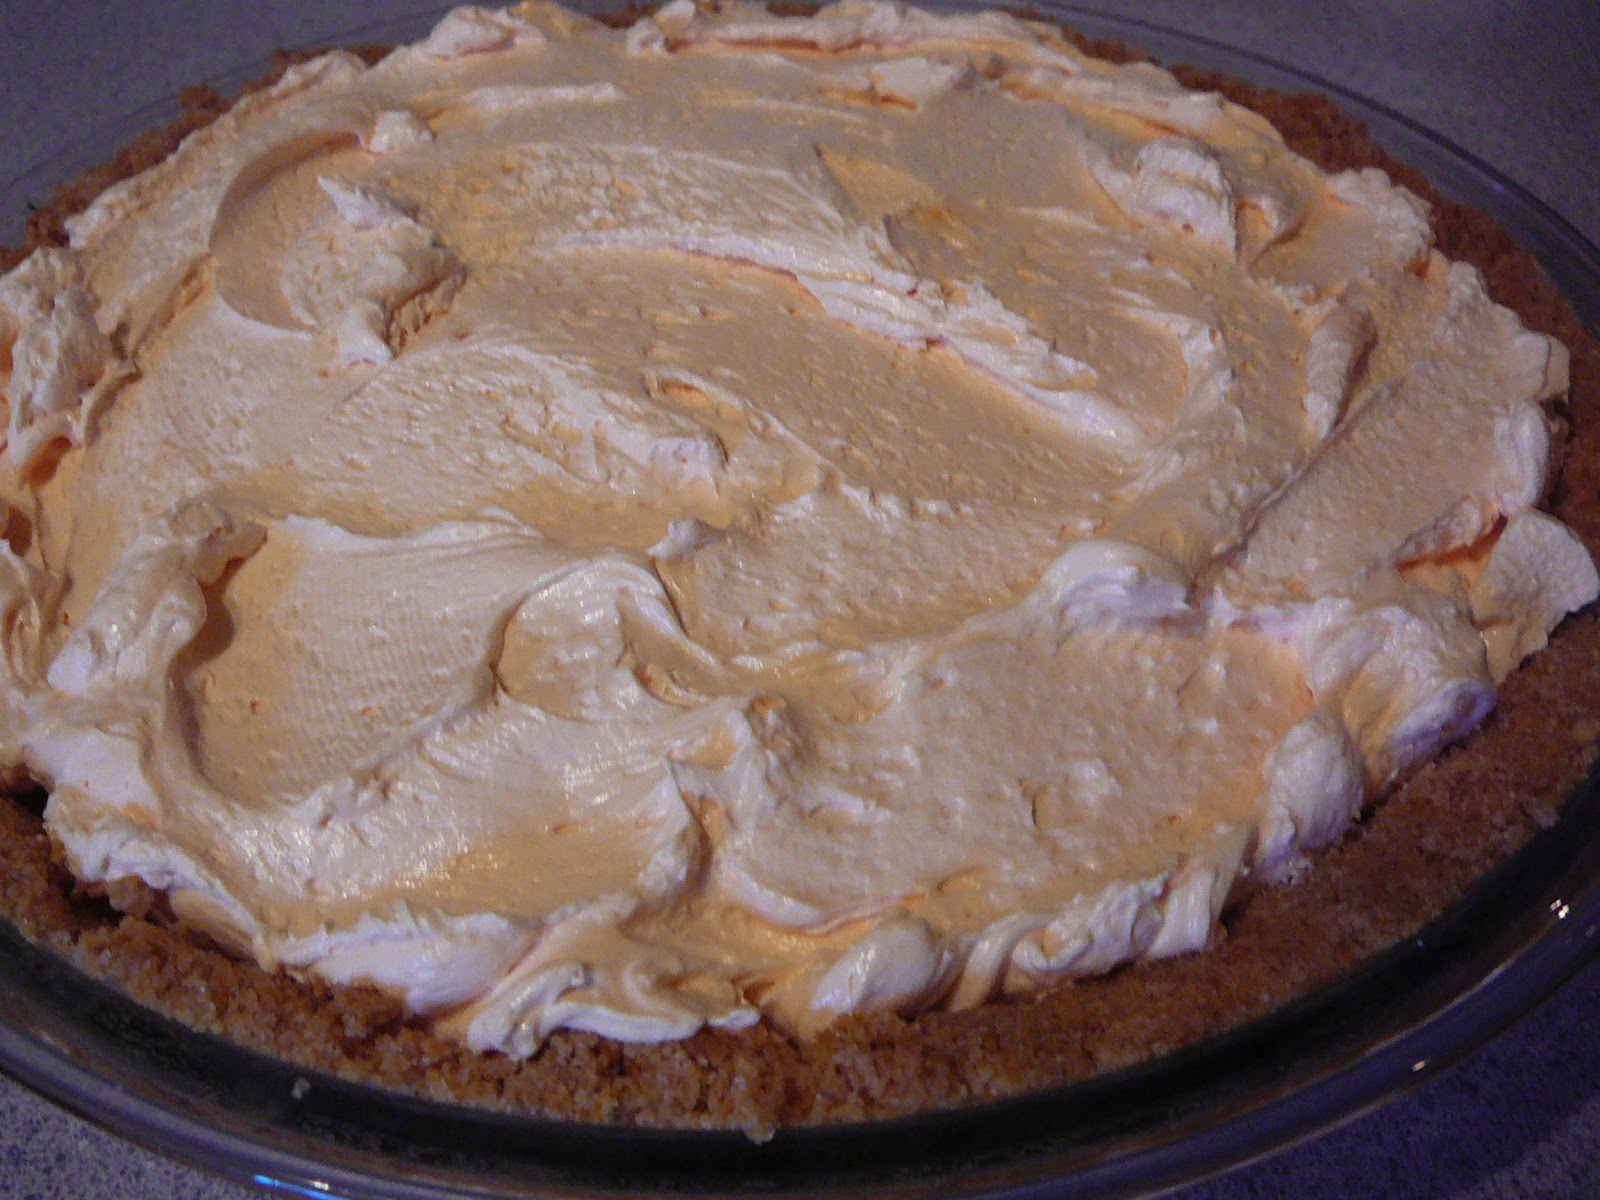
Freshly sliced bacon we just made at home!!
So here it is!! Delicious!! Sweet and salty, just wonderful!!  Brian is thrilled and the home made bread made these "Bacon, Lettuce, and Tomato" sandwiches a real treat for supper this evening.  I will be ordering and curing our bacon from now on for sure!!

By the way, there was only a slight difference in the two curing solutions.  The bacon was slightly sweeter in the second batch but I cannot say we liked it any better.  The liquid smoke made no difference I could taste. Both were deeply flavored with a salty sweetness that was excellent.

2/14/12

All Gone Chili

It is sooo cold, snowy, dark, gloomy and I have a head cold to boot. Yicky!!What a day. 

Well I decided to just spice thing up so last night I whipped up a big batch of chili.  Never can go wrong here chili!!  Brian is crazy about it and so am I.  Just pulled together what I had on had and it was hot, spicy, sweet, and satisfying. 


Ingredients:

2 pounds ground meat of your choice
1 can chili hot beans
1 can chili mild beans
3 diced onions
4 cloves chopped garlic
1 large can pureed tomato
1 C. ketchup
1/3 C. Chili Powder
1 t. cumin
1 t. cocoa powder, unsweetened
1 t. salt
1 t. pepper
2 T. sugar
3 c. water or a can of beer

Brown the meat with the onions and garlic and season with the the salt and pepper.  Add the tomatoes, beans, ketchup, chili powder, cumin, cocoa, sugar, and beer or water and simmer for 2-3 hours stirring and adding liquid if needed.  Serve steaming hot with your favorite toppings and see what happens!!

Pineapple Sponge Cake, Made with Just Two Ingredients!!

Aunt Betty's Pineapple Sponge Cake with Fresh Berries 'n Cream.
This recipe comes to me again from Aunt Betty who said she makes it every week in the spring and summer for a fast light and low calorie treat!!  We tried it and like it too.  My favorite way to serve this quickie is with fresh fruit. As the "shortcake" it adds a great undertone of delicious pineapple which adds a new dimension to whatever fruit you have on hand.  Aunt Betty is a Weight Watchers person and always has these great low fat and low calorie ideas to share!! We enjoyed this one several times last year after giving it a try and I am ready to go again.

The directions Betty gave are that you MUST use Betty Crocker Angel Food cake mix with this recipe or it does NOT work out so I have always used Betty Crocker Angel food cake mix to make this one.
 Ingredients:

1 box Betty Crocker Angel Food Cake Mix
1 can crushed pineapple (it matters not if it is sweetened or unsweetened)

Preheat oven to 325 degrees F and butter and flour a 9" x 13" baking dish.

Stir together in a large bowl the cake mix and the pineapple as you would brownies, just until all ingredients are moistened.  Pour in the prepared pan and bake for 30-35 minutes until the cake tests done.  Cut cooled cake into squares and serve as is or with berries, fruit, ice cream, or anything else you heart desires.

I must confess I have a horrible case of spring fever combined with cabin fever and a bad cold.  This cake with fruit sounds sooo good to me that I am revamping a recipe from 6/2/11 and repeating it for me as much as for all of you!!

2/13/12

Red and Green Salad!!

Red and Green Cabbage, Cauliflower, Spring Onions, Peas, Bacon, Mayo, and Cheese Marry Up into a Crunchy Salad.
Every time you turn around any more you hear of the tremendous benefits of eating deeply colored fruits and vegetables.  This salad utilizes red cabbage as one of the star ingredients and it is tasty and crunchy to boot with a great bacon  and cheese backdrop.   It is a spin off of a lettuce and cauliflower salad posted earlier and a salad my Mother made last weekend when we visited her north of Fishers.

Ingredients:

1/2 head of red cabbage sliced thinly
1/2 head of green cabbage sliced thinly (I used Savoy because that is what I had on hand.)
1/2 head fresh cauliflower sliced into bite sized pieces
3-4 spring onions sliced
2 C. thawed frozen peas
1 pound of bacon diced and fried crisp, then drained well.
1 1/2 C. Hellman's Mayonnaise
3 T. sugar
3 T. Parmesan cheese

This salad is best if made the night before serving.  Using a deep bowl laver these ingredients in the order they are given.  Layer the Hellman's by spreading it like frosting with a butter knife or an off set spatula will work the best.  Then sprinkle across the mayo, first the sugar then the cheese.  Cover and refrigerate.  The salad also keeps well and just gets better as it wilts a bit.

2/12/12

Cinnamon Candy Apple Slab Pies

Rustic Slab Pie of Apples Laced with Cinnamon Imperials and Caramel Bites.
One slice of delicious with coffee on the side.
I have a basket of goodies I keep hidden away in a cold place full of yummy things to bake with.  Every time I get bored with the same old stuff I pull it out and dig through it and I think of some new twist to put on what ever I have banging around in my head.  Today's inspiration was for dessert using apples.  I wanted something a bit different from an apple pie or apple crisp.  When I came up with a bag of Cinnamon Imperials and a bag of Kraft caramel bits it became rustic flat pies laced with red cinnamon candies and bits of chewy caramel.  Here's how it went together:

8 cooking apples (I had Johnna gold's  about the size of a tennis ball) peeled and sliced into the lemon juice waiting in the bottom of my large bowl
1/2 C. granulated sugar
1/2 C. demura, raw, or brown sugar (adds to the caramel flavor)
pinch of salt
1/4 C. flour
juice of 1 lemon
1/2 t. vanilla
4 T. caramel bits (you could also use quartered caramel candy)
2 T. Cinnamon Imperials (otherwise known as red hots)
1/2 stick butter cut in dice

2, 9" pie crusts unbaked (see Cherry Pie and Crust for 4-5 Pies 7/7/10 or Pastry for Three Pie Crusts 10/29/10 or use your favorite recipe)

Preheat oven to 375 degrees F.  Prepare 2 sheets of Reynolds baking paper.  This is new and my first time to use it.  It has foil on one side and parchment on the other.  I rolled the crust on the parchment side and filled the slab and gathered it up around the filling while still on the paper and lifted the whole thing onto one end of a half sheet pan.   It worked out well.

Using a large bowl combine the lemon juice, apples, sugars, salt, flour, vanilla, caramel bits, and cinnamon candies stir well and set aside.  Roll out the pastry onto either parchment or the cooking paper as described.  You want at least a 9" circle.  Place the filling inside the pastry then gather the crust up around the fruit.  Dot the center opening with the butter.  Lift the paper onto the half sheet pan and repeat the process for the second pie.  Bake for 40-45 minutes until bubbling and golden.  Cool slightly before serving or serve at room temperature cut into wedges.

2/9/12

Toasted Spiced Almonds and " bacon tease".

The other day I was reading a blog titled,  Is Butter a Carb?  It is posted by an Irish fellow, Liam who is a student living in Glasgow.  He had done a piece very similar to my Spiced Pecans, posted on 12/7/10.  He was using whole almonds which sounded good to me as I have a 5 pound bag of raw almonds in the upstairs freezer!!  So I gave them a whirl knowing the any kind of nuts go like hot cakes around here.  Our middle son Michael especially likes almonds and I am sure he will like these.

Ingredients:

1 egg white
1 t. cold water
2 C. whole almonds
3 T. sugar
3 T. packed brown sugar
1 T. cinnamon
1/2 t. salt

Preheat oven to 250 degrees F. and line a half sheet pan with foil.  Butter well if using foil or spray with cooking spray.

Whisk the egg white and water well until it is very frothy but not stiff.  Add the almonds and stir well to coat.  Using another bowl mix the sugars, salt, and cinnamon then add them to the nuts.  Stir altogether coating well.  Spread on the prepared sheet and bake for 1 hour turning the nuts every 20 minutes.  Remove from the oven and cool completely.  Break up and store in an airtight container.

THE TEASE.  I WOULD HAVE NEVER DREAMED I COULD CURE MY OWN BACON.  But that is what I am up to now!!  Even as I write it is curing away, 4 pounds of it in my spare refrigerator.  It will be "working" for a full 7 days.  I have written the first half of the post chronicling why I am interested in this, the recipes,  the availability of ingredients,  and will conclude next Wednesday 2/15 by frying some up and reporting what I have yielded without any artificial ingredients or nitrates or other undesirable and harmful additives.  So stay tuned if you too love real bacon but not the nitrates.


2/7/12

Judy's Banana Bars

Mother gave me a Church Cookbook I have been enjoying from the Church I was raised in as a girl. This recipe looked good to me so I was inspired to put my twist on it today as my soup simmered away.

The cook book is Pitch-In From the Pews from Christ Lutheran Church in Noblesville, Indiana and this recipe comes from Rita Vokt who came by it from her late sister-in-law.

Ingredients for the bars:

1/2 C. butter softened to room temperature
1 1/2 C. sugar
2 eggs
1/2 C. buttermilk
1/4 C. sour cream
2 large mashed ripe bananas
2 C. flour
1/2 t. salt
1 t. vanilla
1 t. baking powder

Note:  You may substitute  3/4 C. buttermilk or sour milk for the sour cream and buttermilk.  Make sour milk by adding 1 teaspoon vinegar to 3/4 C. milk.

Preheat the oven to 375 Degrees F.  Butter and flour a 9" x 13" baking pan well and set it aside.  Cream butter, sugar, and eggs until fluffy and add buttermilk and sour cream.  Blend in the mashed banana, salt, vanilla, and baking powder.  Add the flour mixing just until all of the ingredients are well blended.  Do not over mix.  Pour into prepared pan and bake for 30 minutes.  Cool and then prepare frosting.


Frosting:

1 C. granulated sugar
1/2 C. butter
1/4 C. milk
1 1/2 C. powdered sugar

 Boil sugar, butter, and milk for 1 minute at a full boil stirring constantly.  Cool for a bit, about 2-3 minutes.  Add the powdered sugar and beat well.  Spread over the bars and watch them disappear!!  This frosting firms up so you will want to get it spread onto the bars quickly.


This is sort of like a banana brownie that is a little cake like only better.  Wondering how a few droplets of banana flavoring would be in the frosting ??


Penny Pincher's Soup, Clean Out the Fridge Soup, or Possibly the BEST Veggie Soup Ever.

We've been gone for days and the refrigerator and freezer are chocked full of vegetables both fresh and frozen cartons of leftover roast beef, stock from the last turkey I cooked, cartons of dibs and dabs of leftover corn, peas, carrots, green beans, Lima beans, and cooked rice.   Just any bit of leftovers I have I freeze for soup.  Sometimes I just start a zip lock  bag and add to it with each leftover vegetable I have. 

There are tomatoes I dehydrated last summer and tomatoes I froze from the garden after slipping off their skins.  I found okra that had been sliced and frozen too, There are hot peppers I have dried so two of them went into the big soup kettle on the stove today. The ingredients are all approximate as they were in some cases "co-mingled"!!

Here are the ingredients I "found" and used for the soup:

2 quarts homemade turkey stock
4 c. cubed roast beef
1/2 large head of cabbage sliced and cubed
3 large carrots quartered and sliced
1 large turnip peeled and cubed
2 parsnips quartered and sliced
1 large onion diced
3 large cloves of garlic mashed and sliced
1/2 c. frozen okra
2 quarts frozen tomatoes
1/4 c. dried tomato
4 c. green beans
2 c. peas
4 c. corn
1/4 c. pearl barley
2 dried hot peppers, leave whole and remove before serving
1 bay leaf, leave whole and remove before serving
2 t. salt
2 t. black pepper
2 t. sugar
2 quarts of water, add only as needed
1 hard cheese rind saved for soup

Add everything together except the water and bring to a boil,  reduce the heat to low and simmer 4 hours or more.  Stir occasionally.  Taste and correct seasonings.  Remove hot peppers and bay leaf.

The cheese rind is from a hard Parmesan cheese about 2" x 2" x 1/2" thick.  It just slowly dissolves in the soup and adds an amazing layer of flavor.  I always try to save hard cheese for such occasions!

Serve in large bowls with saltine crackers.  My husband likes a bit of shredded cheese atop his hot soup, just melting and gooey.

Golly the freezer and refrigerator look good!!

PS:  There are no potatoes in this soup so it will freeze just fine should I want to put some away.  You can always add them upon thawing the soup.......Potatoes do not freeze well because they turn mealy.


2/6/12

Herb and Dill Dip for Veggies or Chips

Don't you just love a "find"????  I do.  That is what this dip is.  My sister Linda makes it and she gave me her recipe which I am now sharing with you.  What makes it so great in my mind anyway is first it TASTES GOOD!! then it is EASY, and last but certainly not least is that I DON'T HAVE TO MAKE A TRIP TO THE STORE!!  All of the ingredients are things I already have in my cabinet and refrigerator.  I really like it as well or better than the buy an envelope and mix it up stuff!!

So here are the ingredients:

2 C. good mayonnaise
1 C. sour cream
1 1/2 t accent ***(I don't use this, but the recipe calls for it so I'll call it optional.)
2 1/2 t. seasoned salt  (We use Lowery's.)
2 1/2 t. dill weed
1 1/4 t. Worcestershire Sauce
2 1/2 T. dried onion
2 1/2 T. dried parsley flakes
4-5 drops of Tabasco sauce

Mix this all together using a whisk until smooth then cover and refrigerate to let the flavors marry.  At least a few hours or overnight.....you don't want to hurry a marriage you know.  Best if done on it's own sweet time.  Enjoy with crisp vegetables, crackers, or anything else you like to dip in a savory concoction.