Translate

Showing posts with label Under 5 Ingredients. Show all posts

1/12/16

No-Knead Crusty White Bread Recipe from King Arthur Flour a BIG Winner with Me!

Delicious toasted and slathered with butter and homemade strawberry jam!
This is a recipe from the King Arthur website.  I came across it and though it sounded promising.  I was not disappointed!  It has the simplest of ingredients and directions.  It appeals to me because you store it in a 5-6 qt. container in the refrigerator for up to a week.  Also it makes 2-4 loaves of bread!  You just pull off the amount of dough you need and let it rise and bake.  Wonderful flavor and crusty and chewy too.  Yum sums it up!

Ingredients for No-Knead Crusty White Bread:

3 C. lukewarm water (about 105 degrees F)
6 1/2 -7 1/5 C. or most accurate of all 32 ounces unbleached all purpose flour
1 tablespoon salt
1 1/2 tablespoons Instant Yeast

The liquid/flour ratio is important in this recipe.  If you measure flour by sprinkling it in a cup and leveling it off, use 7 1/2 cups.  However if you measure flour by scooping the cup into the flour then leveling it off, use 6 1/2 cups.  The most accurate measure is by weight and 32 ounces is the perfect amount of flour!  I got the chance to use my new kitchen scale for the first time and it work out perfectly!

Combine all of the ingredients in a large mixing bowl or large plastic container with a tight fitting lid.  I used a big ice cream bucket!  Perfect! Just stir everything together with a big wooden spoon until combined.  It will make a very sticky rough dough.

Bread dough in an ice cream bucket! 
Note:  If you choose to dirty up your big mixer use the beater blade and medium speed for only 30 to 60 seconds.

Cover the dough in the bucket or 5-6 quart container and let rise for 2 hours at room temperature.  Next leave covered and refrigerate for at least 2 hours or up to 7 days.  The longer you leave the tangier it will get.

When you are ready to bake sprinkle the top of the dough with flour.  Grease your hands and pull off 1/4, 1/3, or 1/2 of the dough.  Round into a ball and place on a piece of parchment paper.  Sprinkle with a bit more flour and cover with saran or a kitchen towel for the rise.  Let the loaf warm to room temperature and rise until doubled.  One to several hours depending on the temperature of your kitchen.

Preheat the oven to 450 degrees F.  Place the pizza stone or pan you plan to bake on into the oven.  Place a cast iron skillet on the bottom rack of the oven also.

Just before baking slash the top of the bread.  Slide the bread on the parchment onto the hot pan or stone.  Quickly pour at least 1 cup of water into the hot cast iron skillet and quickly close the oven door.  Bake 25-35 minutes until deep golden brown in color.

This would make 4 nice bread boules for soup I am thinking!
When done remove and cool on a rack,  When cold store in an airtight bag. 


4/7/15

Easy Make Ahead 5 Layer Ice Cream Cake Makes for "Ohhs and Awws!"

This is the easy way, I don't want to work at it, make ahead dessert to please young and old alike.  You have lots of options too!  You can use any cake or cookie base, any flavors of ice cream or sherbet, and optional sweetened whipped cream depending on just how far you want to go!

I would recommend using a spring form pan and parchment paper just for the sake of ease.  Or you could use saran or other strong plastic wrap.

You can bake your own cake or cookie layer in the spring form pan as directed or use a purchased cake you can trim to fit!  I recommend removing the cake from the spring form pan after it is totally cool and then putting it back when you start to assemble!

Make either a tall collar around the inside perimeter of the spring form pan or place layers of plastic wrap  tall enough to drape over the outside but pull up around the layers as they become taller than the sides of the pan.  After the cakes freeze solid they will be easy to pull away from the sides.  I would NOT put anything under the actual cake or cookie layer as you will leave the whole cake on the removable disk bottom of the spring form pan to serve from.  Just place the whole thing on a decorative flat cake plate to serve.  I found it easiest to cut with a large serrated bread knife.

Ingredients for My 5 Layer Ice Cream Cake:

1 box brownie mix baked in a 10" spring form pan (or your choice)
1/2 gallon each Bryer's  Chocolate, Strawberry, and Vanilla ice cream (or your choice)
1/2 pint heavy whipping cream
2-3 T. sugar

After baking and cooling the brownie layer and removing it from the pan, reassemble the spring form pan and place the color around the perimeter and return the layer to the bottom.  Snap securely shut.

Using an electric mixer whip the cream adding the sugar a tablespoon at a time until it forms soft peaks.  Set aside.

Cut the cartons away from the ice cream one at a time.  Cut the rectangle into thick slices, about 5/8" thick or thereabouts.  Place the large slices down over the brownie first then cut smaller triangles and shapes to fit.  By now the ice cream has softened somewhat and you can press it out to seal the edges somewhat.

My first layer was chocolate.  Repeat the layers as above.  Next I used vanilla and then strawberry.
Be sure to add additional parchment as needed to form a tall tube as you go.  Frost the top with the whipped cream.  Drape plastic wrap across the entire top of the tube and set in the freezer at least overnight.  Longer is fine too!

Be sure you have made ample space in the freezer to place the completed cake.  Before serving you may want to further decorate with cherries, strawberries, chocolate curls or anything you can imagine!  This makes a large dessert, 12-16 servings depending on the size of your slices.  We had 11 for Easter dinner and there were 5 generous slices left to store.  I placed the single slices in individual plastic containers and stored them in the freezer.  Ready at any time to be enjoyed with no mess!


3/18/15

My Favorite Turkey Sandwich

Ready to serve turkey sandwich.
This turkey sandwich has long been a favorite of mine.  My Grandparents on my Mother's side raised turkeys for market for a number of years and what my Grandma could do with a turkey! But that is another story!  We were making them on white bread back then but today I am using oatmeal bread at 140  calories a slice.  Many calories less is rye at 140 for 2 slices and white wheat at 130 calories for 2 slices.  Significant saving, but I wanted oatmeal bread today!

Meat is always easier to slice cold.
Over the weekend I roasted a turkey breast I picked up on sale last week and also have almost a quart of luscious turkey broth put back in the freezer for another day.  I placed it after salting and peppering generously on a small rack and roasted at 325 degrees F in a covered cast iron dutch oven maybe 2-2 1/2 hours or so.  Next I allowed it to cool and slipped it into a large plastic bag and stored it in the refrigerator.

Lovely slices of turkey.
Today I simply pulled back the plastic and using a fillet knife sliced thin slices and removed the skin.

Ingredients for My Favorite Turkey Sandwich:

2 slices your favorite bread
1 T. mayonnaise or dressing of your liking ( I like Miracle Whip on this.)
lettuce washed and dried ( I washed and removed the stem from 1 large leaf of romaine.)
3-4 slices real turkey (Not processed.)

Slather dressing on slices of bread.  Add lettuce and top with turkey.  Add second slice of bread, serve, and enjoy.

12/7/14

Mother's E-Z Cookies. All of the grandchildren ask my Mom for these at Christmas time! Just thought I would share this busy season!

These "snow capped" drop cookies are a family favorite.
My Mom has made these for years and years and are one of her "go-to" recipes that are requested by young and old alike!  They would work for lots of occasions besides Christmas but I need to get into the grove so I am starting with these now.  Poor Katie hasn't had a homemade cookie for ages when I pick her up at school.  Bad Grandma!

The colored candy sprinkles give a festive look and taste great too.
Ingredients for E-Z Cookies:

1 boxed cake mix "Funfruiti, Party Rainbow Chip"  (The white cake with the colored sprinkles in the mix.)
1 thawed box of Cool Whip, 8 ounce size
1 egg
powdered sugar for rolling

Preheat the oven to 350 degrees F.

When taken from the oven they should be puffed and set but not browned.
Combine the first 3 ingredients until well mixed.  Drop by teaspoons full into a dish of powdered sugar and roll them around to coat well.  Place onto an un-greased baking sheet.  Leave 2" between the balls of dough.  Bake for 12-15 minutes.  Yield 28 cookies.   Cool, serve, and enjoy!

This is my 1,000th post.  What fun it had been.  Thank you all for visiting!

10/12/14

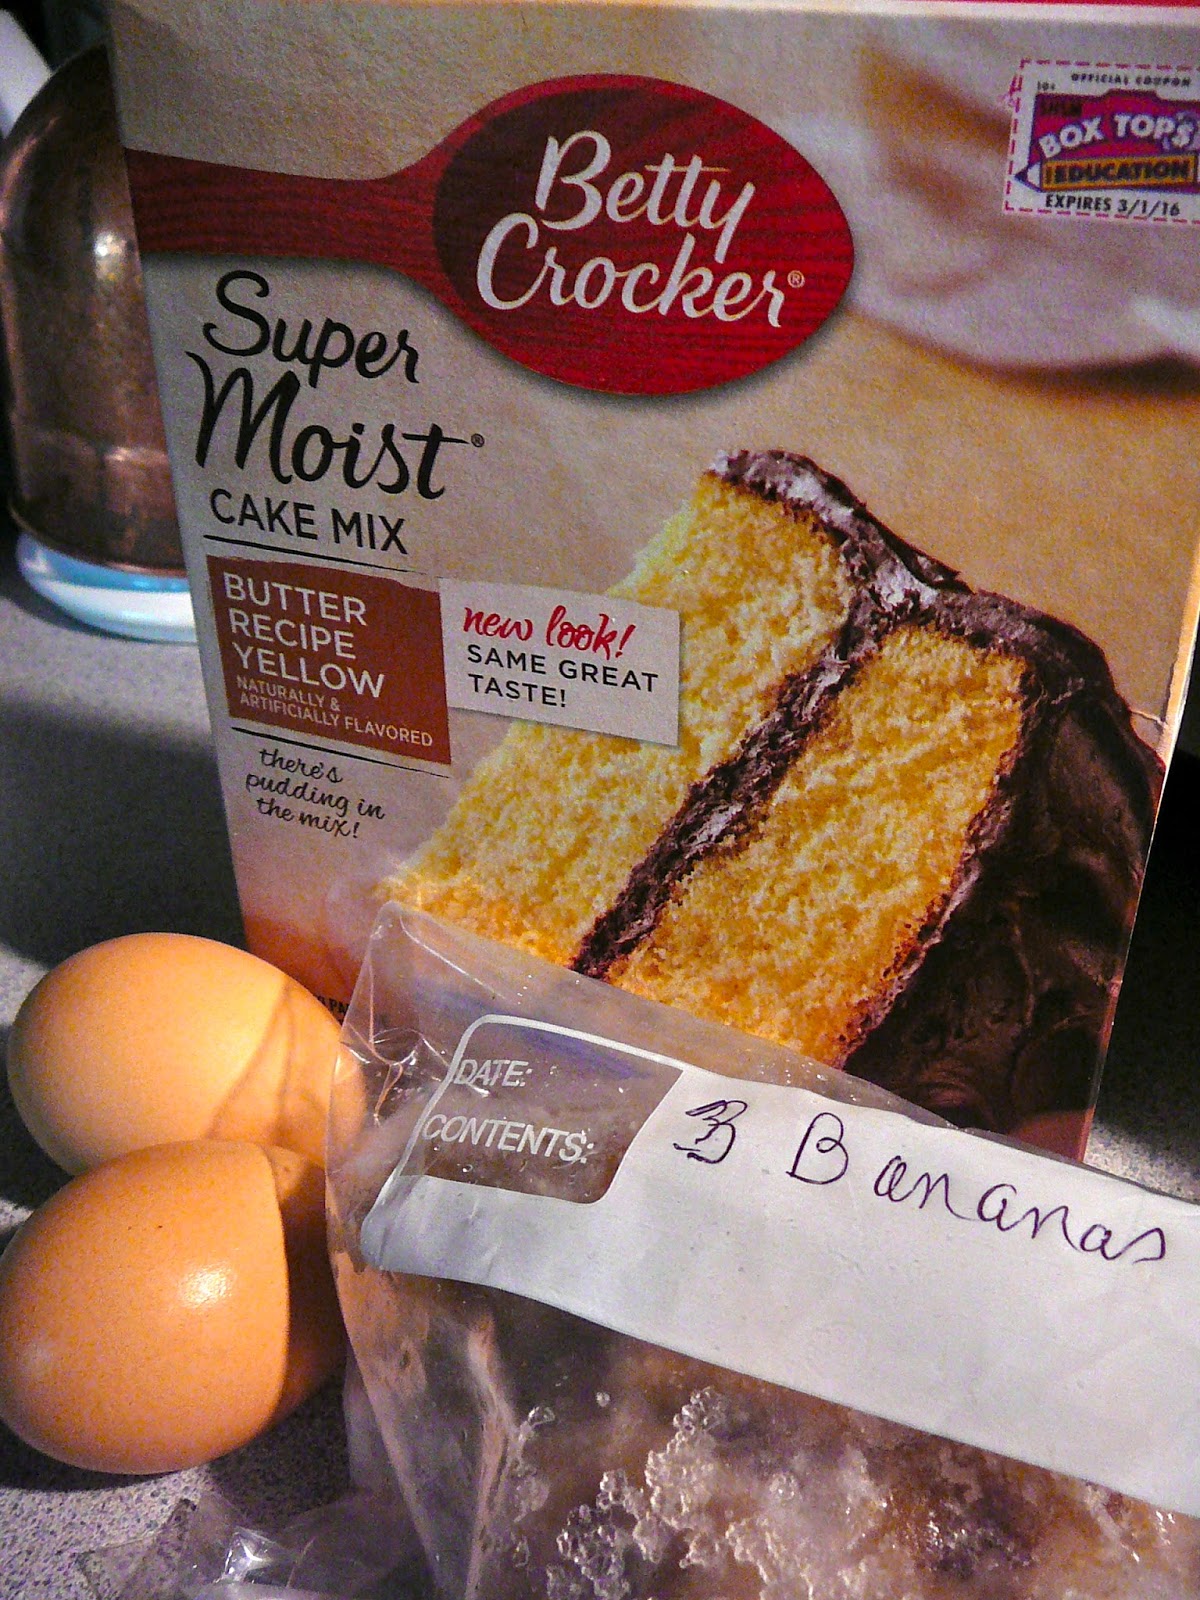
1-2-3 Banana Bread


Another 1-2-3 recipe! ONE yellow cake mix, TWO eggs, THREE ripe bananas, just beat together for  2-3 minutes with your electric mixer and pour into a buttered floured loaf pan. Then bake 45 - 50 minutes at 350 degrees F. until a skewer inserted into the center tests clean.  Cool on racks and store tightly wrapped.  If you like stir in a few chocolate chips or rough chopped walnuts or pecans to the batter just prior to baking but that is purely optional.

Yield one very quick and easy loaf of banana bread.

I saw this little recipe a few months ago and it stuck in my mind but I am sorry to say I cannot for the life of me remember where or exactly when.  But, it was too easy a little recipe to forget!

10/9/14

Yellow Squash, Zucchini, and Yellow Pepper Spaghetti Cut on Mandoline Julienne DELICIOUS Spaghetti Alternative

Vegetables cut on the Julienne blade with my mandolin equals delicious vegetable "spaghetti".
This is such an exciting alternative to pasta that I am beside myself!  Plus my non diet food husband thinks it is just delicious!  Very healthy alternative for dieters as well as gluten free folks. 

This is the third time I have prepared some variation of the recipe in the past few weeks and all have been met with RAVE REVIEWS.

NOTE:  This is great using zucchini alone or combined with other vegetables, use what you have or what sounds good!

Harry Brown my Egg man gave me several yellow summer squash, something I am normally not fond of, and asked me to try the zucchini fries using them.  And I will.  But first I used them along with zucchini and a yellow pepper in this dish.  At this point I am sold on this!

Mandolin   
 The vegetables:

I have two mandolins but this Asian one Juliennes very finely the end result much like angel hair pasta in size.  Previously I boiled  the shreds for 3 minutes.  Last night I covered and cooked on high a big dish, maybe 4-5 shredded squash, for 9 minutes.  It was tender crisp, faintly sweet, and delicious.  I did butter the casserole and drizzle the squash and peppers with a little olive oil, kosher salt , and black pepper.  It was so good with the spicy shrimp!  The recipe bears repeating.  I would use these vegetable shreds in any recipe calling for spaghetti!

Any seafood can be used in this dish.  I had shrimp in the freezer.
The Shrimp:

1 pound raw, shelled, and deveined shrimp
2 T. each butter and olive oil
2 t. Sriracha hot sauce or to taste
2 T. water, white wine, or stock
salt and pepper to taste

This is the other star of this dish!
Saute shrimp in oil and butter until opaque. Add remaining ingredients and stir to combine.  Serve over hot vegetable spaghetti.

Spicy Shrimp on Zucchini.
Yield 2-3 servings. 

9/25/14

Fall Weekend Snacks, Two of My Favorite Favorite Cut Out Cookies and My Best Caramel Corn

Sugar Cookies with sprinkles of colored sugars.
As the weekend nears and I spy but one cookie left from the last batch I made, the "cookie monster" inside me rears up and I must bake more cookies.  If you are a regular reader you know I very rarely buy cookies, never pies or cakes either.  We just do not like them or the chemicals inside!

French Cinnamon and Honey Rolled Cookies.
So last night I got busy and baked 2 batches of my favorite rolled and cut out cookies.  My  easiest handling doughs.  Kid cookies and grown up cookies!  Both recipes were first posted in 2011 but they are go to recipes that I make over and over again so they are worth repeating.

At least half of these are going to be sent off to my twin grandsons north of Indianapolis.  I have to keep then supplied too as Emily and Kate are here more and get ahead in their consumption of Grandma's cookies!

These almost form a cookie wreath!
thehiddenpantry.blogspot.com/2011/01/cinnamon-honey-cookies-and-elder-berry.html    This is the link to my recipe for a French cookie I adore made with honey and cinnamon.  It is an easy dough and yields a delicious cookie that just gets better as it sits.

thehiddenpantry.blogspot.com/2011/12/sugar-cookies-to-cut-out-and-decorate.html       This link is to my "GO TO" sugar cookie recipe that I have made for decades!  You can decorate these any number of ways and I have!  Today I just brushed with a tiny bit of plain water to dampen and sprinkles with colored sugars.

These make me smile and are a happy beginning to a weekend.

We love caramel corn.
Another "OLD STANDBY" is this caramel corn.  It is my favorite as it has a flavor much like that of Werther's caramel.  This is a SUPER EASY RECIPE requiring no candy thermometer, or messing with hard ball or soft ball testing.  You just bring to a boil and time.  It has worked perfectly every time for me!  Here is the link to this 5 STAR Carmel Corn (in my book anyway!).     thehiddenpantry.blogspot.com/2013/10/carmel-corn-fall-tradition-at-our-house.html

Take care not touch this hot caramel as it will really burn!
I also many times add nuts to the mixture for a protein and fiber rich snack food.  So happy first week of Fall!  

9/18/14

French Pie Pastry in the Food Processor, Easy and Delicious!

The pastry handles beautifully!
I am working up to making a new recipe for cooked Apple Pie Filling that I am going to freeze to fit into a prepared crust as in the Peach Pie Filling I recently posted.  With that in mind I am going to go ahead and prepare the pie pastry to have ready in the refrigerator so I can make a test pie the morning I get started.

I have had the apples for a week now but they were picked the same day I got them so there is no big rush there.  Yesterday morning I got another round of shots in both knees so it takes me a day or two to get back to full speed.  I am thinking tomorrow morning I will do the first 10 pounds.  I expect that to be enough for 3-4 pies depending on the amount of waste.

I really do like the canned apple pie filling I have made the last 2 years and I prefer the cooked apples.  But, after coming across a Cooked Apple Pie filling you freeze in my Ball Blue book and thinking to adapt that to the method I used for the Frozen Peach Pie filling I am anxious to do a test batch!

But first things first!  Yesterday I saw while doing my hand sewing, Melissa d'Arabian  on her $10.00 Meals Program this Pie Crust she made in the processor.  I have made this basic recipe before and had issues of the butter getting too warm to work easily.  Her specific tips about dicing the butter and placing it in the freezer and then using the pulse action of the food processor sound like "IDEAS I WISH I HAD THOUGHT OF!"

Cut the butter into dice like pieces and stick in the freezer a while before making the crusts.
But I will add my own HELPFUL HINT of saving and freezing the butter wrappers for using in buttering dishes later as needed!

Freezing butter wrappers comes in so handy for greasing pans and dishes and no messy hands!
Ingredients for French Pie Pastry in the Food Processor:

2 sticks of butter, cut to dice and frozen
2 1/4 C. flour
1 t. salt
1/2 C. cold water  (8-10 T.)

When the dough comes together you are ready for the nest step.
Place butter, flour, and salt into the food processor and pulse until a coarse sand like consistency.  Next add the cold water a tablespoon at a time pulsing until the pastry comes together and starts forming a dough.  Dump onto a floured surface and gather together to form a ball. Split into two pieces and form them into two disks.  Wrap them well and place into the refrigerator for 30 minutes or up to 3 days or freeze for later use.

This is the easiest pie dough ever!
Ready for the refrigerator or freezer.
Before rolling take them out for 5-10 minutes to soften just a bit.  Roll on well floured board and proceed with your favorite recipe. Don't forget to label and date if you freeze.  Generally for a two crust 10" pie I would bake at 375 degrees F. for 50-70 minutes.  If the edges brown more than you like cover with strips of foil.  OPTIONAL brush with an egg yolk mixed with a little water and sprinkle with sugar (or cinnamon and sugar) before baking.    Yields two 10" pie crusts. 


9/12/14

BEACH PIE (A Lemon Pie) Is the BEST Lemon Pie I Have Ever Tasted AND I Blew My Diet Today!!

When I saw this recipe I just was taken with the crust made with a sleeve and a half of saltine crackers??  Yes there is more, a bit of butter and a bit of sugar equals salty and sweet plus lemon and whipped cream!  I HAD to try this!

I found the recipe on line and have it down as "Bill Smith's Atlantic Beach Pie" and I did adapt it a little.  It comes from Bill Smith of Crook 's Corner in Chapel Hill, North Carolina where it is hailed as a sweet-salty twist on a classic lemon pie from that region.

I would have never thought to make the crust of saltine crackers but this works and well!

Ingredients for 1 Pie Crust:

1 1/2 sleeves of saltine crackers (about 60 crackers.)
1/2 C. soft butter
3 heaping T. sugar

Preheat the oven to 350 degrees F.  Butter a 8-9" pie plate and set it aside.  Place the crackers in a gallon size zipper bag and crush them with a meat mallet or a rolling pin being very careful not to go too far with it!  You do NOT want to end up with powdered crackers but rather broken up crackers!
Add the sugar and the butter to the bag and knead them together until the crumbs hold together a bit.  Press into the pie shell and bake for 15 -18 minutes until golden.

After removing the crust from the oven as it cools a bit (it does not need to become cold), make the filling.

Ingredients for the Lemon or Lime Filling:

1, 14 ounce of canned sweetened condensed milk
4 large egg yolks
1/2 C. fresh squeezed lemon juice or lime juice or combination of both
fresh whipped cream
coarse salt for garnish, optional

Beat the egg yolks into the milk, then beat in the citrus juice.  I just used a big wire whisk and it was perfect.  It is imperative  to completely combine these ingredients until smooth.  Pour into the cracker crust and bake for another 16 minutes until the filling has set.  Cool and then refrigerate, the pie needs to be completely cold to be sliced.  Serve with fresh sweetened whipped cream and a sprinkle of coarse sea salt if desired.

This so good I actually had a second piece, something I NEVER ever do!  So be warned, if you like sweet and salty and sweet and tart this pie is near irresistible. (At least it was for me!)


4/7/14

Vanilla, Vanilla Ice Cream


My birthday was in March and I am the new owner of a Cuisinart Automatic Ice Cream Maker.
I am astounded at the simplicity and speed at which this new appliance works.  Gees!  I am used to the old salt and crank ice cream.  This little machine is easy all around and fast!  Ice cream in 20-25 minutes do far.  Yummy too.  MY RULE is to place the "CHILL" bowl into the bottom of the freezer and just leave it there until needed.  After using wash, dry, and place it back in the bottom of the freezer until next time.  Then I am always ready!

This weekend I adapted 2 recipes from the manufactures recipe book and they were both great.  Here is the first.

Ingredients for Simple Vanilla Ice Cream:

1 C. 2% milk
3/4 C. sugar
2 C. heavy cream
pinch of salt
1 T. pure vanilla

Whisk together the milk, sugar, and salt until the sugar and salt are dissolved.  Add the cream and vanilla and mix thoroughly.  Refrigerate 2 hours or overnight.

Assemble the "chill" bowl and paddle in the ice cream maker and pour in the chilled liquid.  Place the cover on and turn ON.  Let it mix 20-25 minutes until it is the consistency of frozen soft serve.

I make it ahead and freeze to serve later or you could serve now.  I remove the ice cream to a covered container and freeze.  Yield about 5 cups.


Ingredients for Custard Style Vanilla Ice Cream:

2 C. 2% milk
2 C. heavy cream
1 C. sugar divided
pinch of salt
5 large egg yolks
1 T. pure vanilla

Using a heavy bottomed medium saucepan over medium heat, whisk together the milk, cream, half the sugar, and salt.  Bring to just BEFORE the boiling point.

While the milk mixture is heating combine the egg yolks and sugar in a medium bowl and whisk until very pale and thick.

When the hot mixture is just prior to the bowl whisk about 1/3 of it into the eggs, whisk in the other 1/3 of the mixture then return it all back to the saucepan.    Use a wooden spoon and stir the mixture over low heat until it thickens slightly and coats the spoon.  DO NOT BOIL!  It should thicken slightly in only a few seconds.

Pour the mixture through a mesh strainer and cool to room temperature.  Next refrigerate 2 hours or overnight.

Install the "CHILL" bowl from the freezer to the appliance and add the paddle and cold custard.  A fix the cover and turn the ice cream maker on.  Let it churn and freeze for 20-25 minutes.  This will be soft frozen and can be served or stored in a covered dish in the freezer until ready to serve.  Yield 6 cups.


10/29/13

Juicing Recipes and Tips.

*Our favorite juice.
There are certainly numerous ways of juicing, citrus reamers, extractors, and blender type machines are very popular.  When my parents had a home in Florida I waited excitedly for the huge boxes of fruit they picked from their trees to arrive.  We so enjoyed fresh orange and grapefruit juices like no other from them!

Now days I usually use an extractor and have gotten back into the groove since we've been sick.  If I can't get it together in the mornings it works just fine to have juices prepared as the first course of our evening meal.  This really helps meet the 5 servings of fruits and vegetables daily goal.  We so often struggle with that.

My dear friend Mickey Thienes shared with me the other day that she juices large batches and FREEZES the JUICE!  Well gees!  Why didn't I think of that?  It is such a great idea.  The down side of these machines is that you have to take them all apart and clean them after each use.  If you are like me you tire of the mess.  She also shared that Elbert's, a natural food grocery in Evansville sells 5 and 25 pound lots of organic carrots for a nominal fee.

I am currently contemplating using up about 10 pounds of apples stored downstairs and may head to town for these carrots and start a big batch to freeze right away.

*My favorite recipe (apple, celery, parsley, carrots, and beets)  I have shared with you many times but here are some others we like too!


 Ingredients for Alkaline Cocktail:
(Good for bouts of Diverticulitis.)

 1/4 head of cabbage
3 ribs of celery
1 carrots, greens removed

Push all ingredients through the hopper and enjoy.


(I seem to have a lot of Inflammation and these next two recipes I find helpful.)
Ingredients for Ginger Hopper:

1/4" slice of ginger root
4-5 carrots, greens removed
1/2 apple seeded

Push the ginger through the hopper with the carrots and apple.


Ingredients for Hawaiian Fizz:

3 pineapple rings with skin
1/2 pear
1/4 " slice of ginger root
sparkling water
pineapple spear for garnish, optional

Juice the pineapple and push the ginger through the hopper with the pear.  Pour into a tall glass and fill with sparkling water.  Garnish with pineapple spear.  YUM.

These are but a few of the many recipes and combinations out there.  My reference and guide is a book I purchased years ago,  Juicing for Life by Cherie Calbom and Maureen Keane.


10/27/13

Peanutty Filled Mini Cups, So Easy, So Good!

Honestly these are just too good to be true and easy too!  Emily wanted me to fix Sunday Dinner at noon today as she has to work later in the day so we are having a chili and chili cheese dog lunch at noon.  I love peanut butter anything with chili and thought these a great dessert for today.

I saw Ree Drummind, from The Pioneer Woman blog make these one day and it just was a simple thing from her childhood.  I wondered how I could have missed something that looks so good?  She was emphatic that you have to use refrigerated peanut butter cookie dough from the store or this will not work.  So off I went to purchase my first tube of refrigerated peanut butter cookies!


Ingredients for Peanutty Filled Mini Cups:

1 tube refrigerated peanut butter cookie dough
1 bag miniature peanut butter candy cups
miniature cupcake or candy paper liners


Next preheat the oven to 350 degrees F.  Line mini muffin cups with small paper liners.  Slice the cookie dough about 2/3" thick and quarter the slices dropping a piece in each paper cup.  Bake for about 12 minutes.  Meantime unwrap miniature peanut butter cups and remove both the foil and the paper cup completely!

Do this quickly as you must pop the candies into the center of each puffed cookie cup as quickly as you pull them from the oven.  This is a hasty project but it pays off!

Cool thoroughly before removing from the pans.  Serve on pretty plates for a tasty treat.  I yielded 40 cookie cups.

10/9/13

Carmel Corn, a Fall Tradition at Our House.

The tree just outside our living room window has it's leaves starting to turn color.  First bright yellow then to a deep red then it sheds purple berries.  It is the first visible sign of fall in our neighborhood.

With the fall comes the apple cider and doughnuts, bond fires, hay rides, and I make Carmel corn! 

I saw this three months ago when it was posted as Crazy Karo Crunch on  blogingwithchildren.blogspot.com    She noted her Grandmother had made it and it tastes a lot like the flavors of Werther's candy over popcorn!  And it DOES!  We love it!  Plus, it is oh so easy to make.

Ingredients for Caramel Corn:

1/2 c. butter
1/2 C. light Karo syrup
1 C. brown sugar (I used light.)
1/2 t. vanilla
2 quarts popped corn (I used Boy Scout pop in the microwave, 2 bags.)
cooking spray

Preheat the oven to 200 degrees F.  Either spray a half sheet pan with cooking spray or if, like me, you want little mess to clean up, line the pan first with heavy duty foil, then spray! Set the prepared pan aside.

Pop the corn and VERY IMPORTANT, pick out every single un-popped kernel, or old maids as we call them, and spread only the popped kernels out on the prepared pan.

In a heavy bottomed medium pan combine the butter, Karo, and brown sugar and stir until it boils over high heat,  Reduce the heat to medium-high and boil for EXACTLY 5 minutes.  Turn off the heat and stir in the vanilla.

Quickly drizzle over the popcorn and stir to coat.  Bake for 15 minutes.  Stir and bake for 15 minutes repeating until the corn has baked for an hour.  If you like nuts in your Caramel corn, feel free to add them at the beginning of the last 15 minutes.  We ate most of it right away but you can store in an airtight container for a week.  (Trust me, you will watch this disappear!)

Allow to cool, break apart,  and serve!

Do not lick the hot spoon and hot Caramel.  It will be tempting!

Do not add  baking soda!

I only have one dirty pan, a spoon, and a measuring cup to clean up!


9/24/13

Jason's Quick Coccodrillo Ciabatta Bread

Perfection.
For a while now I have periodically read a site called Homesteading Today.  There is everything you ever conceived of having to do with "self sufficiency" and "how to" discussed there in various forums.  I happened to look at bread making recently and fell head over heels in love with a site I wound up on.   thefreshloaf.com

My holes could have been a little bigger. It went a little long in the triple stage I think  But still excellent!
From further reading there I found this recipe for Jason's Quick Coccodrillo Ciabatta Bread.  I could not wait to get it made!  Today has been the day and it has turned out beautifully.  Craggy, crusty, holey a chewy delight for our dinner tonight!

Evidently the original formula was posted on usenet in the great alt. bread recipes group by Jason Molina.  All credit to him!  This takes 4-5 hours to go through the process so plan accordingly on a day you can keep an eye on it!  It does not use the traditional stretch and fold method for ciabatta because it is too slack (wet) a dough.  The only stretch is in the final shaping.

Ingredients for Coccodrillo Ciabatta:

500g. bread flour (1 C. bread flour= 136g=3.67 C., I used a scant 4 cups)
475g. water (1.9 C., I used a scant 2 cups)
2 t. yeast
15g. salt (5.69g salt=1t., I used a slightly rounded 2 teaspoons)

Using a Kitchen Aid style stand mixer:  Mix all the ingredients until roughly combined with the paddle.  Stop.  Let it rest for 10 minutes.

Note:  This did not call for 110 degree F. water so I used just water a little warm from the tap.

With the paddle or hook, beat the mixture hard!  It will start a bit like pancake batter but will in from 10-30 minutes set up and work like a very sticky dough.  If the dough starts climbing up the paddle switch to the hook.  The dough will have beaten enough when it separates from  the side of the bowl and starts to climb coming off the bottom of the bowl.

Place the dough into a well oiled container and let it TRIPLE, yes it must triple.  This took 2.5 hours.  I brought 2 C. of water to a boil in the microwave in a big mug.  Next I set it and the dough, oiled, and covered by a clean tea towel in my oven and closed the door.  The little bit of warmth and humidity just did the trick.

Proofing for 45 minutes.
Now empty the bubbly dough onto a floured board scrapping to get every last bit out!  Cut into 3 or 4 pieces.  Spray with oil and dust with lots of flour.   Cover with a tea towel and proof for 45 minutes.

About 20 minutes into the 45 minutes proofing crank your oven up to 500 degrees F. 

At the end of 46 minutes or so the loaves should be puffed and wobbly.  Pick up and stretch into the final ciabatta shape (about 10" oblong rectangle) and flip them upside down onto parchment paper or a well floured peel!  This redistributes the bubbles.  Be gentle it may look like you have ruined them but the oven spring is immense on these!

Love this recipe and will make it a regular in my bread basket.
Bake at 500 degrees F until they are 205 degrees in the center. (About 15-20 minutes.)  Rotate 180 degrees half-way through.  Cool on racks and enjoy.  Yield 3-4 loaves.