Translate

Showing posts with label Beverages. Show all posts

3/17/15

My Grandma's Hot Chocolate Recipe Made by the Cup, Delicious, Easy, Inexpensive, and Versitle

I will admit to getting old insomuch as it would be quite impossible to deny at this point with children in their mid 40;s!  But further I do not mind it.  No, not at all really.  I think it is because I had such wonderful Grandparents and thought them the most wonderful and amazing people in the whole world! So they were beautiful to me.  I loved the snow white hair and the big smiles on softly wrinkles faces.

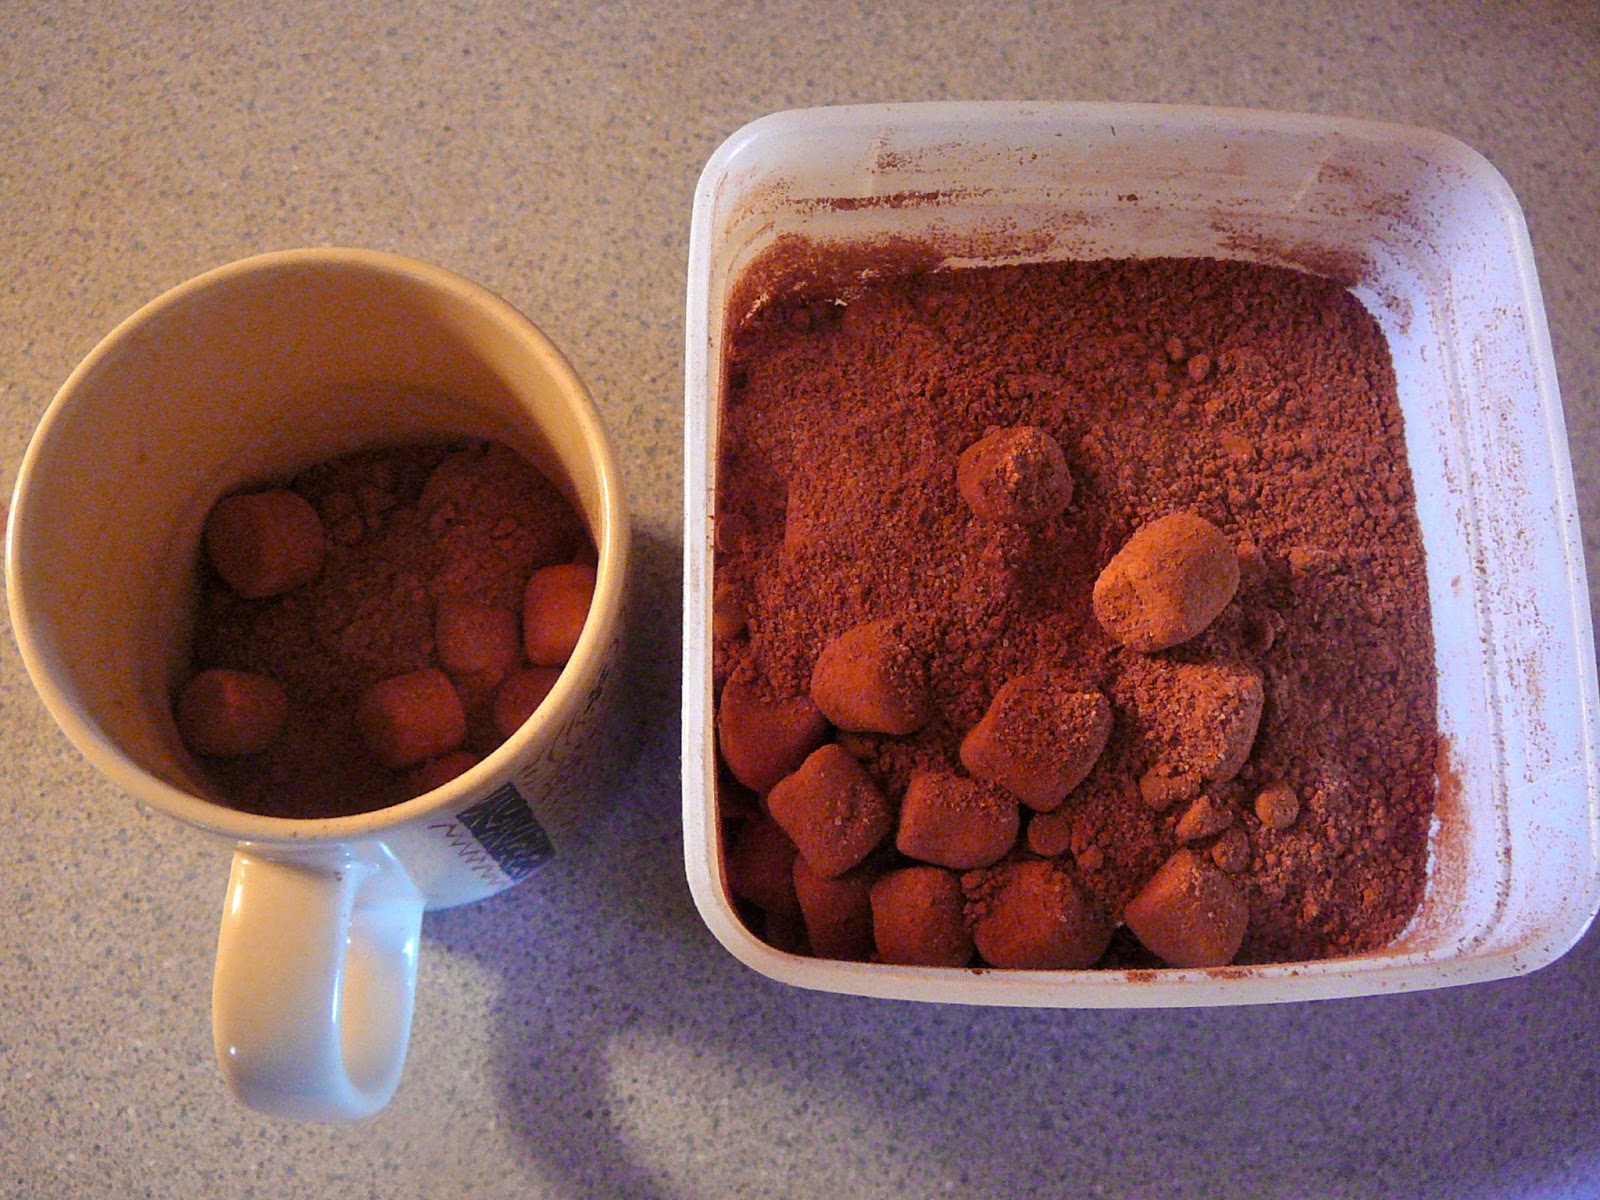
One of my favorite memories of my Mother's Mother was the hot chocolate she made us.  It makes me wonder why today people are buying mixes? They just must not know about this? The other beauty of this is that it is actually "warm" chocolate and not all that hot which works quite well for little ones who really do not like "hot" anything, but generally have to wait for things to cool before they can enjoy them fully.  Here is her pure and simple recipe.  You may tweak it for flavor intensity and sweetness. Heat in the microwave to warm it more and just generally enjoy!

Ingredients for Grandma's Hot Chocolate:

1 t. unsweetened cocoa powder (Grandma used Hershey's Cocoa Powder)
1 T. sugar
pinch of salt
1/3 C. very hot tap water or boiling water (Grandma used hot tap water)
1 1/2 C. whole milk ( Grandma used right from the refrigerator but you can warm it if desired)
marshmallows, optional

Place the first 3 ingredients in a 2 cup glass measuring cup or other large mug. Stir together and add the very hot water and stir until the dry ingredients are dissolved.  Stir in the milk and serve.
Garnish with marshmallows if desired.  Yield 2 cups.  Yummy!  May you never buy mix again!


1/18/15

Hacking My Heart Out, Such a Great Excuse for a HOT BUTTERED RUM Toddy or Black Elderberry Tea!

My favorite "toddy" is this Hot Buttered Rum.
Yes dear friends, I have gone from dancing with my sweeper to hacking my heart out! Ye-ks! Not fun, and now Brian has started too.  Thank goodness our kids are grown as we would surely keep the whole house up at night.  Poor Molly our dog has gone to the back bedroom or downstairs to the family room to get some peace. 

No clue as to what in tar-nations this is.  No temperature, intermittent sore throat, cough, cough, hack, hack, then sneeze and blow your nose.  And, it is reluctant to leave.  I am going on 3 weeks with it.  Let me say it is much, much better now than the first two weeks.  But still, GO AWAY, please!

My Dr. called in cough medicine and when I went to pick it up and saw they wanted $80 some dollars for it I told them they could keep it.  I am WAY to cheap to spend that on a little bottle of cough medicine.  I went to hot toddies and black elderberry tea and have felt most comforted.  And I highly recommend both!

It is believed that the black elderberry contains properties that inhibit the reproduction of viruses.

Usually I have elderberry syrup made up or I mix 1 teaspoon of whatever tea I am  making plus 1/2 teaspoon of dry black elderberries together per cup and brew as usual.  Delicious.  Here is the link on  the making of the syrup.    thehiddenpantry.blogspot.com/2011/08/black-elderberry-syrup-and-jasmine-tea.html

After I came home from Church I sat and quilted until my fingers got sore.  Then I give it up until the next day and am sure as my fingers strengthen or callus I will go for longer sessions.  I am a sight as I peer through my bi-focal's  trying to make tiny hand stitches and hack, hack, hack away.  My salvation is a big glass of ice water I keep handy! 

Thank you all for all of the WONDERFUL comments you have left lately.  I have really enjoyed reading them and many are treasures!

Gotta go now, hacking again.  It might be toddy time.  Here is the link should you want one too!    thehiddenpantry.blogspot.com/2010/11/hot-buttered-rum.html

8/27/14

Easy Method Spicy Tomato Juice to Enjoy Now and Later (Using a Juice Extractor)

This morning I had an 8:30 AM appointment with our "EGG MAN" Harry B.  Harry asked yesterday if I could use more tomatoes to can and of course I was happy he did!  Never did I dream he would have near a 100 pounds waiting for me!  WELL, HE DID!

SO.........I have just finished hauling 18 bags filled to the brim of fresh, picked yesterday, red ripe and juicy, Indiana home grown tomatoes out of the Durango and into the house!

(And I was going to start my sewing today.)

Harry also shared with me his neighbors tried and true quicker and easier way of making tomato juice and canning it for winter.  This is great as I have never had a great love for the food mill.  Plus, I do own a nice juice extractor I had never thought of using in this way.

Use this method adjusting for any quantity of tomatoes on hand and to your taste.  If you do not like the spicy version just omit the peppers.  1 teaspoon of salt is pretty standard per quart of juice and I like fresh lemon juice but bottled will so, use 2 Tablespoons per quart.

Easier Home Canned Tomato Juice:

Scald glass canning jars and caps and lids.  Keep the lids and caps in simmering water until ready to use.  Sterilize glass canning jars.

Assemble juice extractor, large stock pots or soup kettles. hot pads, spoons, ladles, measuring spoon, and funnel, clean towels, and paper towels.

Wash the tomatoes.  Quarter the larger ones to fit into the intake chute of your juice extractor.  Have a large plastic liner in a basket handy to empty the pulp in to discard.

Place the tomatoes through the extractor measuring the juice and emptying it into the stock pot.  Season with salt, lemon juice, hot peppers, and anything else your family likes.  Harry uses 3-4 hot peppers per quart.  Whew!

Bring the juice to a boil and simmer at a minimum 10 minutes as you skim the top for foam.

I try to time this so the canning jars are just coming out of my dishwasher from the sanitize cycle, the caps and lids are simmering away, and the juice is simmering.   Now when all is ready fill the hot jars and cap, being sure you wipe the jar edges clean and leave 1/2" head space.  Harry said he processes 5 minutes but his neighbor does not process at all.  Most recipes advise processing between 10 and 45 minutes in a water bath with 1" of water above the lid tops.  Start the timer AFTER the water has come to a full rolling boil.

When the processing is complete cool the jars sitting on clean tea towels for 24 hours.  Store for up to a year in a cool dark place.

NOTE:  This is from my first test batch and I used  my large soup kettle and about 12-15 pounds of tomatoes which yielded 5 quarts of juice.  I added  1 1/2 jalapeno peppers to this batch along with the salt and lemon juice.  It was mildly spicy, you tasted the peppers but it did not burn.  Just an FYI in case you were wondering.  Now off to do more, 16 more sacks of tomatoes await me.

FOLLOW UP COMMENT:  The tomato juice made with my extractor tended to have less body, pulp as does have traditionally made tomato juice.  The first batch had more than the second batch.  I think the difference came on my patience level and the skimming process.  The first batch I simmered longer and I think there was less "foam" to skim than the second batch.  Then I remembered my friend Joyce making it this way and having a similar outcome.  It still tasted like tomato juice it is the the consistency and color that differs.  After 2 additional batches of juice I switched to straight canning the tomatoes netting about 50 quarts of tomato product.


12/22/13

Doing Pie and Cookie Dough Today! Christmas Buffet Menu.

5 pie crusts
Today I have made up my recipe for 5 single crust pie crusts (or 2 double and a single)  because I am making two very special people their favorite pies to send with my husband in the morning when he leaves for work.  He can deliver them for me and they will still be nice and warm.  That sounds like a great Christmas surprise to me!  I have the pastry made up and patted out into 5 disks and wrapped in waxed paper then dropped into a plastic bag  and stashed into the refrigerator.    thehiddenpantry.blogspot.com/2010/07/cherry-pie.html   thehiddenpantry.blogspot.com/2012/11/canning-apple-pie-filling-my-revision.html     thehiddenpantry.blogspot.com/2012/05/raisin-pie-and-primary-election-day.html

Home canned apple pie filling
I will use my last can of homemade Apple pie filling for one pie and then I am making an very old fashioned Raisin pie.
Raisins simmering
   

Snicker doodles
Next this morning I am making up a batch of Snicker doodles    thehiddenpantry.blogspot.com/2010/08/old-fashioned-snickerdoodles.html   then a recipe of sugar cookie dough  thehiddenpantry.blogspot.com/2013/12/baking-christmas-cookies.html   and a batch of dough for painted roll out cookies.   thehiddenpantry.blogspot.com/2013/02/painted-hearts-cut-out-cookies-for.html   I will bake the Snicker doodles today and store the made up cookie dough to bake off tomorrow after my marathon trip to both the butcher and the market.

Since I have been troubled with bad knees I was counting the days to the injection appointment.  But, the injections bother me about a day and a half but then I jump up and feel 30 again for awhile!  Today is my first feel like 30 day.  Thus the reason I have postponed the marketing.

Planned Christmas Buffet:

This Christmas I am planning a buffet to be left out and enjoyed at will.  The ham for Thanksgiving was such a hit I am repeating it.   thehiddenpantry.blogspot.com/2013/03/baking-whole-ham-for-easter.html    I also ordered several pounds of the butchers delicious homemade potato salad (yes I did!)  But I will throw together some baked beans.  Thinking of a huge, maybe 4 pound platter of fresh strawberries and some chocolate ganache for dipping!  Then our other "likes" include a platter of ice cold shrimp cocktail, a cheese ball with crackers, assorted bread. thehiddenpantry.blogspot.com/2011/12/old-fashioned-persimmon-pudding-my.html   Assorted beverages on ice and maybe a bit of hot buttered rum!    thehiddenpantry.blogspot.com/2010/11/hot-buttered-rum.html
Spiced Pecans
Some spiced nuts, and of course veggies and dip.  Dessert will be Christmas cookies and a batch of Christmas rice crispy treats with red and green holiday sprinkles!  Then maybe, just maybe, I will do up a persimmon pudding with whipped cream for good measure.  

Raisin and Apple Pies
Monday Morning 7:30 AM:  The pies have finished baking and are packed for Brian's deliveries! 
Since they are still hot I dropped a cooling rack into the bottom of each of two large tote bags.  Next I covered the rack with a clean tea towel and put the aluminum pie plate in a second aluminum pie plate to sturdy up the base.  Then I rolled 2 additional clean tea towels into cylinders and used them as bumpers to keep the pie from sliding.
Tucked away to travel


The last step was to tear, fold, and enclose two ample sheets of fresh aluminum foil for the pis to be covered with when cool. 

12/21/13

Grandma's Pumpkin Bread, Frosted Pumpkin Loaf Cake, and a Tea Blend for Gifting.

I placed 4 walnut halves in a row down the top for a festive look!
You know, things have sort have gotten away from me and today I am bearing down to catch up!  Starting with this very treasured Pumpkin Bread recipe shared with me a lifetime ago by Grandma Powell.  It is delicious and makes 2 big loaves.  I made one adding chopped walnuts (I used 1/2 cup) and the second without nuts.  The first loaf is to given as a gift later today along with a tea blend I made up using Black Nigirli Tea and Black Elderberries.  Either blend half and half or place a half teaspoon of each into pre-purchased tea bags.  The tea has anti-viral properties and can be helpful when suffering with a "bug".

The second loaf I will frost and use as a Pumpkin Loaf cake for Sunday dinners dessert.

Ingredients for Grandma's Walnut Bread:

3 C. sugar
1 C. vegetable oil
4 lg.eggs
2/3 C. water
2 C. pumpkin
1 C. chopped nuts
3 1/3 C. flour + 1 T. separated
1 1/2 t. soda
1 1/2 t. baking powder
1 1/2 t. salt
1 1/2 t. cinnamon
1 t. nutmeg
1 t. ground cloves

No nuts version
Butter and flower generously 2 loaf pans and set them aside.   Preheat the oven to 350 degrees F.

Beat together the sugar and oil.  Add in the eggs one at a time beating after each addition.  Blend in the pumpkin.  Stir together the dry ingredients and add them alternately with the water to the batter mixing until just blended.  Add a  tablespoon of flour to the chopped nuts and stir together well, this will keep them from sinking to the bottom of the loaf.  Stir in the nuts.  Divide the batter between the 2 prepared pans evenly and garnish with a row of walnut halves down the middle of the loaf if desired. 

Bake in the preheated oven at 350 for about 1 and 1/2 hours until done when tested with a skewer in the center of the loaf.

After removing the loaves cool on a rack for 20 minutes.  Run a thin knife all the way around the outside edge to loosen.  Invert the loaf into your hand and remove from the pans then continue cooling on the rack until cold.  Store in a large plastic bag.  Slice and serve with soft butter or softened cream cheese.

Ingredients for the Frosting:

The formula for the frosting I am using for the no nuts loaf is for each 1 C. of powdered sugar add 1 T. soft butter and 1/2 t. vanilla.  Then add 1 T. cream and stir together.  Add additional droplets of cream and stir until reaching the consistency you want.  Drizzle or spread across the loaf and serve.


11/11/13

Asian Chicken Mushroom Broth or Soup, Good for What Ails You! And, Preserving Lemon Grass.

Steaming Hot Asian Chicken Soup.
We have had more issues with illness this fall than ever in our 40 years of marriage!  Friday my poor husband had a temperature of 103 degrees F. by the time I got him into our doctors office.  That is a lot of temperature for an adult.  So I am pulling out all of the stops!  Doing everything I know to do to help get him back on his game again.

I had already started juicing as noted in earlier posts and today I broke out the chicken soup!  The special chicken soup chocked full of the herbs and vegetables that are known to have curative properties,  I am hoping this will, along with the medicines from our doctor push him over the top and get him back to his happy and well self.  This is his third lung infection in as many months!

Ingredients for Asian Chicken Mushroom Stock or Soup:

(Stock)

2 chickens
2 large onions quartered
14 cloves of garlic
2-3" piece fresh ginger sliced
2 hot peppers
2 stalks of lemon grass bruised
2 C. shitake mushrooms
water
chicken bouillon cubes
salt
black pepper
1 C. dry *Goji berries (found at Asian markets and Health food stores alike.)
********************************************************************
(Soup)

Cooked cooled rice
Sliced green onions for garnish, optional
Diced chicken, optional
Diced carrots, optional
Diced celery, optional
Frozen peas, optional
Soy sauce, optional
Hot sauce, optional

Combine the first 8 ingredients in a very large stock pot and cover until the water is 2" deep covering the chicken.  Bring to a boil and simmer 1 1/2 hour.  Remove the chicken to a large platter to cool.
Add salt, pepper, and bouillon to the stock to taste.  Add the Goji berries and simmer at lowest setting for 20 minutes more then turn off the heat.  Remove the chicken from the carcass.  At this time you can strain the stock and freeze for use later.  It may be served pipping hot in a mug or you can add chicken, rice, and vegetables and serve as a soup.

To serve as a soup bring a portion of the stock to a rolling boil.  Add desired amount of the raw diced vegetables and simmer 15 minutes or so until tender crisp, add cooked diced chicken and return to a boil.   Place a half cup of cooled rice in a serving bowl and ladle the hot stock atop the rice and chicken.  Garnish with sliced green onions, hot sauce,  and a splash of soy sauce if desired.

If you freeze some of the stock leave 1" head space.  Cooked rice and cooked chicken also freeze well.  This concoction settled my husbands stomach and he was better next morning.

*Goji berries are a newly discovered super food known to have great restorative properties.

My pot of Lemon Grass was handy to have still sitting out on the patio to make this.  I realized it was going to be our first hard freeze tonight!  The temperature predicted to drop to 28 degrees!  So I pulled it all up,  cut the tops down to about 6",  and cleaned off the bulbs much as you would a green onion, but they are much harder and fibrous.  Using my butcher knife on a cutting board I trimmed the bottom root off.  After drying them of any moisture from rinsing them I placed them into a freezer bag and stowed them in the deep freeze to use another day.

10/29/13

Juicing Recipes and Tips.

*Our favorite juice.
There are certainly numerous ways of juicing, citrus reamers, extractors, and blender type machines are very popular.  When my parents had a home in Florida I waited excitedly for the huge boxes of fruit they picked from their trees to arrive.  We so enjoyed fresh orange and grapefruit juices like no other from them!

Now days I usually use an extractor and have gotten back into the groove since we've been sick.  If I can't get it together in the mornings it works just fine to have juices prepared as the first course of our evening meal.  This really helps meet the 5 servings of fruits and vegetables daily goal.  We so often struggle with that.

My dear friend Mickey Thienes shared with me the other day that she juices large batches and FREEZES the JUICE!  Well gees!  Why didn't I think of that?  It is such a great idea.  The down side of these machines is that you have to take them all apart and clean them after each use.  If you are like me you tire of the mess.  She also shared that Elbert's, a natural food grocery in Evansville sells 5 and 25 pound lots of organic carrots for a nominal fee.

I am currently contemplating using up about 10 pounds of apples stored downstairs and may head to town for these carrots and start a big batch to freeze right away.

*My favorite recipe (apple, celery, parsley, carrots, and beets)  I have shared with you many times but here are some others we like too!


 Ingredients for Alkaline Cocktail:
(Good for bouts of Diverticulitis.)

 1/4 head of cabbage
3 ribs of celery
1 carrots, greens removed

Push all ingredients through the hopper and enjoy.


(I seem to have a lot of Inflammation and these next two recipes I find helpful.)
Ingredients for Ginger Hopper:

1/4" slice of ginger root
4-5 carrots, greens removed
1/2 apple seeded

Push the ginger through the hopper with the carrots and apple.


Ingredients for Hawaiian Fizz:

3 pineapple rings with skin
1/2 pear
1/4 " slice of ginger root
sparkling water
pineapple spear for garnish, optional

Juice the pineapple and push the ginger through the hopper with the pear.  Pour into a tall glass and fill with sparkling water.  Garnish with pineapple spear.  YUM.

These are but a few of the many recipes and combinations out there.  My reference and guide is a book I purchased years ago,  Juicing for Life by Cherie Calbom and Maureen Keane.


10/26/13

Ahhhh-----a Lovely Cure, Magic Potion/Kadha, Soothing my Cough and Cold!

This is an age old Indian potion passed down from generation to generation.
Quite by accident, actually in an earlier post I asked if anyone could tell me the difference between green and black cardamom.  At this point a wonderful reader, Ashwini Deshpande explained in such lovely terms both the difference and usage I was intrigued enough to follow her back to thank her.  Upon doing so I discovered her blog,  indulge-ashscorner.blogspot.com and her lovely story and recipe for this concoction!

Her mother had made it many times for her as a child as she now does for her children.  Insomuch as I have everything called for I gathered and made so for myself.  IT IS QUITE LOVELY.  I will make it again.  Plus I think I actually feel a bit better!  Thank you Ashwini!

Here is her recipe for Magic Potion/Kadha:

1 1/2 C. water
1 Green Cardamom Crushed with skin and seed
2 whole cloves
1/2" stick cinnamon
1/2" ginger grated
1/2 t. lemon grass, fresh or dried
1 T. basil leaves
honey to taste

Using a small pan add the water and the above ingredients except exclude the honey for now. 

Heat over medium heat and let the potion simmer until the spices give out their extracts and the water changes to a slightly light green color.  Strain into a mug discarding the herbs and spices.   Add honey to taste and enjoy!  Enjoy 2-3 times a day until you are feeling better, and I will!

10/9/13

Chai Tea Concentrate, Homemade to take the chill off my bones! Another fall favorite.

Chai tea ingredients simmering away.
I love the flavors and aroma of Chai tea.  Recently I made a delicious Chai tea using instant tea as the base and Mother loved it when I split my batch with her as did I......Here is a link to that recipe.    thehiddenpantry.blogspot.com/2013/08/fall-is-just-around-corner-and-this.html

Then I saw this made from scratch concentrate and I just had to make it.  The only thing slowing me down was I had used all of my cardamom pods and failed to get more.  Nobody carries them here in our little town so I went to one of the wonderful Asian markets in Evansville and readily found them.  What threw me was there were two varieties.  The green which is what I have always gotten and there was also black.  If anyone out there knows the difference in use please leave me a comment.  I shall have to investigate!

This recipe was adapted from tasty-yummies.com who adapted from numerous recipes floating the blog-a-sphere.

Ingredients for Homemade Chai Tea Concentrate:

4 1/2 C. good water (I use water from reverse osmosis but if you are lucky enough to have good water that is fine too.)   Note:  Our water is so bad that from the tap it smells like a chlorinated swimming pool!
8 bags of black tea
2 cinnamon sticks
1 vanilla bean split in half (or 1 tablespoon of vanilla extract can be added at the very end.)
1/2 C. raw cane sugar, or more to taste(or if you prefer coconut sugar or date sugar.)
1-3" piece of fresh ginger cut into pieces
10 whole cloves
8 cardamom pods
1/2 t. freshly ground nutmeg
2 whole star anise pods
1/2 t. whole black peppercorns
1/2 of an orange jest peeled with a vegetable peeler
1 T. raw honey or more to taste, or add more sugar

Combine all of these ingredients in a medium saucepan and bring to a boil.  Reduce the heat and simmer for 20 minutes.  Line a strainer with cheesecloth or a coffee filter and strain into a bowl to cool.  After cooling refrigerate in a lidded one quart container or jar.

To serve mix 1 part concentrate with 1 part milk.  Serve warm or cold.  Yield about a quart of concentrate.  Keep up to 1 week refrigerated.

I am in hopes this will also act to settle Brian's stomach as a 3" piece of ginger should have that effect.  Not sure if the  fact we eat late is the problem or that he takes several meds in the evening.  I can't help but think this is one of those "chicken soup" sort of things.  It just is good for you all around!  He loved the flavor  of it served up warm before bedtime.

The concentrate would make a great Holiday gift or assemble the ingredients less the water and package along with the directions.  Also it would be a great used as a flavoring....say Chai ice cream?? Or muffins?? Or tea bread??  YUMMM.


8/22/13

Making Grape Juice for Concord Grape Jelly

Concord grapes picked fresh from the vines.
We seem to have a peak season going on for concord grapes!  My hubby came home early last night and we headed over to the west side of Evansville to the home of Bill and June Shirley as they offered to share their bumper crop of concord grapes with us.  Off we went with baskets and clippers in hand only to find they had most of the work already done and good 20 pounds of grapes were waiting for us!

We sat as the evening sun went down and visited awhile before heading back.   It was a very nice evening.  Thanks to the Shirley's we will have grape jelly to share this year.

You will need Concord Grapes,  colander,  pan for washing,  slotted spoon,  large heavy bottomed kettle with lid,  potato masher, cheese cloth, and twine.

Note:  About 3 1/2 pounds of grapes will yield 4 cups of juice.  (Ball Blue Book)

The first thing necessary is to pick all of the grapes from the stems and debris and give them a good rinse in cool clean water.  I don't leave them to soak, just a good swish and then out.  I did two  batches as I did not want to over fill my kettles and have a boil over.

Mashing is easily done in batches with a potato masher.
As soon as I picked over and rinsed about 4-5 cups of grapes I added them to a large heavy bottomed kettle and mashed them.  Doing them in batches then mashing is much easier then doing them all at once and then trying to get them mashed.  Just dump each new batch on top and give them a bit of elbow grease with your potato masher and you will make quick work of it.

Cover the pan and simmer the grapes until the fruit is soft.  Gather several layers of clean cheese cloth and lay them across a large bowl.  Carefully pour the fruit and juice into the cheese cloth lined bowl.

I have hung 2 cheese cloth bags of cooked grapes to drain into bowls.
Gather up the excess and the corners and tie the cheese cloth with butchers twine.  Leave enough length in the string to be able to suspend it above the bowl and hang for several hours.  I start with probably 20" then fold it in half and double knot the ends together.  Just loop the looped end around the gathered corners of the cheese cloth and pull the knotted end through the loop and shown in the picture.  The weight will pull and hold the bag taught.  If you need to shorten the knotted end for the height to your bowl just knot it again to make it shorter and loop it over your knob.

I hang the bags by the handles of my upper kitchen cabinets over large bowls.  My house is quite cool with our air conditioning and I leave it 12-24 hours.

The "Ball Blue Book"  advises that the juice may be used fresh, canned, or frozen for later use.  To prevent formation of tartrate crystals in grape jelly, the juice should stand  in a cool place for 12 to 24 hours.  Strain again through damp cheese cloth to remove any crystals that may have formed.

Tomorrow I shall perhaps make grape jelly!  Or if not I will store the precious juice in Mason Jars in the refrigerator or the freezer.


8/16/13

Fall is just around the corner and this Chai Tea Mix is delicious! Plus this might be what heaven smells like?

Chai Tea not only is delicious but it must be what heaven smells like!
Sometime ago I got the "2013 tasteofhome ANNUAL RECIPES" cookbook.  This is one of the best recipes I have found and adapted, just a bit.  This mix makes delicious Chai tea.  In fact, it was my lunch today along with a bowl of fresh peaches.  It makes a large batch and would be lovely given in a pretty glass jar with a ribbon as a very thoughtful gift.

Ingredients for Chai tea Mix:

2 C. sugar
2 C. unsweetened instant ice tea powder
1 1/2 C. powdered French vanilla nondairy creamer
1 1/4 C. powdered nondairy creamer
1 1/4 C. packed brown sugar
3/4 C. nonfat dry milk
2 1/2 t. ground cinnamon
1 1/2 t. ground nutmeg (I grated in 1 whole nutmeg.)
1 1/4 t. ground cardamon
1 1/4 t. ground cloves
1 t. ground allspice
1/4 t. ground white pepper
1/2 t. kosher salt
FOR EACH SERVING 
1 C. hot 2% milk (I used vanilla soy milk.)

Warning this smells delicious as you make it and made me smile a lot!

In a large bowl combine the first 13 ingredients.  Using a blender or food processor process the mix in batches until powdered.   Store in an air tight container in a cool dark place for 6 months.

To prepare Chai tea:  Place 1/4 C. mix in a mug.  Add hot milk and stir until combined.

Yield 32 servings, 8 cups tea mix.  Plenty for gift giving or just to share.


5/10/13

General Tao's Chicken Sauce & Monteray Cherry Juice, Two Great "Finds"

I always get General Tao's chicken when we go out and this turned out just as good as any I have ever eaten.
I have looked high and low for a recipe for General Tao's Chicken and even my Ultimate Chinese and Asian Cookbook does not give a recipe.  When I came across an Asian sauce for General Tao's Chicken made by TY LING Naturals, I snatched it off the shelf and have given it my best efforts this evening. It turned out GREAT!  I was happy with the results and Brian loved it.

Ingredients for General Tao's Chicken:

6 boneless skinless chicken thighs
salt
pepper
2 eggs
2 T. cornstarch
oil for frying
Ty Ling General Tao's Sauce
dried red pepper flakes

Cut any excess fat from the thighs and cut each thigh into 4-5 pieces.  Place about 1/2" oil in a heavy skillet and heat.  Meanwhile beat the egg and cornstarch until smooth.  Season the thigh pieces with the salt and pepper and toss them into the batter.

Fry the coated chicken pieces in the hot oil until deep golden brown and remove and drain on paper towels.  Do not crowd. fry in 2-3 batches.

Combine the cooked chicken pieces in a dish with about 1/3 to 1/2 cup of the Ty Ling General Tao's Sauce stirring to just coat each piece.  Sprinkle with dried red pepper flakes and serve hot over just cooked rice.  This is a sweet, spicy, hot, sticky and delicious dish, the best way I know to enjoy a chicken thigh!   Yield 2 servings.

Concentrated Monterrey tart Cherry Juice Concentrate.

I have made another discovery.  Tart Cherry Juice, if has a lot of nice effects.  We have been drinking one glass each evening with our supper.  We do not add any sweetener.  We just use 2 generous tablespoons of the concentrate in a glass of filtered water over ice.  We are starting our second week and there are some noticeable improvements in our sleeping.  We both looked at each other and said the same thing one morning.  "Gee,  I am sleeping better!"

I also have slowly noticed some improvement in my arthritis.   Less stiffness and swelling.  The literature suggests some other benefits but these are the things we are certain about.  Certain enough that I bought a second bottle of concentrate today.  It is not cheep.  Almost $28. a quart but if the benefits continue it is worth it!  I buy it at Rivertown Butcher Shop but have seen it other places too.  You can visit them online if you are interested.  I do not sell it, get paid to talk about it, or own stock in the company.  We just think we feel and sleep better.   www.natureblessed.us  is the web address given on the bottle.

2/8/13

Hot Cocoa Mix in a Jar, Just in Time for Valentine's Day Giving!

Things have been so crazy around here since well before Christmas and this week has been no exception.  Finally though, I am hopeful anyway, we have passed the turmoil and will settle back down to a pleasant every day life.  Hopefully everyone is on the recovery list and on the way to good health and spring is just around the corner.....my lands!  Valentine's Day is next week!!

Given that realization I am planning some special cookies next week to give my Grandchildren and children and a special jar of a homemade hot cocoa mix.  We have 3 sons and I think I will make up another jar and give one to each family.  I just finished 2 and took a photo to share with you as this is such a nice idea some of you might like to try it too.  When my boys were young and at home I always kept a big jar made up of my special homemade cocoa mix.  This recipe is a bit more special as it includes mini semi sweet chocolate chips and miniature marshmallows.  I made them in layers using a funnel in quart jars.  It does look special and festive and a piece of red fabric fastened under the band with a red ribbon should do just the trick!! I will work on that too.

Ingredients for each quart jar of dry Homemade Cocoa Mix:

1 C. granulated sugar
1 C. unsweetened cocoa powder
1 C. powdered milk
1/2 C. mini chocolate chips
1/2 C. miniature marshmallows
1/2 t. salt

Layer 1/2 C. granulated sugar in the bottom of each jar you are making.  Next add 1/2 c. cocoa powder, 1 C. powdered milk, 1/2 c. cocoa, 1/2 C. granulated sugar, 1/2 t. salt, 1/2 C. mini chocolate chips, and 1/2 C miniature marshmallows. 

Gently lift the jar and tap it several times on the counter to tamp down the ingredients and then top off again with additional marshmallows.  Top with a seal and screw on the band.  Cut about a 5" square of red or other fabric and remove the band.  Lay the fabric atop the seal evenly and screw on the band.  Add a ribbon around the screw top and a card.

The instructions for the card should be to empty all of the contents into a large bowl and mix well.  Measure 1/3 C. of the mix into a mug and add 1 C. of boiling water, stirring to mix and melt the ingredients.  Return any remaining mix to the jar and reseal until needed.  Yield 12 servings per 1 quart of mix. 

I am going to make up another jar and gussy them up a bit and I will add that photo later.  For now I just wanted to get this idea out there for anyone who might like to give it a try.  I LOVE food gifts in jars!  To receive them as well as to give them.