Translate

Showing posts with label Food in Jars. Show all posts

10/4/14

French Cut Green Beans (Cutting and/or Canning or Freezing) Fall Bean Crop

This is a French Bean Slicer!
A few months ago I was on a real tear cleaning and reorganizing the entire house.  It is truly amazing what you find that you forget you even had!  At least it worked that way for me.  One "find" was my French Bean Slicer.  Yep, there is was in that big deep drawer where I pitch all of the stuff I can't bear to part with but don't use very often.  I have had this little jewel for so long I couldn't begin to tell you when or where it came from, except that I sent off for it years ago from somewhere?

Lovely French Sliced Green Beans.
But make no mistake I DO love it!  I love it to French slice not only green beans but also for sugar snap peas I put into Rissoto. 

But.....lest I get ahead of myself.  This saga started as  they often do with a call to our good friend Harry Brown the egg man, as I call him!  Our tomatoes are gone and I wanted to get some slicing tomatoes and thought he might have some.  When I arrived there was a 10 gallon bucket 2/3 full of beautiful green beans he had just picked.  Needless to say they went home with me along with those tomatoes and a bag of squash!  They amounted to 14 pounds of near perfect beans.

Pints of broken beans.
At this point I starting breaking beans and then the light bulb came on!  I had broken half the beans, 13 pints by the time I had a brain storm! There is that French Bean slicer in the drawer!

The hour was late by now but I fetched it in but a minute!  Beautiful and effective it is.  I thought to simply break off the ends of the remaining beans and to store them away in the refrigerator until this morning.

Two gallons of whole beans.
Right after my Saturday call to Mother and 2 cups of hot black coffee I started!

This took no time at all and was fun in fact!
First I washed and drained the beans and attached the French Slicer to the dining room table positioning a chair under the drop chute to catch the beans. It is easy and a fun little gadget!  You just put a few beans in the chute and crank the handle.  In no time I was finished and quite happy with the prospects of my own French Sliced Green Bean Casserole for the holidays!

Lovely French Cut Beans.
Having put the jars and Ball Caps and Lids in the dishwasher to sterilize them before calling Mom I was set.  All I needed was the canning salt and a big pan of boiling water.  I used the drinking water from the reverse osmosis filter and set it and the pressure cooker canner to boil.

Beans, Salt, and Water is all I use.
Next I filled the jars and added a teaspoon of salt per quart and a half teaspoon for pints.  Leaving 1" head space I filled the packed jars with the boiling filtered water.  Next I wiped the rims and put the lids and caps on.

About to run out of jars I canned 3 quarts, 11 pints, and froze 3 quarts of beans.
Ready to process:  *Process 20 minutes for pints and 25 minutes for quarts at 10 pounds of pressure.
To freeze after breaking or slicing blanch in boiling water for 3 minutes and plunge into an ice bath.  Drain well and package with same amounts of salt as above in freezer bags or cartons and store in the deep freeze.  I yielded 23 pints total.

These quarts will make my holiday casserole.
*Per the Ball Blue book guide to preserving,100th Anniversary Edition.

10/9/13

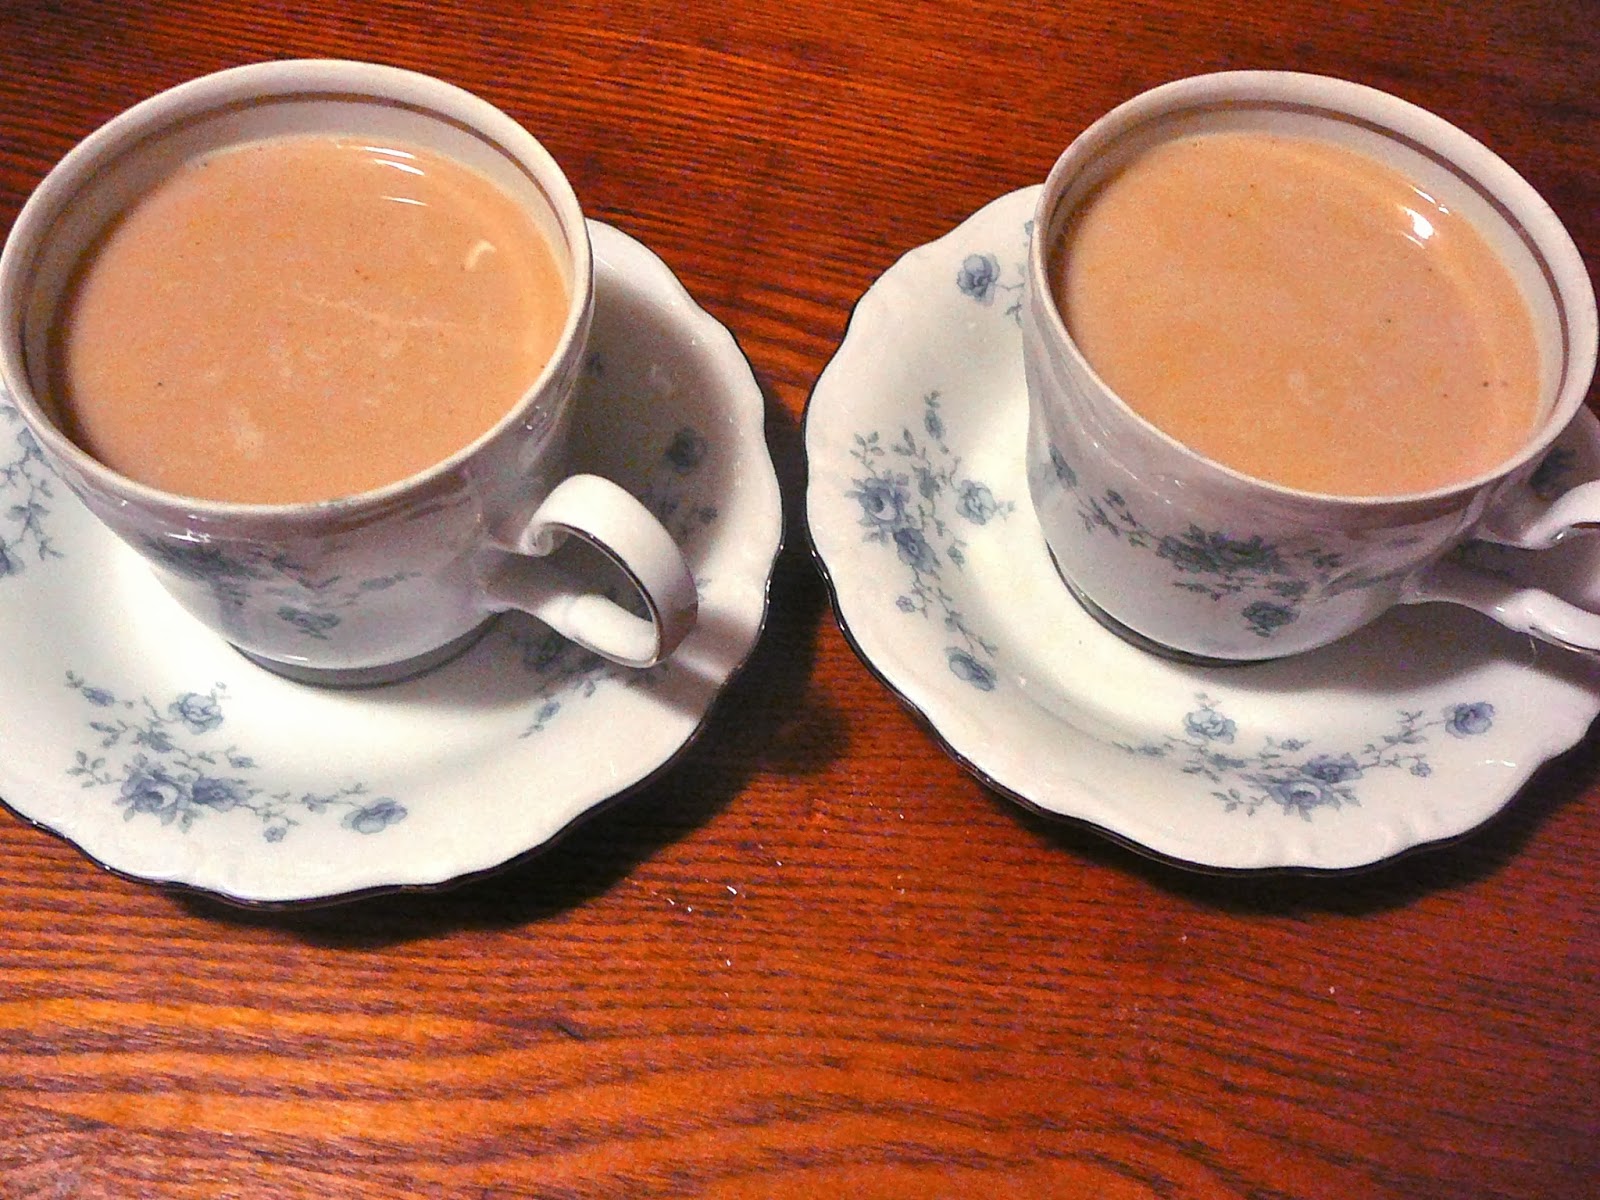
Chai Tea Concentrate, Homemade to take the chill off my bones! Another fall favorite.

Chai tea ingredients simmering away.
I love the flavors and aroma of Chai tea.  Recently I made a delicious Chai tea using instant tea as the base and Mother loved it when I split my batch with her as did I......Here is a link to that recipe.    thehiddenpantry.blogspot.com/2013/08/fall-is-just-around-corner-and-this.html

Then I saw this made from scratch concentrate and I just had to make it.  The only thing slowing me down was I had used all of my cardamom pods and failed to get more.  Nobody carries them here in our little town so I went to one of the wonderful Asian markets in Evansville and readily found them.  What threw me was there were two varieties.  The green which is what I have always gotten and there was also black.  If anyone out there knows the difference in use please leave me a comment.  I shall have to investigate!

This recipe was adapted from tasty-yummies.com who adapted from numerous recipes floating the blog-a-sphere.

Ingredients for Homemade Chai Tea Concentrate:

4 1/2 C. good water (I use water from reverse osmosis but if you are lucky enough to have good water that is fine too.)   Note:  Our water is so bad that from the tap it smells like a chlorinated swimming pool!
8 bags of black tea
2 cinnamon sticks
1 vanilla bean split in half (or 1 tablespoon of vanilla extract can be added at the very end.)
1/2 C. raw cane sugar, or more to taste(or if you prefer coconut sugar or date sugar.)
1-3" piece of fresh ginger cut into pieces
10 whole cloves
8 cardamom pods
1/2 t. freshly ground nutmeg
2 whole star anise pods
1/2 t. whole black peppercorns
1/2 of an orange jest peeled with a vegetable peeler
1 T. raw honey or more to taste, or add more sugar

Combine all of these ingredients in a medium saucepan and bring to a boil.  Reduce the heat and simmer for 20 minutes.  Line a strainer with cheesecloth or a coffee filter and strain into a bowl to cool.  After cooling refrigerate in a lidded one quart container or jar.

To serve mix 1 part concentrate with 1 part milk.  Serve warm or cold.  Yield about a quart of concentrate.  Keep up to 1 week refrigerated.

I am in hopes this will also act to settle Brian's stomach as a 3" piece of ginger should have that effect.  Not sure if the  fact we eat late is the problem or that he takes several meds in the evening.  I can't help but think this is one of those "chicken soup" sort of things.  It just is good for you all around!  He loved the flavor  of it served up warm before bedtime.

The concentrate would make a great Holiday gift or assemble the ingredients less the water and package along with the directions.  Also it would be a great used as a flavoring....say Chai ice cream?? Or muffins?? Or tea bread??  YUMMM.


3/12/13

Over One Million "Hits" Milestone Passed Last Weekend.

It doesn't really mean anything special to anyone but me.....but I have to tell you I am just tickled to death to think that over a million of you have stopped by to visit this little blog!

Wow!  I am just plain "got"! So as I am also suffering from a obviously early case of spring fever I thought I would combine some spring favorite pictures and the top posts to date.  Then I will get back to the "spring" cleaning at hand!

The number 1 post to date is Aunt Betty's 1-2-3 Cake in a mug.   http://thehiddenpantry.blogspot.com/2011/11/aunt-bettys-1-2-3-cake.html 

Number 2 is Buttermilk Pie.   http://thehiddenpantry.blogspot.com/2010/11/buttermilk-pie-my-oh-my.html

Number 3 is Easiest Stove Cleaning.   http://thehiddenpantry.blogspot.com/p/easiest-cleaning-for-enamel-tops-and.html

Number 4 is Chocolate Chocolate Pudding Cake.   http://thehiddenpantry.blogspot.com/2012/02/chocolate-chocolate-pudding-cake.html

Number 5 is Helpful Hints for Scrubbing Bathrooms.     http://thehiddenpantry.blogspot.com/p/helpful-hints-for-scrubbing-bathtub-and.html

Number 6 is Making Egg Noodles.   http://thehiddenpantry.blogspot.com/2011/11/make-egg-noodles-for-now-or-store-in.html

Number 7 is Our First Snow.   http://thehiddenpantry.blogspot.com/2011/11/our-first-snow-accumulation-of-season.html

Number 8 is Fruit Cream.   http://thehiddenpantry.blogspot.com/2011/11/fruit-cream-lovely-fruit-salad.html

Number 9 is Home Cured Bacon.   http://thehiddenpantry.blogspot.com/2012/02/home-cured-bacon-quick-easy-and-no.html

Number 10 is Cleaning Dingy Sheet Pans.   http://thehiddenpantry.blogspot.com/p/cleaning-dingy-sheet-pans-and-cookie.html

Number 11 is Casserole of Pork Chops.   http://thehiddenpantry.blogspot.com/2012/05/one-pan-pork-chop-dinner-for-four.html

And, number 12 is Pecan Pie in Mason Jars.   http://thehiddenpantry.blogspot.com/2011/09/pecan-pie-in-mason-jars.html

Thank you all and do come again.


2/8/13

Hot Cocoa Mix in a Jar, Just in Time for Valentine's Day Giving!

Things have been so crazy around here since well before Christmas and this week has been no exception.  Finally though, I am hopeful anyway, we have passed the turmoil and will settle back down to a pleasant every day life.  Hopefully everyone is on the recovery list and on the way to good health and spring is just around the corner.....my lands!  Valentine's Day is next week!!

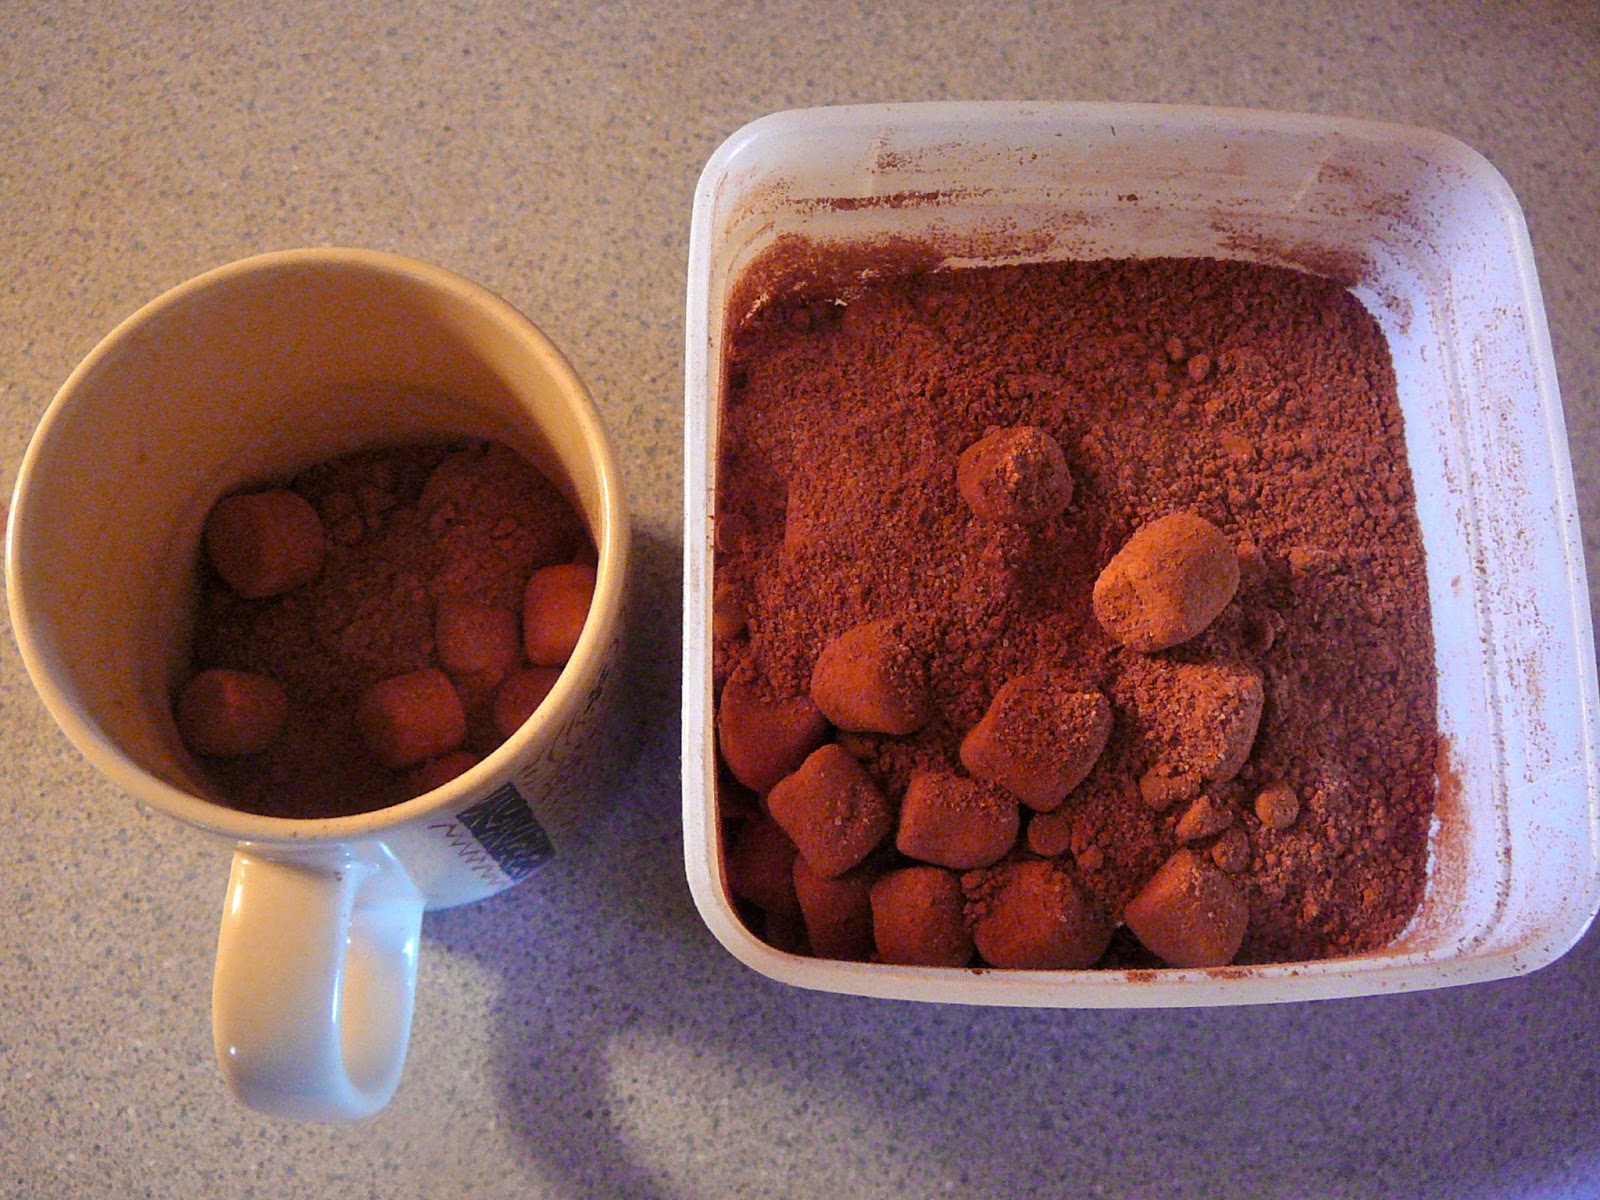
Given that realization I am planning some special cookies next week to give my Grandchildren and children and a special jar of a homemade hot cocoa mix.  We have 3 sons and I think I will make up another jar and give one to each family.  I just finished 2 and took a photo to share with you as this is such a nice idea some of you might like to try it too.  When my boys were young and at home I always kept a big jar made up of my special homemade cocoa mix.  This recipe is a bit more special as it includes mini semi sweet chocolate chips and miniature marshmallows.  I made them in layers using a funnel in quart jars.  It does look special and festive and a piece of red fabric fastened under the band with a red ribbon should do just the trick!! I will work on that too.

Ingredients for each quart jar of dry Homemade Cocoa Mix:

1 C. granulated sugar
1 C. unsweetened cocoa powder
1 C. powdered milk
1/2 C. mini chocolate chips
1/2 C. miniature marshmallows
1/2 t. salt

Layer 1/2 C. granulated sugar in the bottom of each jar you are making.  Next add 1/2 c. cocoa powder, 1 C. powdered milk, 1/2 c. cocoa, 1/2 C. granulated sugar, 1/2 t. salt, 1/2 C. mini chocolate chips, and 1/2 C miniature marshmallows. 

Gently lift the jar and tap it several times on the counter to tamp down the ingredients and then top off again with additional marshmallows.  Top with a seal and screw on the band.  Cut about a 5" square of red or other fabric and remove the band.  Lay the fabric atop the seal evenly and screw on the band.  Add a ribbon around the screw top and a card.

The instructions for the card should be to empty all of the contents into a large bowl and mix well.  Measure 1/3 C. of the mix into a mug and add 1 C. of boiling water, stirring to mix and melt the ingredients.  Return any remaining mix to the jar and reseal until needed.  Yield 12 servings per 1 quart of mix. 

I am going to make up another jar and gussy them up a bit and I will add that photo later.  For now I just wanted to get this idea out there for anyone who might like to give it a try.  I LOVE food gifts in jars!  To receive them as well as to give them.

11/3/12

Cinnamon Candy Apple Butter in the Crockpot.

Yes, I have been going a bit overboard with the apples lately......I admit.  But they are so good,  so good for you, and I was Blessed with so many this year! This is probably my last posting on the subject.....well maybe.....we'll see.

Anyway.

Ingredients for Cinnamon Candy Apple Butter in the Crock Pot:

5 pounds of cooking apples, I used Golden Delicious
1 1/2 C. brown sugar
1/4 C. Red Hot Candies. or Cinnamon Imperials
1/2 t. cinnamon
1/2 t. salt
1/4 t. nutmeg
1/8 t. cloves
1/4 t. ginger
2 C. apple juice
1 t. vanilla

Peel and core the apples and turn the slow cooker on high, add the apple juice, then the apples, sugar, and spices.   Cover and cook for about 1/12 hours.  Stir well and reduce the heat to low.  With the lid set ajar continue to cook for 7-9-hours.  Add the red hots and the vanilla and stir well.  When the candy has melted use a stick blender to even up the consistency or process in food processor or blender a batch at a time.

Fill sterile jars leaving 1/4" head space and wipe the rims well with a clean damp cloth.  Lower into boiling water bath and process for 10 minutes after returning to a boil.  Cool and check to be sure the jars have sealed.  Store in a cool dry place for up to one year.  Yield 6 half pints.


11/1/12

Meyer Lemons in Honey

Honey and Meyer Lemons.
I was thinking about "Hot Toddies" yes, I do like a Toddy every now and again.....and for some reason it hit me how neat it might be to put together Meyer Lemons and wonderful local honey.  It is a fact that honey does not spoil.  Lemons are acidic.  So I married them up and yum.  I think is is a marriage made in heaven.  (For my favorite Toddy Recipe see Hot Buttered Rum 11/20/10.)

Thinly Sliced Meyer Lemons and Honey.
Then I was thinking about winter colds.   How nice it would be to have this lovely concoction all made up and ready to use as a cough syrup, or in tea, if not a Toddy!! Oh I can think of lots of ways to use this.

So......I washed and scrubbed then dried 6 beautiful Meyer Lemons and sliced them thinly into 2 sterile pint jars and poured in the honey, harvested but a mile down the road.  Bliss.

After running a knife around to release any air bubbles and securing the lids I tucked them into the refrigerator where I am certain they will be fine for a long, long time.  But I doubt it will last even a short time.  It just might be liquid sunshine.  Yield 2 pints.

9/13/12

Grape Jelly, The Old Fashioned Way, Cooked and Canned at Home for the BIGGEST Flavor.

Beautiful Blue-Black Concord Grapes for Jelly or Jam
I am so excited!!  I just found Concord Grapes!  I have tried to buy them every fall for at least the last three years and not gotten any.  So when I saw these at of all places WalMart I bought 4 boxes and hoped for the best.  I may go back tomorrow and check for more!!!

To Prepare the Juice:

I checked my pectin box and the Ball Blue Book and both called for 3-3 1/2 pounds of grapes.  These were sold by the dry quart measure but I am guessing close to or just under a pound apiece.  so with 4 I purchased there should be just enough for a recipe yielding 8 cups of delicious grape jelly.

First the grapes need to be washed then removed from the stems and crushed and placed into a large heavy bottomed kettle.   Add 1 1/2 Cups of water and bring to a boil.  Reduce to simmer, cover, and cook gently until the fruit has softened, about 10 minutes for soft fruit such as grapes.

Place three layers of cheese cloth in a large mixing bowl with the edges extending well outside of the bowl.  Pour carefully the grape juice and pulp into the center of the fabric.  Gather the overlapping fabric together to form a sack and tie securely with butcher twine.  I use the handle from my upper kitchen cabinets and secure the bag to it and relocate the bowl directly beneath to catch the juice as it drains from the pulp.  Let this hang undisturbed until no juice is dripping.  If you are tempted to squeeze the bag it is permissible but your jelly will NOT be clear.  I do not squeeze it at all.

To Prepare the Jars:

Wash and sterilize the jars and lids to  have enough for 8-9 cups of jelly.  Keep the lids and bands in simmering water until you are ready to use them.  Stack the clean sterile jars in the rack of the cold packer and hook the rack across the rim of the pan and bring the water to a boil beneath the jars to keep them hot.  Keep another kettle of water simmering in case you need to add additional water to the bath to process.  The boiling water will need to cover the filled jars by at least 1" .

To Make Grape Jelly:

Once the juice is ready measure it.  Place 5 C. pure grape juice into  a large pan.  You may add up to 1/2 C. water if needed to make up any shortage of liquid.  Add the pectin and 1/2 teaspoon of butter to keep the foam to a minimum.  Using another medium sized bowl measure 7 C. of sugar and set aside for now.

Bring the juice to a full rolling boil (one you cannot stir down) while stirring.  Add the sugar all at once to the juice stirring until dissolved over high heat.  Bring back to a full boil stirring constantly.  Boil for exactly 1 minute.   Remove from the heat.  Skim off any foam if necessary.  Ladle hot jelly into hot jars leaving 1/4" head space.  Wipe the rims with a clean damp cloth and adjust the two piece caps firmly.  Process 5 minutes in boiling water canner.

Remove the rack from the bath and hook over the edge of the bottom pan and leave for 5 minutes.  Then lift the rack and cans out and onto a folded layer of towel.  Remove each jar carefully onto a tea towel and leave undisturbed for at least 24 hours.  Store in a dark cool place for 1 year.   I yielded 9 and 1/2 cups of jelly.

I find that jelly made this way is so much more flavorful and fragrant than purchased varieties.  I suspect they water down the juice to produce more but then I don't know that for sure.  It is just my opinion. 


9/11/12

MEAL IN A BASKET, Pasta Soup Mix and Aunt Betty's 1-2-3 Cake in a Mug Mix for a Gift Box

A lot of you may recall my Godson Jacob was in a terrible accident about 200 days ago and remains in a coma although he is much improved and slowly is progressing.  We watch and pray as we see him "emerge" a tiny bit at a time.  He is now home and my sister works days and my brother-in-law works nights and they now provide 24 hour a day care for him with medications and every 4 hours, 24-7.   Friends and family are helping with meals and because I am 4 hours away I thought this might be a nice fill in to pack up and send to them.


I do not know where I got this.  I have it hand written with my recipes and think it is a great soup starter and lends itself to adding any additional meat or vegetables you might like to add.

I am including in my "CARE PACKAGE" a batch of Aunt Betty's !-2-3 Cake mix in a Mug.  This should work nicely.


Ingredients for Pasta Soup Mix:

2 T. dried basil
1 t. Herbs De Provence
1/2 t. celery salt
1/2 t. garlic powder
1/4 t. pepper
1/4 C. dried onion bits
1/3 C. beef bouillon granules
3 1/2 C. tri-color pasta
1 quart glass jar

Fill the bottom of the jar with the seasonings as listed then add the pasta on top to fill the jar.  Attach or enclose these directions to complete the recipe:  (I also included a can of crushed tomatoes in my basket.)

Bring 8 C. of water and 2 C. crushed or diced tomatoes to a boil in a large kettle.   Add the soup mix from the jar and simmer uncovered stirring occasionally for about 15 minutes until the pasta is tender.
For a heartier meal add any cooked poultry or meat on hand to the soup.   (Or brown and drain ground beef or sausage.)  You may also add additional cooked vegetables on hand as desired.  Taste and season with salt and pepper to taste.


A jar of home canned tomatoes, purchased or fresh tomatoes from your garden would make a lovely presentation.  I added a batch of Aunt Betty's 1-2-3 Cake in a Mug mix for any sweet tooth!  A bit of scrap fabric to decorate the jar, a paper market basket and red tissue paper helped fill the basket.  I stopped at the market on the way and added a few pieces of fresh fruit to finish off my package.  (I tried fitting in 2 big mugs which would have been fun to serve the soup and/or the cake from but they were too large to fit in my basket, but it might work for you.)

To make Aunt Betty's 1-2-3 Cake mix purchase any Angel Food Cake Mix (I like Duncan Hinds mixes the best,) and another cake mix of any flavor you like and mix them together in a large plastic bag to combine.  Place 3 tablespoons of the combined mix in a large mug and add 2 tablespoons of water.  Stir until just combined, do not over mix.  Microwave one minute on high then serve warm.  Many have noted they add choc chips, frosting, whipped toppings and more and love this relatively low calorie treat.

 I first gave this recipe in November 2011.  There are many many comments and additional variations given by readers.   If you would like to view them type "Aunt Betty's 1-2-3 Cake" in the finder box in the lower right margin of the blogs first page.


8/29/12

Canning Cinnamon Apple Pie Filling

I have never tried this before, but I don't see why it wouldn't work, so thought I would give it a try!!  I spotted a version of what I have adapted here on christianhomekeeper.org and their jars looked just beautiful.  As there are 2 five pound bags of cooking apples in the downstairs refrigerator I can get at it!

Ingredients for Canned Apple Pie Filling:

1 peck (10 pounds) cooking apples (Johnathan, Gala, Granny Smith, Arkansas Black, Rome, etc.)
peeled, sliced, and cored (I used 1/2 Gala and 1/2 Johnathan.)
6 C. sugar
1 1/2 C. Clear-jel*
2 T. Cinnamon
2 1/2 -3 C. cold water
6 C. apple juice or water (I measured from and used from the water prepared with ascorbic acid that I sliced the apples into.)
1 t. salt
3/4 C. lemon juice or ascorbic acid according to pkg. directions, if you use the ascorbic acid instead of lemon juice increase water/apple juice amount above to  7 C. and dissolve according to pkg. directions.)

*Clear-jel is a type of easily dissolving corn starch and does not clump nearly as badly as regular corn starch tends to do.  (I ordered mine from the King Arthur Flour Company on line and had it in just a couple of days.)

I place the empty jars in the rack in the up position over the boiling water to keep them hot.
Prepare 6-7 quart jars and lids.  Slice the apples into a ascorbic acid and water bath to prevent browning.

I used 2 pans with 6 C. water and 6 t. ascorbic acid each to cut the apple slices into and hold.
To facilitate the apples from shrinking and your jars from appearing half full you first boil the apple slices in this recipe.  Bring a large heavy bottomed kettle with the first amount of cold water to a boil.  Add about 1 quart of the apple slices at a time and bring the water back up to a boil for about a minute or so.  Next strain the apples out of the water using a slotted spoon or spider and add the next batch of apples.  Keep the parboiled apples covered and warm while boiling the rest of them.

Apples ready to boil.
When you have finished with all of the apples empty the water and you may reuse the kettle in the next step.  Add the sugar, Clear-jel, cinnamon, and apple juice (If using ascorbic acid instead of lemon juice dissolve it in the apple juice or water per the package directions.) or water to the heavy bottomed kettle and stir.  Turn the heat to medium high and bring to a boil stirring until thickened, bubbling, and smooth.  Turn off the heat.

Add the apples and stir.  If you are using lemon juice instead of ascorbic acid add it now and stir well.

Fill  the hot jars 3/4 full of apples and syrup.  Top off each jar with syrup to within 1" of the rim of the jars.  Run a plastic spatula around the inside of the jars to release air bubbles.  Wipe the rims with a clean wet cloth.  Add lids and rings. 

Process the quart jars in boiling water bath covering the entire jar and lids for 25 minutes.  Remove from the pan and allow to sit on a tea towel on the counter to cool undisturbed overnight.

I really was pleased with the way these turned out and will probably make more for the winter's baking.  I may even dress up the jars and give as Christmas gifts. I can see a square of cotton fabric
across the top of the jar and the ban screwed on to hold it with a ribbon and a gift tag attached.  I would certainly appreciate such a gift.

Yielded 7 quarts.

8/23/12

Canning Nectarines & Peaches.

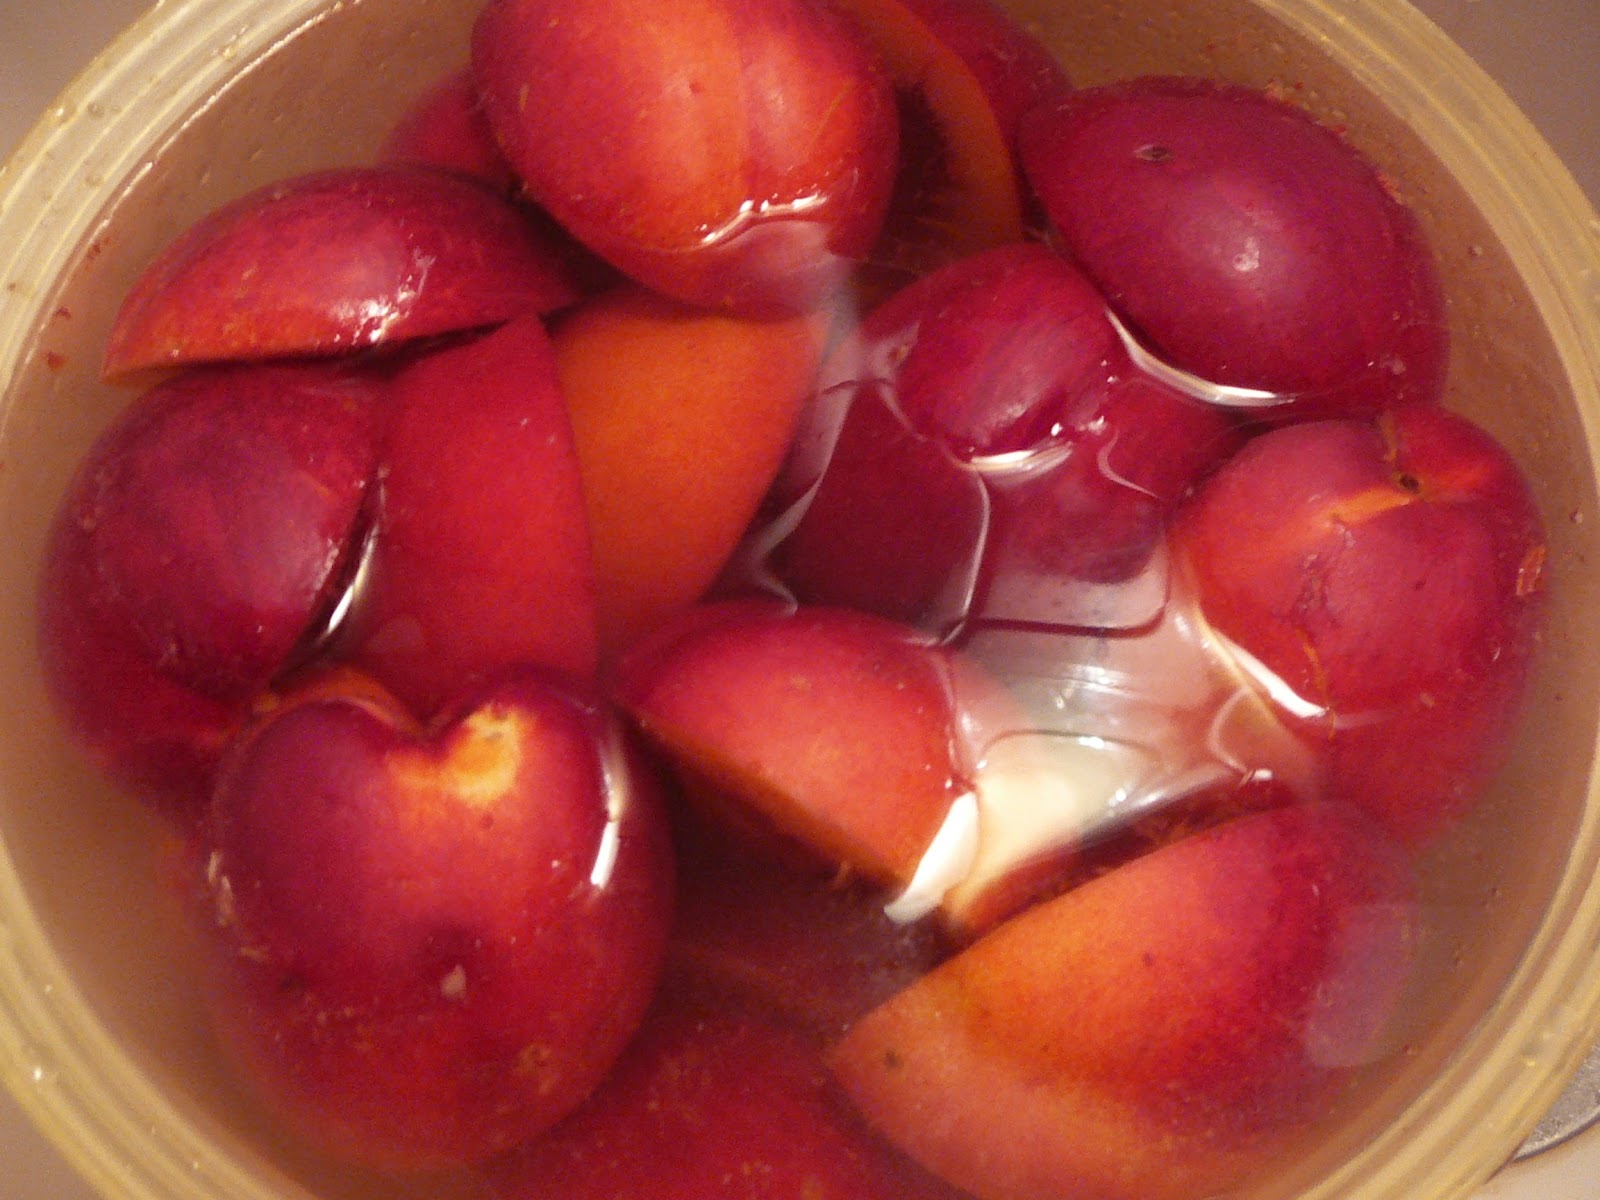
Halved and pitted nectarines in the ascorbic acid bath.
I have never canned nectarines or even thought of it.  We just always eat tons of them when they are in season here and available at the local orchard.  They may well be my very favorite fruit.  I can even remember the very first time I ever had one as a little girl!

Be that as it may, while perusing through my Ball Blue Book,  I saw a recipe for canning them and thought, "Why not?"  Canned plums are quite good and so should be these.

Our weekly half shares from Joe Engelbrecht's Fourth Generation Orchard have been great and right now I sit with 10 pounds of apples, 10 pounds of nectarines, and 5 pounds of peaches in my extra refrigerator.  Saturday I will receive more of something, I am guessing apples so I best get busy!

First I placed the quart canning jars, screw bands, and lids in the dishwasher on sterile wash and turned it on.

Peach halves and a couple of nectarines.

First I set a large kettle of water to boil to slip the skins from the peaches.  Next I prepare 2 large bowls of water with an ascorbic acid bath (1 t. ascorbic acid per each 1 C. of water dissolved together) for both kinds of fruit.  You do not peel the nectarines for canning, only halve them and remove the pits.  Both kinds of fruit require 30 processing time so I can do a couple of quarts of each and batch the processing together.

Next I prepare a batch of medium syrup:

3 1/4 C.  sugar
5 C. water
5 t. ascorbic acid

Heat all together until the sugar is dissolved then turn to lowest heat.  Yield 7 C. medium syrup.

Prepare a large bowl with ice and cold water.  Plunge about 5-9 peaches into the boiling water and leave for about 3 minutes.  Remove with a slotted spoon and plunge into the ice water.  Halve each peach and remove the pit and skin.  Place the peach into the waiting bowl of water and ascorbic acid to sit until all of the rest of the peaches have been prepared in the same manner.

After the peaches were completed I halved and pitted the nectarines and placed them into their ascorbic acid and water bath.

Remove the clean hot jars from the dishwasher and fill with the prepared fruit leaving 1/2" head space.  Add the hot syrup to fill again leaving 1/2" head space then use a butter knife to remove any air pockets you see.  Proceed to fill all of the jars.  Wipe the jar rims with a clean wet paper towel and place the lids on snugly.  Place the jars evenly in the cold packers rack and hang the rack atop the rim of the water until it comes to a boil.  Then, lower the rack and jars into the boiling water.  The water should cover the lids of the cans.  Add boiling water if it does not.  Bring the water back up to a boil and process for 30 minutes for quart jars of peaches and nectarines.

Yield 5 quarts of fruit.
When the time is up remove the rack to hang again on the rim of the cold packer for about 10 minutes.  Then lift the rack out and onto a towel on the counter.  Remove the jars again to a towel on the counter and let them sit undisturbed for 10-12 hours before storing.


8/8/12

Fresh Pack Bread and Butter Pickles a Quart at a Time

I REALLY like little pickle recipes that you can make a jar or two at a time.  You really do not always have enough for a big recipe and I HATE to let anything go to waste.  Fresh pack pickles are so popular and everyone loves those Klaussen Fresh Packs!

This is a recipe I saw on line at Williams-Sonoma and held on to for just the day I had a few cucumbers that needed to become something.  I am very happy with the results  my version netted and I hope you will be too.

Ingredients for One Quart of Fresh Pack Bread and Butter Pickles:

4 C. sliced cucumbers sliced about 1/8" thick
1 sweet onion sliced as above
2 C. white wine vinegar or 2 C. white vinegar
3/4 C. sugar
1/4 C. kosher salt
 1 t. mustard seed
1 t. celery seed
2 bay leaves

Slice the cucumbers and onions into a nonreactive container and set aside.  Pour the remaining ingredients into a medium sized nonreactive sauce pan and bring to a boil stirring until the salt and sugar are dissolved.

Pour the hot brine over the vegetables and stir together well.  Let cool to room temperature and pack into a clean one quart jar and screw on the lid.  Store in the refrigerator.  Will keep well for  a month refrigerated.

Discard any remaining brine.  Yield 1 quart.