Translate

Showing posts with label Mending and Patches. Show all posts

2/15/15

Sewing a Gentleman's Eye Compress and Eliminating My Pile of Mending

Gentleman's Eye Compress
I have been given a project by our middle son Mike.  He has asked me to make an eye compress for a friend.  The description was much too colorful to elaborate on here but suffice to say he needed two pouches to hold rice connected in the center.  You see his friend's eye doctor described this to be microwaved a few minutes and used warm across both eyes as a remedy for tired dry eyes.  I am happy to give this a whirl!

The top one is more practical as the larger amount of rice will hold the warmth longer.
First I selected a soft cotton flannel fabric and laundered and dried it.  Next I traced two sizes using tailor's chalk, a wide mouth jar lid, and a small saucer as patterns.  I was uncertain what size I would end up with after sewing and filling the pouches with rice.  As it turned out the larger is more practical as the larger amount of rice holds the warmth longer.

I will leave the opening to turn the compress right side out LARGER the next time.
Next I double stitched around the edge with the right sides facing each other 1/4" from the raw edge.  I left an opening not stitched at the bridge large enough to turn the compress right side out.  The next time I will leave the opening larger for ease of turning. 

A quick trip to the kitchen for a funnel and a bag of rice and I was near to completion.  After filling the two sides with a comfortable amount of rice I hand stitched a double row across the opening to close and for added strength.  The bridge width can be adjusted by lightly twisting to shorten the length of the connecting strip as needed. 

Just microwave a couple of minutes to warm and you are all set to relax! 

My stack of mending projects was 5 deep!
Mother always had a stack of mending to do.  Much more than I do as many items nowadays don't hold up long enough to mend.  I wonder does anyone else out there mend?  It Is not a phrase I have heard anyone use in years.

Possibles Bag
After making the compress I thought I would clean up my stack so I repaired a friend of my husband's "possibles" bag.  (A utility type bag men use/carry when shooting cap and ball type firearms as a hobby.)  The strap was loose so I stitched it back!

Next I cut off a pair of our grandson's PJ's with the knee out and hemmed them.  Good as new!  Now I am in the backstretch...with only my husband's long underwear to mend and a button to match and sew onto a pair of slacks.  And now he mending is done until the next time.


11/10/14

Mending and Repairing Grandma Ruby's Vintage Quilt

All of the binding has come loose and I am carefully making repairs.
It has been quite a while since my brother-in-law Bart and sister-in-law Pam gave us this quilt that Grandma Ruby had made.  The binding was in need of repairs even then.  At that time I was still working and in my head it went on my now infamous "list".  While many of you have traveled with me as I have knocked things one right after another off that list I am remiss I haven't gotten to this before now!

I love these bright colors and the yellow she bound it with!
My last trip to Hobby Lobby netted the yellow quilting thread needed and today is the day I have started!  At noon when I ait to start this I am half way around in sewing the binding.  The stitching was gone most of the way around only attached at all on one side and frayed.  There are also spots in the quilt top in need of a few loving stitches!  But by far the greatest repair is in the binding!

The happy quilt! 
I have always loved this quilt as green is about my favorite color and I find this very bright and quite cheerful!

9/18/14

Sewing, Mending, Repairing, and More

There are three blocks to do, this is the second.
My sewing is finally underway!  Sunday afternoon I started slowly by putting a casing into a pair of Brian's favorite sweatpants and inserting a cord as a tie so he could continue to wear that favorite pair of pants with the elastic out of the waist!

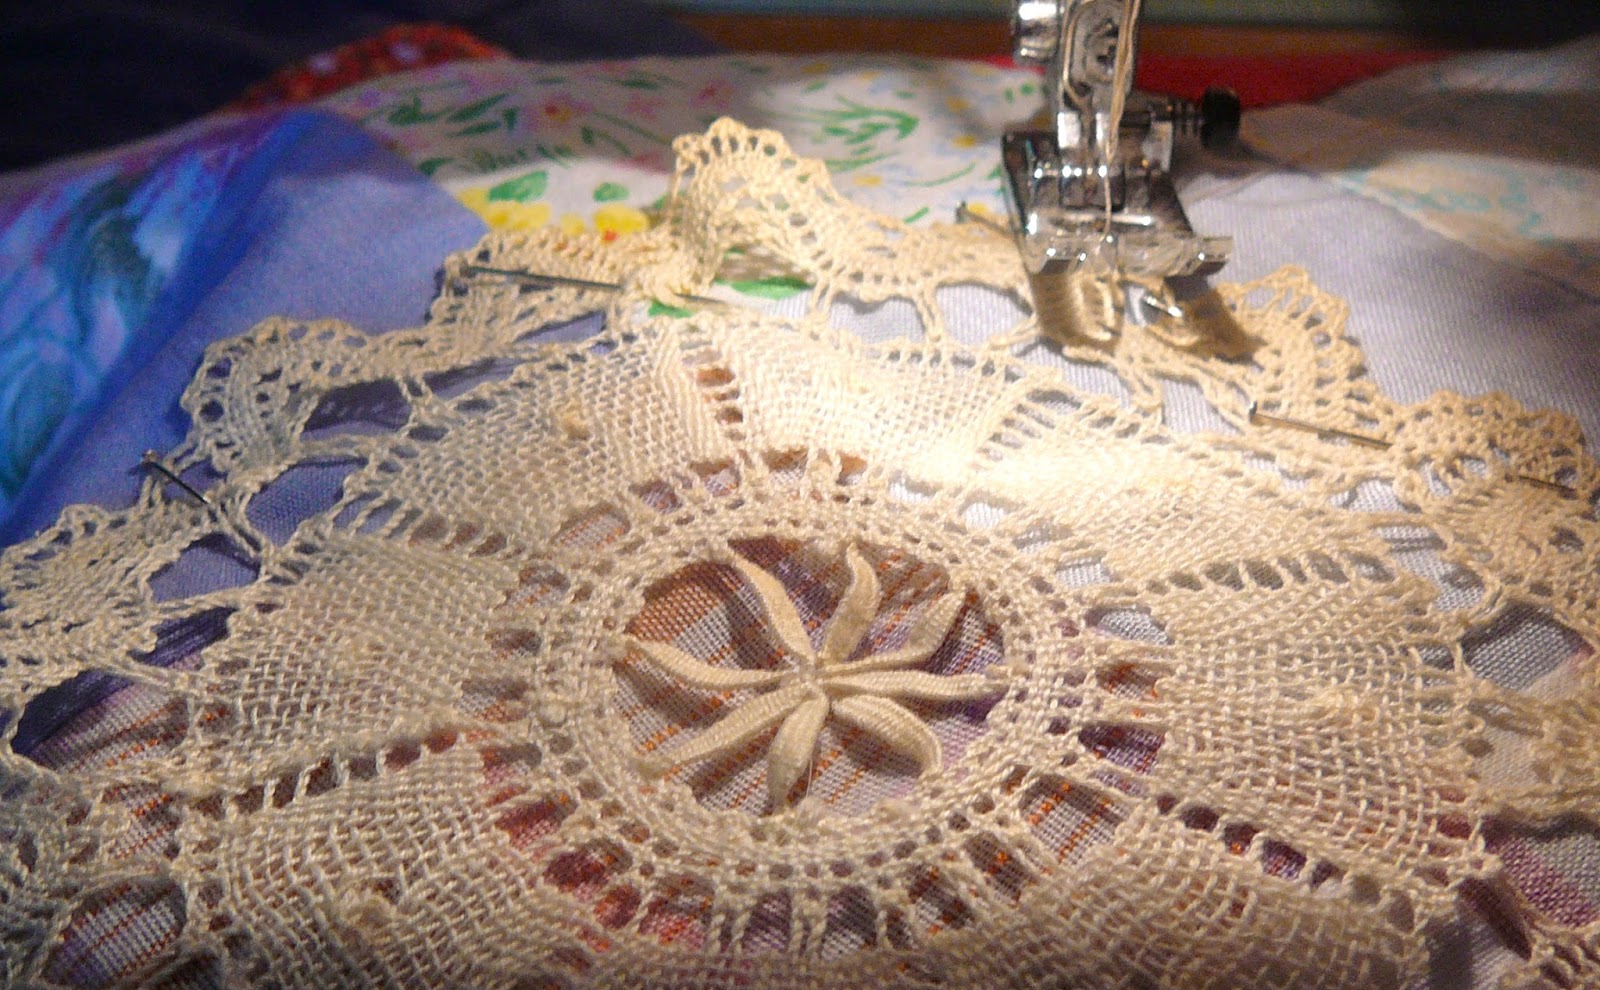
Next I pinned mid weight woven lace and lace doilies in place on two coverlets showing some wear!  This afternoon I stitched them and they are good as new! 

There is a pieced quilt top I need to decide to either tuft or quilt but first I want to embroidery the names of the women who have stitched it together by hand and will finish it.  The last one I completed was embroidered after the fact and I am sure it will be easier to do it now before it goes together!

My purpose is to leave these to my children with an idea of their age and the ancestors who created them. This piece is all hand stitched quite beautifully with again vintage fabrics that are not as heavy as the first one I finished.  It is primarily dark fabrics and I am unsure if hand quilted what color thread I would use.  On the other hand I could use a heavy batting and tuft it as a comforter using a contrasting wool yarn for wonderful winter warmth.  I really loved the way the blanket stitched edges looked in the crazy quilt and would use this again on this one if I  choose tufting.

There are several other finished tops and some are light weight and light colors that would be very suited to hand quilt.  Others are pieced in velvet just a wide range to ponder suitable finishes!


5/7/14

Ottoman "ReDo" or Repairing a Worn Ottoman

Molly is my able assistant in all projects.

When I ran out of 30 gallon trash bags today my attention was diverted.  I enjoy seeing all of the "treasures" as I go through the boxes heaped high with fabric, lace, notions, and doilies. 


I was admiring the hand made doilies and it occurred to me that for the short term and until I decided if I could part with or have upholstered my green velvet wing chair and round ottoman it might work nicely to attach a patch of sorts.  There was a very nice round crocheted piece that would perhaps look good perched atop the worn spot in the center of the ottoman.

An overcast stitch using a double thread all the way around the outside of the doilie worked great.

Molly our trusted Brittany Spaniel agreed and off we went to find just the right color of thread, the right size needle, and scissors.  She raced me up the stairs as she relishes always winning.  So she sat by my side and I made short work of the patch.  And what a lovely patch it turned out to be!

I think this rather lovely!

 I really do like the end result and may have unwittingly solved the whole dilemma.  You see my best friend gave me the chair years ago and for that reason it is very difficult for me to part with it.  Although truth be told it is about shot.  But then some might say, so am I!  Just because it has grown a little worn it may not be ready to cast off.  No I think the chair and ottoman will be fine, just fine.

3/1/14

Ease a Zipper that Sticks......or Ease Thread that Knots....More "Cheap Tips"

There is always a zipper that sticks or wants to kink at our house.  Somewhere along the line I learned this handy trick and have used it so many times.....on children's coats, little boy's pant zippers, long robe zippers, and many more.  Just rub a bar of soap down either side of the teeth of a zipper and work it a few times repeating until it works with ease.

To ease hand sewing with an old needle just poke it a few times in a bar of soap or if you are fortunate enough to have bees wax that works even better.  When hand sewing if you find your thread wants to knot just run the length of thread through bees wax then thread the needle and sew away.

1/23/14

Sewing Repairs and My Winter Garden.

These blossoms are about 2" long!
Christmas week one of several of my Christmas cactus plants began blooming.  Now there are 3 in bloom!  What a spirit raising experience to have these beautiful fuchsia blooms with snow on the ground and an outside temperature of 7 degrees F.

A bud just opening.
The buds are just as lovely as the blooms and both last quite a long while.  I have started many of these and given them away.  The secret to them is they like to be, and bloom when they are root bound!

Amaryllis bulbs.
An additional treat is the amaryllis bulbs I started a week after Christmas.  I see buds and leaves shooting up in a large basket in the dining room!  Love to see these beauties in bloom too.  All of these cheer me on my way each day and I am off to do repairs and mending........

Sewing on a snowy cold day.
Brian has long underwear that the elastic is out of it, our granddaughter has a book bag for me to repair, plus there is my favorite pair of socks and then the fabric to be gone through and the quilt tops to work.  Lots of stitching is waiting to happen.  I basted the 3 pairs of long johns, (Easier to tear out hand basting than machine basting when checking for correct fit!) repaired the book bag, and darned the socks.  That is a start!

8/8/13

Second Vintage Patchwork Coverlet Repaired with Vintage Doilies

These are much sturdier than they appear and are perfect for covering places where the fabric itself had worn out.
Today has not gone as planned so I changed the plan and started back sewing.  I am making my way back to finishing some of the projects I have started so I can start some new ones!!

I love the delicate look these doilies lend to the overall appearance of the coverlets.
Today I completed the repairs on the second  vintage patchwork coverlet and am really happy with both of them.  They should both be just fine now for a good long time.

Basically I just select what will best work where and pin them down then stitch them snugly and back stitch trimming any loose threads as I go.

I really like that they have all darkened with age and appear as different shades of tea stain.  It adds to the vintage feel of the project.

Lots of personality reflected in these coverlets.  History too as Mother made them from the cloths belonging to my Grandmother and my Dad.
There is a comforter I am almost done with and it is very very old and some of the fabric is disintegrating so I am planning on using this technique for it also.

It is lovely that the patchwork patterns can show through some of the repairs and still be an effective restoration.
This is a frayed seam repair made with a strip of a nappy cotton lace and it works perfectly by stitching a rectangular box instead of just a row.
I really love this project and look forward to work on more if these  as it is needed.

3/14/13

Mending knit pajama pants with a dinosaur applique, (patches) for the little ones!

This dinosaur wraps his tail around the back of the pajama leg and does the job!
I must admit to having put my thinking cap on for this one.  When one of the little boys put his knee through a perfectly good pair of pajama bottoms I didn't want to just mend them and wind up with a knotty seam that would not only look bad but would be uncomfortable.

The knit pants are a black background with green dinosaurs tromping through every which way.  I dug into my treasure trove of fabric and found a green velour knit that was nice and heavy and stretchy.

The first step was to insert a plain half sheet of paper into the pant leg and trace the relaxed size and shape of the hole to be sure I would allow a big enough applique to cover the gap.

Next I sketched a dinosaur like the ones already on the pajamas large enough to allow the finished patch to cover the tear.  Then I added enough seam allowance to be able to turn under the raw edges.

I flipped the dinosaur over so he would not be backwards, then traced him with a charcoal pencil before I started cutting.

I still added more on thinking it is always easier to trim excess off but you cannot add more fabric on if short in a spot.

For this project I decided to try using a fabric glue stick to adhere the turned under edges and then I pinned my replica over the hole.

Velor is very forgiving and I simply overcast stitched him on and then put an eye on with a French knot then trimmed his back with a chain stitch using embroidery floss.  Seems like it took most of the day but I think he looks presentable.  Surely enough so for a 4 year old anyway.  Plus there was all of that extra love I stitched into the repair!

Gosh, I am thinking really hard about going back with my "glow in the dark" thread and outlining this dinosaur!  My fingers are too sore right now but we will see.....Isn't glow in the dark thread a neat thing?   I found it online at Sublime Stitching about a year ago and sent off for it.  Way cool in my book.