 |
| I love the border print for a young lady! |
Sunday was a lovely day as we celebrated our Granddaughter Katies' birthday with her special request for Oreo Cheesecake Cupcakes. The link follows, they are EASY and delicious!
thehiddenpantry.blogspot.com/2012/07/oreo-cheesecake-cupcakes.html and
thehiddenpantry.blogspot.com/2013/05/cheesecake-cupccakes.html
 |
| Our Granddaughter loves these Oreo Cheese Cake Cupcakes. |
Monday started with a rap on my front door shortly after I had started both the dishwasher and the washing machine. Many times I do not even answer the door if I do not expect or know the person. But, in this instance I recognized the ID on the man's shirt as someone from the crew working next door on the new owners home.
Upon opening the door I was met with a sheepish smile and notification they had hit our water main. They were very nice and wanted me to know they had summoned a plumber and would take care of the repairs but they needed to turn off the water to our home. Hurriedly I drew water in a dishpan and turned off the appliances. So much for all of that! Late in the afternoon repairs were completed and they advised me to turn on the outside water and flush the air and dirt from the lines before using water inside.
Tuesday there were medical tests scheduled at 1:00 PM with special instructions for the morning so other than filling up bird feeders and like cores that day was shot too. Upon returning home around 4:00 PM. I conceded this day to be shot too! Tests were fine, just a pain to deal with.
So here is is Wednesday morning and I just completed the last of the laundry and made a quick run to the bank. I am ready to finish the girls tote and move on to other things. If you are interested in the beginnings of this projects I began on 7/30/13, started serious sewing on 8/14/13 and finished up today. Here are the 2 links back to the earlier postings for directions to make this bag:
thehiddenpantry.blogspot.com/2013/07/coordinating-denium-border-print.html and
thehiddenpantry.blogspot.com/2013/08/sewing-again-velcro-fasteners-starting.html
 |
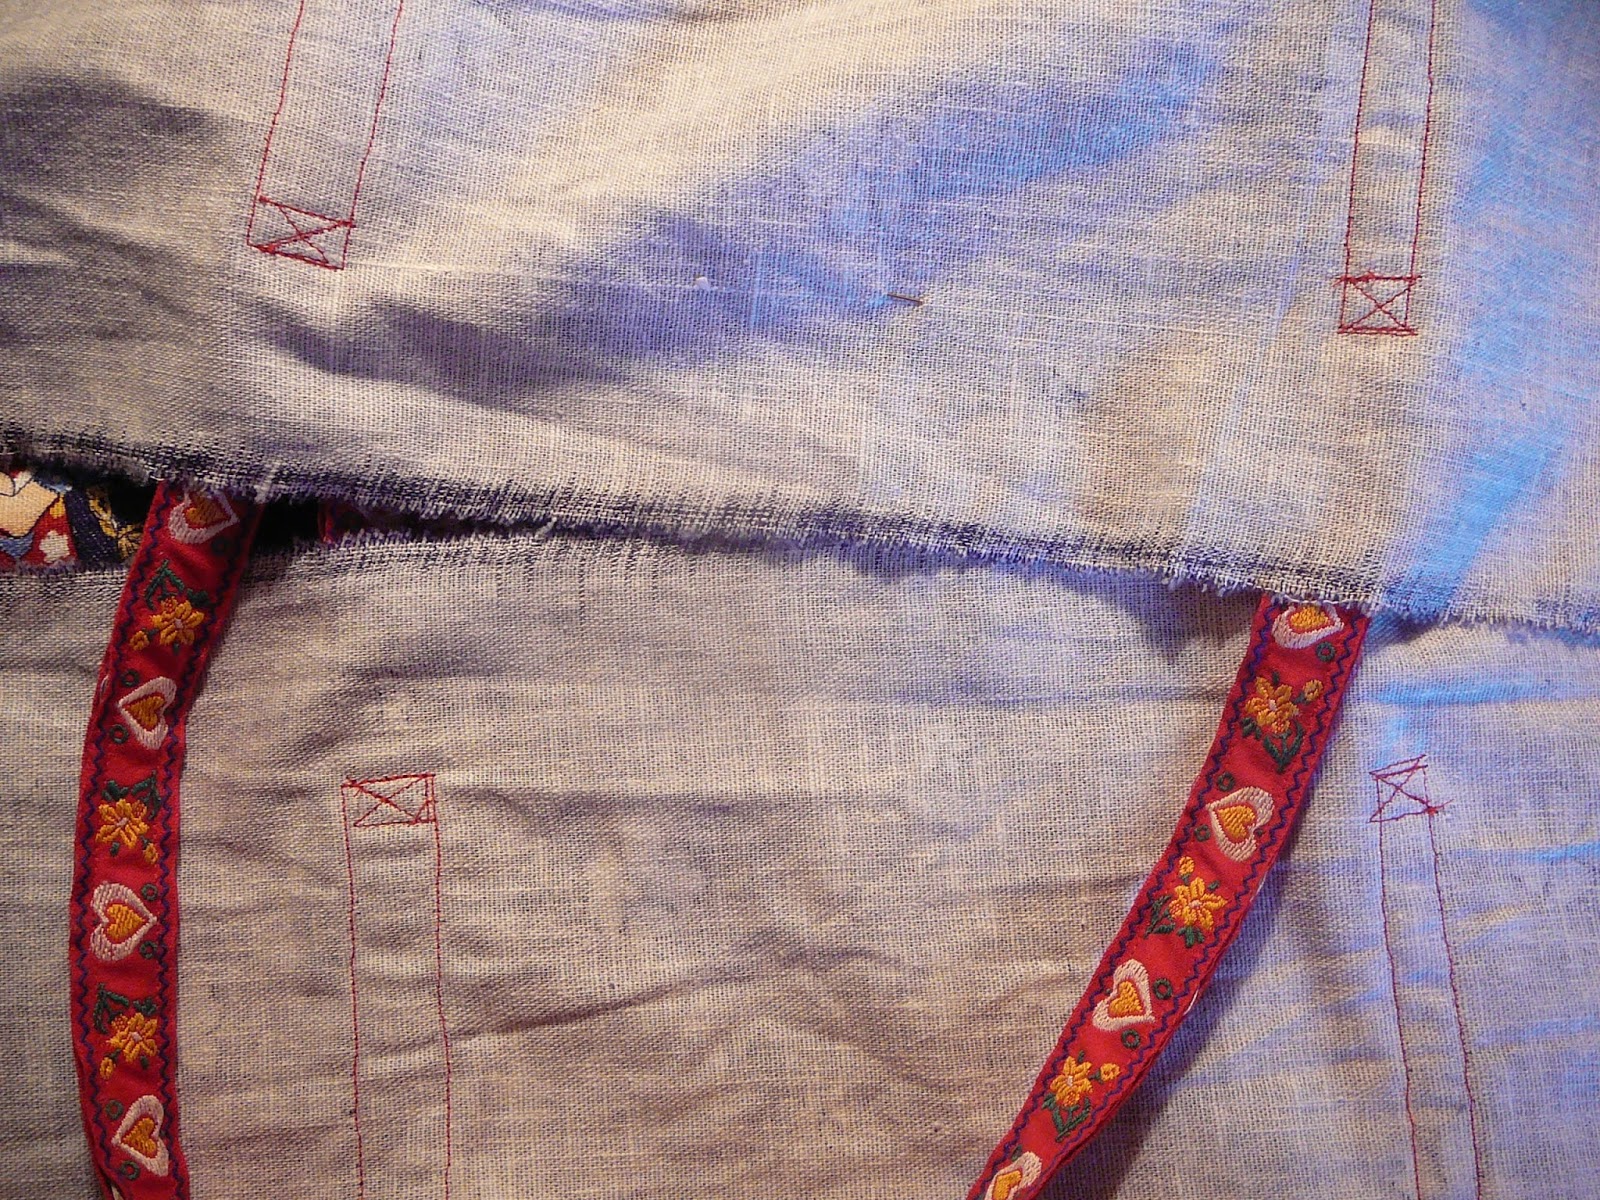
| At the starting point today one side of the strap was sewn and the other not! |
When we stopped I had discovered the bobbin had run out of thread and so the straps were only half sewn so the first thing I did today was finish the sewing on the remaining strap.
Of note is to finish the straps I go back and sew a box at the top point of attachment with a X through the center of each to reinforce them.
 |
| Look closely and you can see the top line of stitching is just to the right of the presser foot. |
 |
| Sew a box and a X within it. Be sure to back stitch and clip all threads. This is the view on the wrong side so you can better see the stitching. |
 |
| I do this on all bags on all 4 straps at the point they are attached. |
Next I stitch the sides seams closed with a 5/8" seam allowance and press the seams open.
 |
| Pinch the side seam and the bottom seam together, lining the up on the wrong sides, then sew across the corner as shown on both of the bottom corners. |
 |
| Clip the seam to open, press, then clip off the excess fabric below the seam line at the corner. |
I prefer the boxed corners at the bottom and pinch the seams and stitch to make them. They seem to hold things better by forming a boxed bottom.
 |
| This gives a nice crisp finish to the bottom of the bag. |
Next seam the sides of the lining and press. BEFORE SEWING HOLD THE BAG AND THE LINING DIRECTLY AGAINST EACH OTHER AT THE TOP MATCHING THE SEAMS OF THE BAG AGAINST WHERE YOU PLAN TO SEW THE SEAMS OF THE LINING SIDES. This is the time to make any adjustments. You want the opening of both pieces to be exactly the same before you close the last seam. Now is the time to make any needed adjustment!
 |
| This says it all. |
I decide where to add a tag at this time if using one and apply it to the lining below the top seam line will be. Again box the bottom corners of the lining just as you did the bag.
With a warm iron turn down the top rough edge of the lining 3/8" and press all of the way around. You are folding it so the wrong sides of the material are touching. Do the same thing with the bag.
Next turn the lining so the RIGHT SIDE is inside and drop it down into the bag. Now you should have the wrong side of the lining and the wrong side of the bag touching. Match the side seams and pin them. Ease the two edges together at the top and pin them.
 |
| I am always feeling really good about this by now! I get excited about getting the job finished! |
Stitch close to the top edge all the way around closing them. Repeat by sewing a second line all of the way around.
 |
| I hope the recipients think she is as cute as I do! |
It is finished and I have just tucked a large and a small girls bib into the bag and folded it to go out in tomorrows mail! Two down and two to go!


No comments:
Post a Comment